


Installation: Existing or New Construction
(retrofitting finished walls)
Warning: Exercise caution when drilling into existing walls. Do not drill through existing wires,
pipes, conduits, heating or air conditioning ducts. If you feel resistance while drilling, stop
immediately.
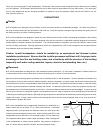
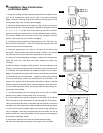
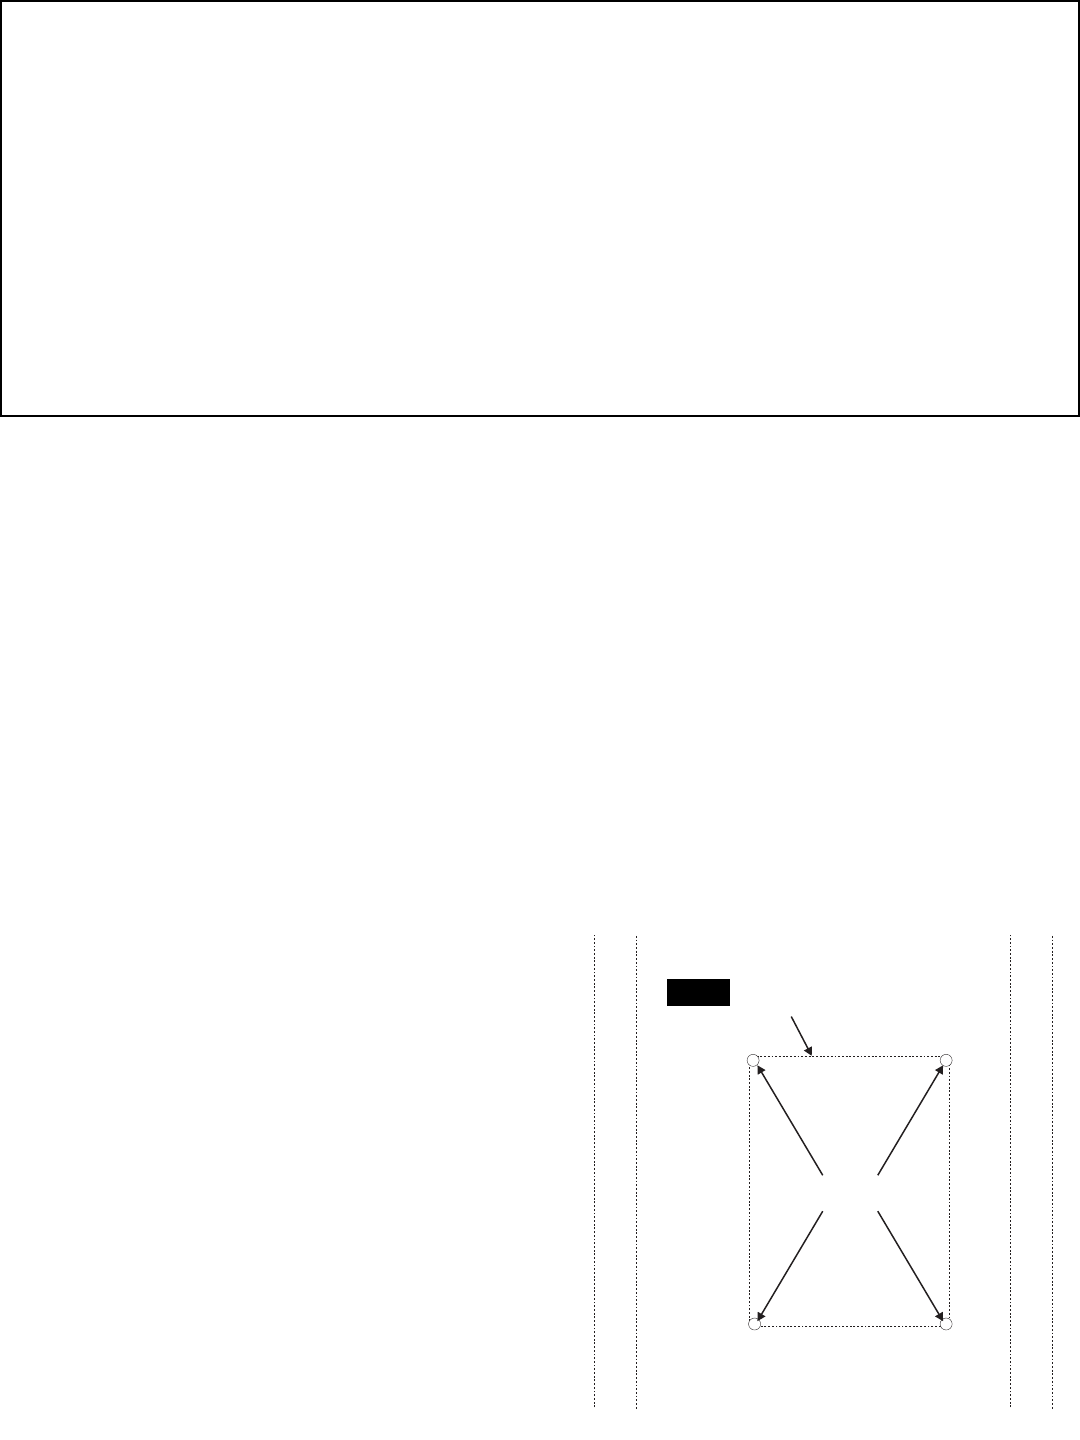
1. Using a studfinder or the “knocking” method, locate the wall studs in the wall area where you wish to mount the speaker. The speak-
er should be installed between adjacent studs, no closer than two inches from either stud (fig.6).
2. Determine that there are no obstructions behind the desired cutout
area. This may be accomplished by drilling a hole in the center of the
cutout area and using an “L”-shaped piece of metal (like a coat hang-
er) to “feel around” behind the wall. If you discover an obstruction, fill
the hole with patching compound and try another location.
3. If there are no obstructions found behind the wall, use the supplied
cutout template and a pencil to draw a 10 1/4”H x 8 1/8”W outline of
the area to be cut out. Use a level to ensure that the cutout is pre-
cisely positioned. Begin by drilling the four corners with a 1/4” bit
(fig.6). Then cut out the wall section with a utility knife or keyhole saw,
following the lines traced around the mounting template. If the wall is
painted or wallpapered, use the keyhole saw.
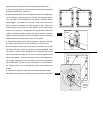
4. If the wall is constructed of lath and plaster, outline the penciled
marks with masking tape, drill the four corners with a 1/4” drill bit, and
use a utility knife to cut through the plaster down to the lath. Use a
saber saw with a metal cutting blade or a pair of tin snips to gently cut
Drill
Stud
Stud
Cut
fig.6
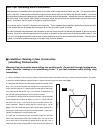
Tech Tips: Optimizing Sonic Performance
Bass response is smoothest when the speaker is mounted within a rigid wall that flexes very little. For improved perfor-
mance, add 2”x4” cross-braces horizontally roughly one foot above and one foot below the speaker location. Use wood
glue and extra screws when attaching the drywall to the studs around the speaker. Additionally, once the speaker cutout
has been made in the drywall, add a bead of wood glue inside the wall where the drywall meets the studs and cross-
braces. If possible, use two layers of drywall for maximum rigidity.
For an easier option, use NHT’s Acoustic Foam Insert Kit. The kit contains flame retardant, dense foam blocks that stiff-
en the drywall and can be added after the drywall is up. See your NHT dealer for details.
For more controlled bass response, add insulation to the wall cavity around and behind the speaker to provide acoustic
damping. Be sure to add the same amount of insulation to speakers in the same room to ensure consistent sound. Use
R-12 or R-19 fiberglass insulation, and be sure to wear protective gloves to avoid contact with the fibers. If the insulation
is paper- or foil-faced, position the paper or foil side away from the speaker.