


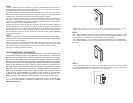
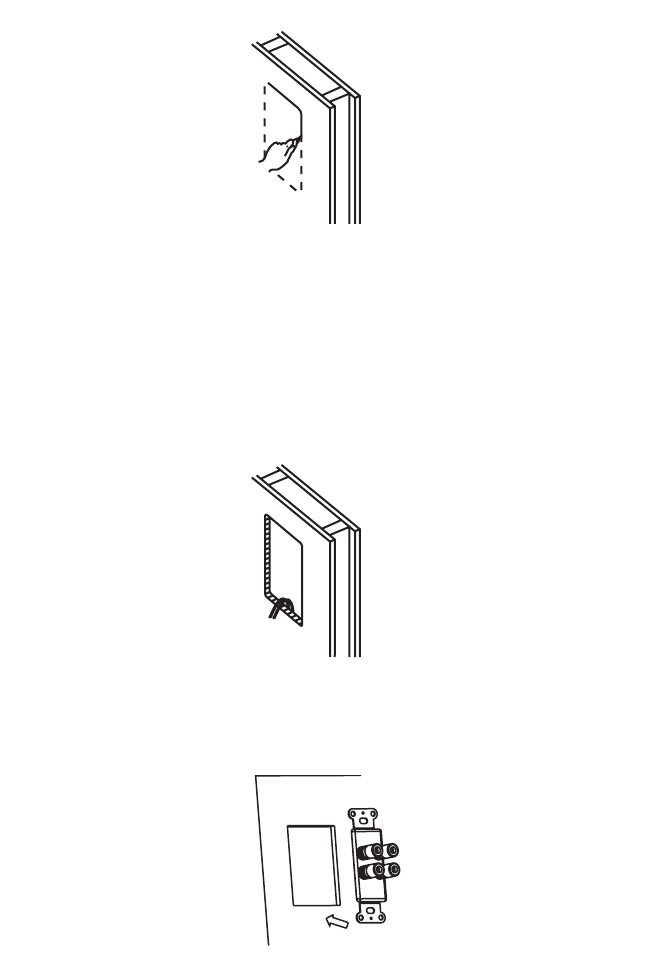
mistakes. If everything seems to be correct, then cutting can begin.
Installer Tip - By drilling a 1/2" hole in each corner (or in four evenly spaced locations for ceiling
speakers) of your template tracing, you can easily cut from hole to hole using a keyhole saw.
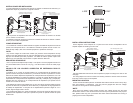
STEP 3
Run correct audio/video cable from source location to speaker/accessory locations. Be
sure to leave amount of wire at each location (8-10 inches) to complete connection. Install
mounting bracket or electrical box (not included) for proper installation.
For In-wall installation, you may be able to access the wall stud bay from the basement.
For In-ceiling installation, you can access the stud bay from the attic or crawl space abo
ve
the room.
STEP 4
Attach audio/video cable to speaker or accessory plate, being sure to observe polarity,
etc. Position speaker/accessory into bracket or E.O. box as shown. Secure in place using
provided mounting screws, use caution not to pinch wires/cable.
*NOTA
El sistema Add-A-Zone viene con cable CL-3, pues hay muchos códigos de construcción y
de prevención de incendios que requieren cable CL-2, CL-3 o FT4. Consulte con el inspec
-
tor de edificios local antes de hacer el cableado previo.
C) Luego, encamine un cable de altavoz de dos conductores desde la caja de enchufe
hasta los altavoces correspondientes derecho e izquierdo. Marque los cables (IZQUIERDO)
y (DERECHO) y determine la polaridad de cada canal (positiva y negativa).
D) Corte el cable de acuerdo a eso y permita que sobresalga suficiente cable de la caja
de enchufe para conectarlo correctamente al control de volumen. (Se recomienda dejar un
exceso de 6 a 8 pulgadas de cable). Meta el cable en la caja de enchufe o en la pared para
evitar que se dañe durante la instalación de la pirca.
E) Meta en la pared el exceso de cable que haya dentro de la caja de enchufe o pliegue los
cables cuidadosamente cuando inserte el control de volumen en la caja. Coloque el control
de volumen de manera que el soporte delantero se alinee con los agujeros de montaje de la
caja. En algunos casos, el control de volumen MUSICA puede entrar muy ajustado y hacer
que sea necesario meterlo por el lado derecho de la caja de enchufe y luego desplazarlo
hasta la posición central.
*NOTA
En las modernizaciones, las placas de extensión de metal y las cajas de enchufe no reco-
mendadas pueden requerir modificación sobre el terreno para que acepten el perfil más alto
y más profundo de las unidades.
F) Fije la unidad con los tornillos suministrados. Recomendamos aflojar los tornillos 1/4 de
vuelta para permitir un movimiento de 1/4 de pulgada de adelante hacia atrás y de lado a
lado. Esto permite que la placa delantera encaje al ras cuando se instale la cubierta.
G) Monte la cubierta y apriete los tornillos.
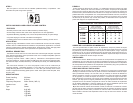
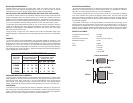
MUSICA WARRANTY INFORMATION
All Musica Add-A-Zone systems purchased in the United States from
an authorized MUSICA dealer are guaranteed against defects in material and
workmanship for a period of ten years from the date purchased by the end user,
and limited to the original retail purchasert of the product. Product found to be
defective during that period will be repaired or replaced by MUSICA at no charge.
This warranty is void if it is determined that unauthorized parties have attemtped
repairs or alterations of any nature. Warranty does not extend to cosmetics or fin-
ish. Before presuming a defect is present in the product, be certain that all related
equipment and wiring is functioning properly. MUSICA disclaims any liablility for
other incurred dam
ages resulting from product defects. Any expenses incurred
in the removal and reinstallation of product is not covered by this warranty.
MUSICA's total liability will not exceed the purchase price of the product. If a
defect is present, your authorized MUSICA dealer may be able to effect re
pairs.
Proof of purchase is required when requesting service, so please retain
your sales receipt and take a moment to register your product on line at www.
MusicaAtHome.com.