


XIAH-FD4
INTRODUCTION
The Ford OEM Radios vary in what buttons they have. This manual covers as
many buttons as possible. The Radio connected to the XiA Unit, most likely, will
not have all the buttons listed in this document. However, the definitions of the
buttons displayed on the radio will still be valid.
XIA CABLE HARNESS PREPARATION
Various Cable Harnesses have been developed for the Ford Application that pro-
vides the capability of having the XiA emulate either an OEM CD Changer or OEM
Satellite Receiver depending on the vehicle model and year.
In vehicles that are not equipped for Satellite Receiver operation, the XiA Adapter
must be arranged for CD Changer emulation. This is accomplished by removing a
jumper wire in the Cable Harness. Looking at the Cable Harness, locate the white
20-pin connector (J1, 2x10) and the jumper wire (White) between J1 Pins 7 and
17. Cut this jumper wire, and store it away with insulating tape. Once this is done,
the board will emulate an OEM external CD Changer.
If the XiA Adapter unit is working with a radio tha
t supports
ACP protocol and is
Satellite ready, no modification to the cable harness is required.
2
POWERING UP THE XIA UNIT
When the unit is first connected to the car battery, the installer must cycle the
radio “on” & “off” at least 3 times, pausing each time for about 6 seconds. This is
required for the unit to synchronize with the external equipment such as iPod and
XM Tuner.
RADIO OPERA
TION
To use the iPod or the XM Receiver after installing the XiA Adapter, turn the radio
“on” and push the “Tape,” “CD,” or “Mode” button. The iPod or XM Receiver---
depending on which is connected---begins to play through the radio speaker sys-
tem. Once this is done, use the arrow keys to advance to the next track (or sta-
tion) or to the previous track (or station). The next section describes the button
operations when listening to either iPod or Satellite Radio.
LCD DISPLAY UNIT
The LCD Display Unit (XIA-LCD) connects to the XiA Adapter Unit to provide visual
display information from iPod or Satellite Receiver---the active device at the
moment. This unit is particularly important in XiA applications where the OEM
Radio does not have a digital display to show the information obtained from the
active device.
PART 1:
RADIO BUTTON CONTROL
Control For CD Changer Mode
Button
Description of Function
CD/Tape Button Selects either iPod Mode or XM Mode by toggling
between the two. If iPod was the previous device that
was playing, them XM Receiver is selected.
Mode Selects the next device. If iPod was the previous device that
was playing, them XM is selected as the next device.
FM/AM Button Deselects XM mode or iPod mode.
SEEK > The right arrow button goes one track up in iPod mode or
one channel up in XM mode.
<SEEK The left arrow button goes one track down in iPod mode or
one channel down in XM mode.
Scan In XM and iPod modes, this button scans though channels
or stations.
<<CD (1) In iPod mode, Button 1 advances to the previous playlist of
music. In XM mode, Button 1 goes to the last station of the
previous category.
CD>> (2) In iPod mode, Button 2 advances to the next playlist of
music. In XM mode, goes to the first station in the next cat-
egory.
Shuffle (6) In iPod mode, this Button shuffles the songs in the current
playlist. In XM it has no effect.
34
WIRING CONNECTIONS
Connect the Yellow wire coming off the 20 pin Molex connector to a 12 volt (+)
constant battery wire which can be found in the OEM radio harness. Be sure to
use a multimeter to verify the 12 volt (+) constant battery wire. Connect the Black
wire to coming off the 20 pin Molex connector to a ground. There is a ground
wire in the OEM radio harness, use a multimeter to verify, or you can connect the
Black wire to a metal brace in the dash.
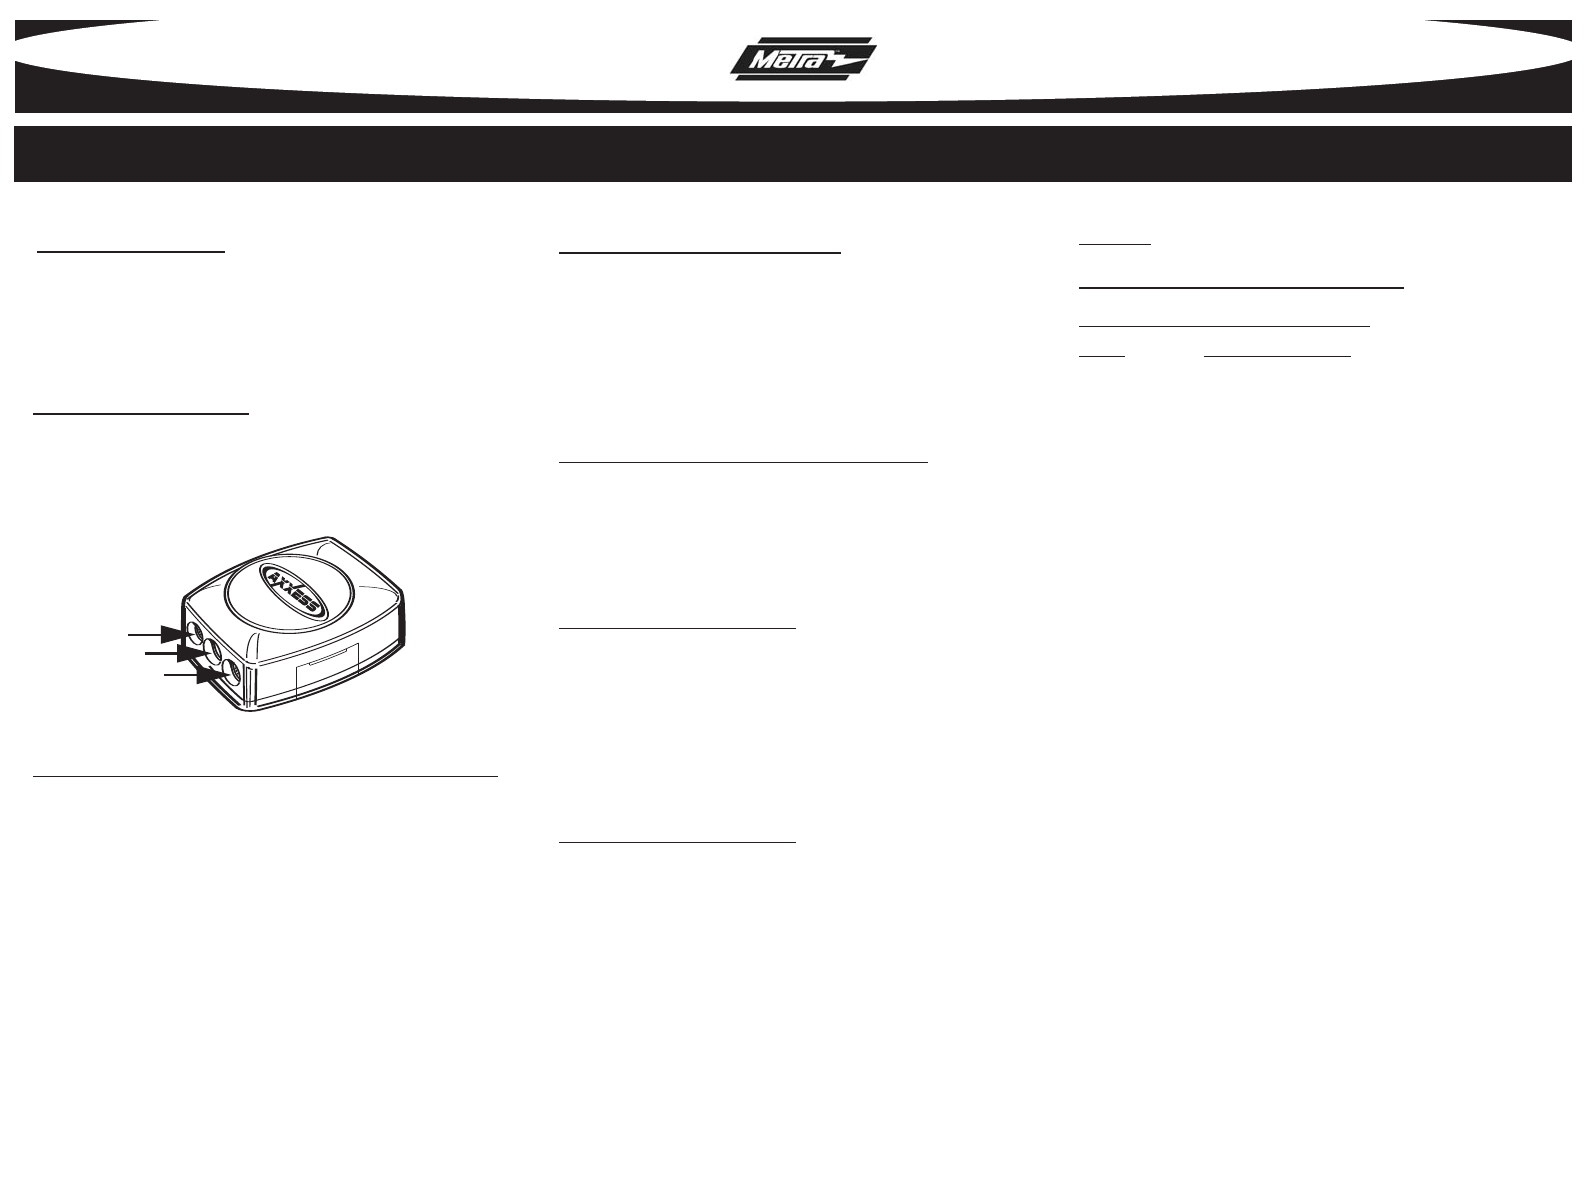
PORT OVERVIEW
1) This port is used with the optonal XIA-LCD display.
2) This port is used with the XM cable XIAH-XMC or the AUX IN cable XIAH-RCA.
3) This port is used with the iPOD cable XIAH-IPC or the AUX IN cable XIAH-RCA.
1
2
3