


22
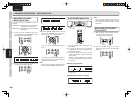
BASIC
CONNECTIONS
BASIC
OPERATIONS
ADVANCED
CONNECTIONS
ADVANCED
OPERATIONS
TROUBLESHOOTING
NAMES AND
FUNCTIONS
ADVANCED
OPERATIONS
OTHERS
ENGLISH
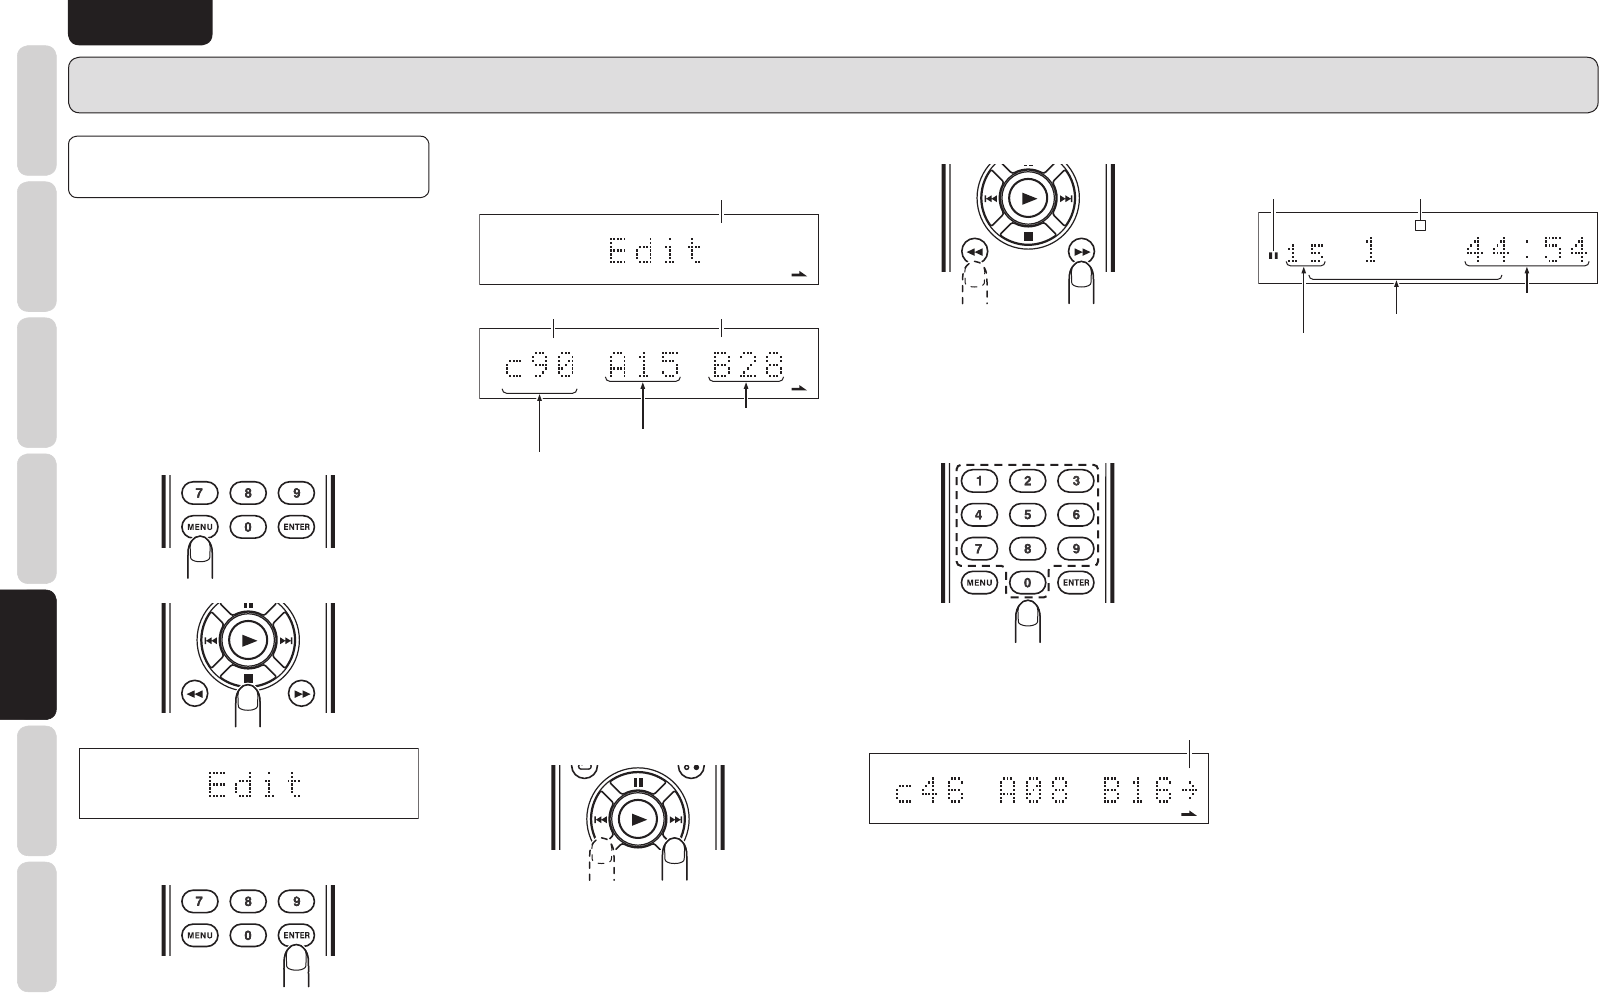
ADVANCED OPERATIONS –AUDIO CD–
EDITING (RECORDING A
DISC ON A TAPE)
When recording from a compact disc to a tape, use
this function to match the tape length to the playing
time of the tracks to be recorded and to create 4-
second intervals between the tracks.
7
Simple edit
This operation fits tracks into a specified tape length
while keeping the tracks in their original order.
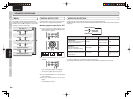
1. During stop, press the MENU button on the
remote controller then the 7 button. “Edit”
appears.
2. Press the ENTER button on the remote
control.
“EDIT” will light up, the player will enter edit
mode, and the tracks will be divided up into
SIDE A and SIDE B.
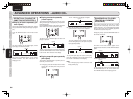
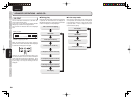
(Example: When a disc with 28 tracks is
loaded)
EDIT
TEXT
12 34 56 78 910111213141516 17181920
EDIT
5 6 13 14
5
5
5 5
5
5
5 5
Flashes
Last track on tape side B
The tape recording time display (90) appears.
Last track on tape side A
Light up
Light up
This example shows that, when the tape
recording time is 90 minutes, track 15 is the
last track on tape side A and track 28 the last
track on tape side B. In other words, by using a
90-minute tape, all of the 28 disc tracks can be
accommodated by assigning tracks 1 to 15 on
tape side A and tracks 16 to 28 on tape side B.
3. To change the tape recording time, specify the
new tape recording time using the ¢ or 4
button or the numeric buttons (0 to 9).
• Use of ¢ and 4 buttons
Each press of the ¢ button allows you to
change the recording time in the order 90 = 46
= 54 = 60 = 74 = 90.
Each press of the 4 button allows you to
change the recording time in the order 90 = 74
= 60 = 54 = 46 = 90.
• Use of ¡ and 1 buttons
Each press of the ¡ button allows you to
increase the recording time by 1 minute.
Each press of the 1 button allows to decrease
the recording time by 1 minute.
• Using the numeric buttons
When numeric buttons are used to specify a
C-46 tape, for example, press 4 then 6.
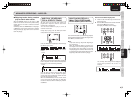
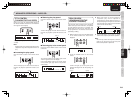
EDIT
TEXT
12 34 56 78 910111213141516 17181920
5
5
5
5
5
5
The arrow mark will flash.
(indicates that tracks after 17 will not be played.)
This display example shows that, with a 46-
minute tape, tracks 1 to 8 will be recorded onto
tape side A and tracks 9 to 16 will be recorded
onto tape side B.
The blinking arrow on the right end of the
character display shows that tracks 17 and after
cannot be recorded on the tape.
4. Press the ENTER button again and set the
editing contents.
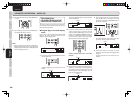
TTL
TRK
TTL
TIME
A
–
EDIT
TEXT
12 34 56 78 9101112131415
Light up
Total playing time of side A
Total number of tracks on side A
Number indicators of tracks assigned to side A light up.
Light up
5. Start playing in accordance with “Edit recording”
(page 23).