


Amplifier Pre-packing Instructions:
Step 1: Remove the perforated top cover. Use a #2 Phillips screwdriver to remove nine philips 6-32
screws: Three per side, two on the top, and one in the back of the cage, in front of the two big B+
capacitors.
Step 2: Install the protective soft grey foam that surrounds the output tubes, one piece per bank of five
tubes, two per amplifier. Do not install this foam if the tubes are hot. Make sure they are cool or
you will have a mess of melted foam. The input and driver tubes do not need protective foam.
Step 3: Replace the top perforated cover and screw it back in place. It is a good idea to tape a note to
the top of the amps so that the recipient is aware that there is foam to remove around the tubes
before they turn it on.
(Really!)
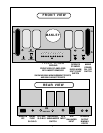
Amplifier Re-packing Instructions:
Step 1: Reassemble the box if it has been knocked flat. Use sturdy packing tape to tape up the long
bottom seam with a few strips of tape, then two strips per each bottom side.
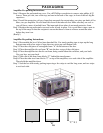
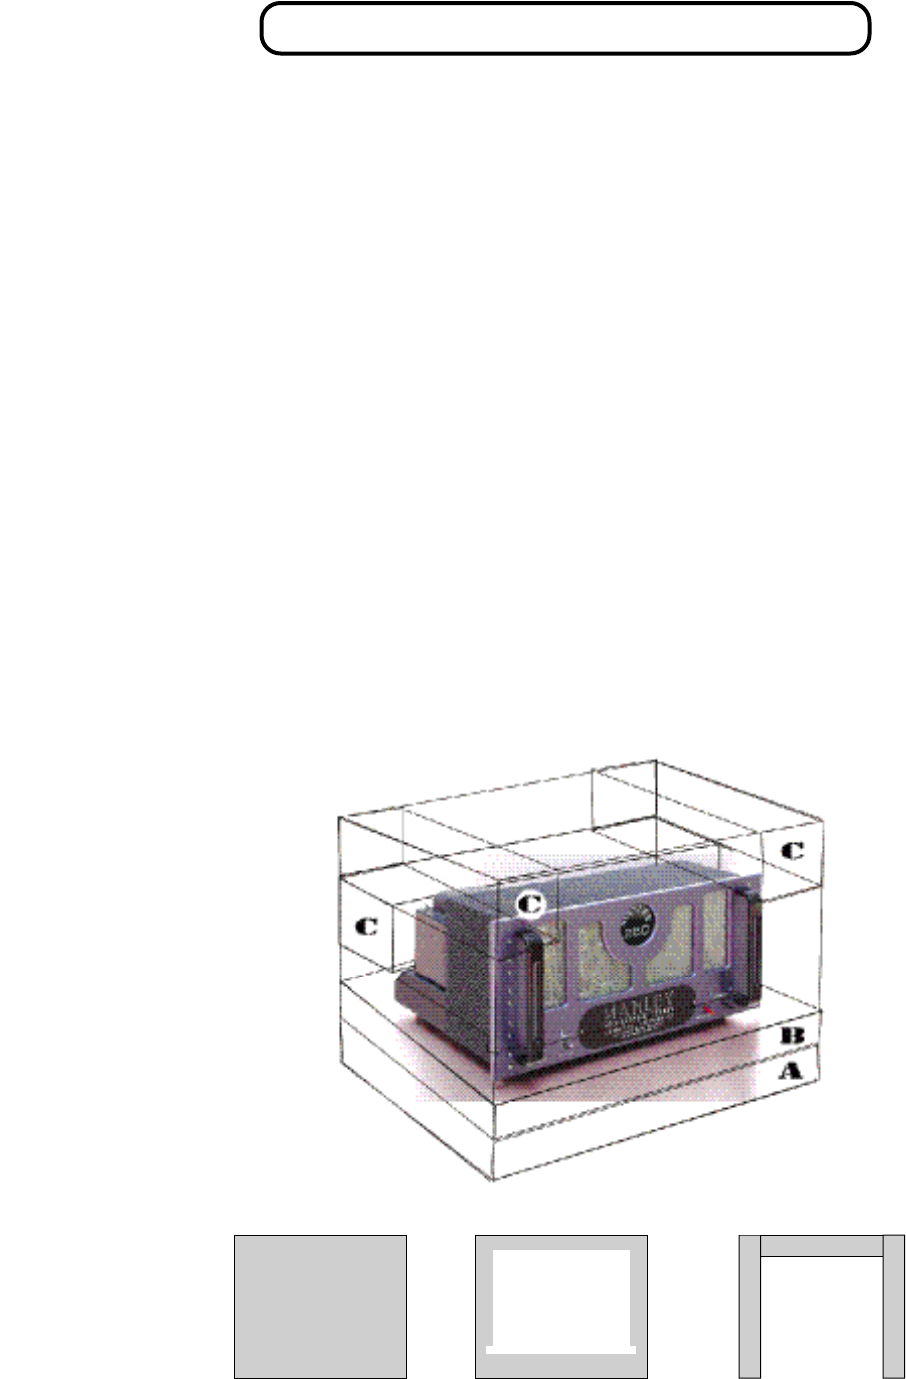
Step 2: Place the solid piece of rectangular foam "A" in the bottom of the box.
Step 3: Place the amplifier die-cut foam "B" into the box on top of the solid piece.
Step 4: Place the amplifier into the die-cut foam, being careful about the switches, and your back.
Use your legs, not your back.
Step 5: Slide one of the three foam blocks "C" behind the transformers.
Step 6: Place the other two foam blocks "C" on top of the amplifier, over each side of the amplifier.
These hold the amplifier down.
Step 7: Seal the box with sturdy packing tape using a few strips to seal the long seam, and two strips
to seal each side.
"A"
16
"B"
"C" X 3
PACKAGING