


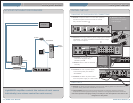


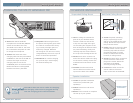


1. Lift the ceiling tile nearest the
grid rail in your desired sensor
location. Guide one side of the
C-clip over one edge of the grid
rail. Providing firm support to the
back of the grid rail with one hand
(to prevent bending), firmly and
carefully snap the second side of
the C-clip over the edge of the rail.
2. Uncoil sensor wire. Connect one
end of the sensor cable to the plug
on the sensor. Loosely secure wire
overhead and route it back to the
820iR.
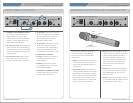
3. Connect the other end of the
sensor cable into one the sensor
input on the back of the 820iR.
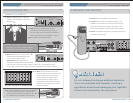
IR SENSOR INSTALLATION
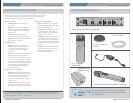
1. Screw the plastic mounting
strip to a place high on the
wall or in the middle of the solid
ceiling. Mount the strip horizon-
tally as shown above.
2. Firmly snap the C-clip on the back
of the IR sensor onto the plastic
mounting strip with the sensor
plug hanging down (if a wall
mount) or toward the receiver
location (if ceiling mount).
3. Uncoil the sensor wire. Screw one
end of the sensor cable to the
plug on the sensor. Route the
wire back to the 820iR,
securing it along the way.
4. Connect the other end of the
sensor cable to the sensor
input on the back of the 820iR.
wall
mounting
strip
c-clip
sensor jack
820iR User Manual | 4
15 | 820iR User Manual
8 2 0 i R U s e r M a n u a l
Speaker Installation
1. Locate the speaker installation
instructions packed with your
speaker(s).
2. Follow instructions and mount
speaker(s).
3. Return to this manual to complete
the set up of your system.
Speaker Install
Instructions
Suspended Ceiling Mount
Wall/Solid Ceiling Mount
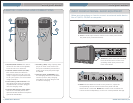
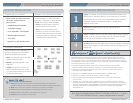
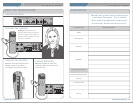
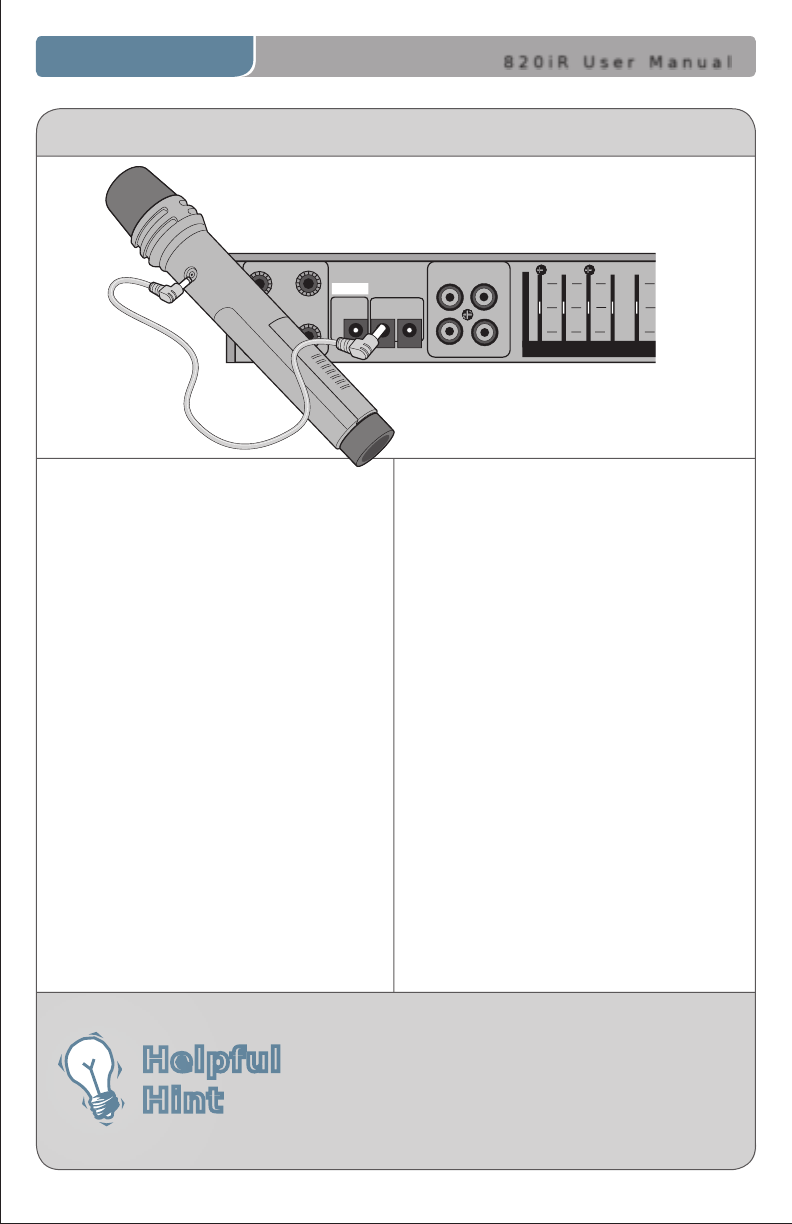
CHARGING THE HM-70 HANDHELD MIC
1. Ensure the HM-70 handheld
microphone is turned OFF (ON/OFF
switch on the side of the unit).
The 820iR can be left on, but must
be connected to AC power in order
to charge the microphone.
2. Connect the loose end of the
charging cable into the jack labeled
CHARGER on the side of the HM-70.
Connect the larger end of the
charging cable to one of the
CHARGERS jacks on the back of the
820iR. The HM-70’s rechargeable
batteries are factory installed.
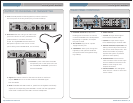
3. The power indicator light next to
the power switch glows green when
the cable is connected and charg-
ing correctly. The light goes out
when fully charged. Batteries
will charge in 8 to 12 hours. A fully
charged battery will run for up to 8
hours of continuous operation.
4. The HM-70 can remain charging
for up to 10 days. Overcharging
will shorten battery life.
The HM-70 does not use a cradle for charging.
The charging cable must be plugged directly
into the charging jack in the transmitter.
Helpful
Hint
SPEAKER OUTPUTS
250
400
70
0
1K 1K4
2K5
4K
6K
3
+1
0
0
-1
0
AUDIO INPUT
CHARGERS
DC
POWER
TV/VCR
CD/DVD
L L
R
R
24V
DC
SENSOR INPU
T
SENSOR
SHOR
T
2.06/2.54
8 2 0 i R U s e r M a n u a l