


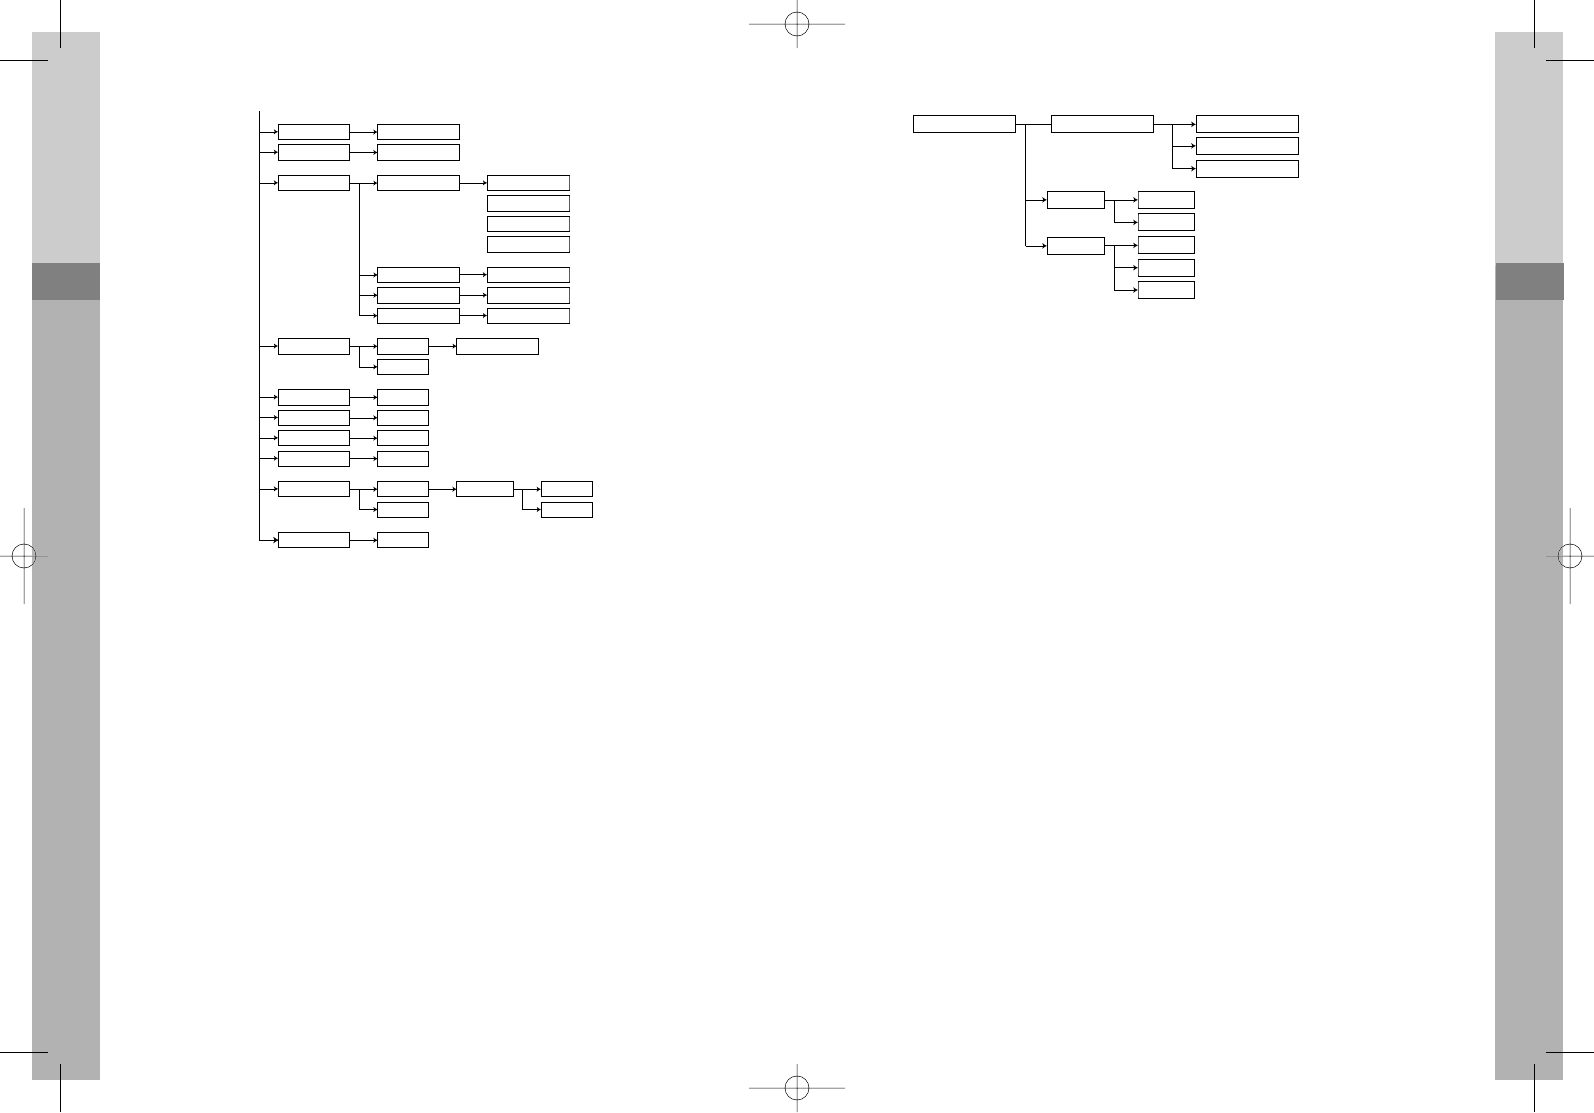
Display Option Settings Menu
With the radio powered on, select the desired channel. Press the MODE button and then the
up or down buttons until
DDIISSPPLLAAYY
appears. Press and release the MODE button to select. Sub-
menu settings include:
CCHH.. DDIISSPP
SSLLIIDDEE SSTT
BBAACCKK LLGGTT
You can toggle between these settings with the up or down buttons. When the desired setting
appears on screen, press the MODE button to select. If you select
CCHH DDIISSPP
, your choices will
include:
NNAAMMEE,, CCHH NNOO
, and
FFRREEQQUUEENNCCYY
(Name, Channel Number and Frequency). You can toggle
between these settings with the up or down buttons. When the desired setting appears on the
display, press the MODE button to view the current information for that setting.
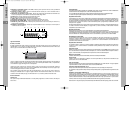
Example of Name display:
TTOOPPAA2233
.
NOTE: The Name, Channel Number and Frequency settings are display-only settings. You can
not change them within these screens.
If you select the
SSlliiddee SSeettttiinngg
, your choices include Slide On or Slide Off. Toggle between the
settings with the up or down buttons. When the desired setting appears on screen, press the
MODE button. Your radio will save your On or Off selection and return to standby mode.
NOTE: If Slide Setting is On, and the radio is in standby for more than 1 minute, a slide message
pre-programmed by your Dealer will scroll on screen.
P/A Option Settings
To enable the P/A Option, press and hold down the T/A button for 2 seconds. To turn the P/A Option
off, press and hold down the T/A button for 2 seconds.
Example of P/A display:
PP//AA MMOODDEE
Weather Alert Option Setting
To enable the Weather Alert Option, press and hold down the WX button for 3 seconds. To turn the
Weather Alert Option off, press and hold down the WX button for 3 seconds.
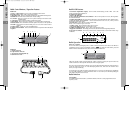
ACC-733 DTMF Microphone Operation
The ACC-733 can be used for telephone interconnect or other DTMF applications. Consult your Dealer
for other application possibilities.
The ACC-733 can be operated in an auto dial mode or manually operated and is back lighted for low
light conditions.
A telephone ringer will be heard when a telephone connection has been established or for an incoming call.
Auto Dial Operation
Up to 16 digits can be dialed when using auto dial. Follow these steps to place a call using auto dial.
A. Enter the desired number by pressing and releasing 0 -9, * or # keys. The dialed numbers will
appear in your radio display. # will be indicated as F in your display. Note: The # key is normally
used to end, or hang up, an interconnect system. Consult your Dealer for exact system
operation. The * key will be indicated as E.
B. Press the SND key to send the dialed number.
C. When the called party answers, press the P-T-T of the microphone to answer. Release the P-T-T
to listen for a response.
D. When the conversation has ended, press and hold the P-T-T of the microphone. Press and hold
the # key for 1 or 2 seconds to end the call. Release the P-T-T when the call has ended.
Manual Dial Operation
A. Press and hold the P-T-T of the microphone and enter the desired number by pressing and
releasing 0 -9, * or # keys. The dialed numbers will appear in your radio display. # will be
indicated as F in your display. Note: The # key is normally used to end, or hang up, an
interconnect system. Consult your Dealer for exact system operation. The * key will be
indicated as E.
B. When dialing is complete, release the P-T-T and wait for the called party to answer.
C. When the called party answers, press the P-T-T of the microphone to answer. Release the P-T-T
to listen for a response.
D. When the conversation has ended, press and hold the P-T-T of the microphone. Press and hold
the # key for 1 or 2 seconds to end the call. Release the P-T-T when the call has ended.
ENGLISH
13
ENGLISH
14
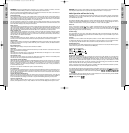
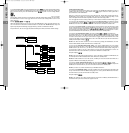
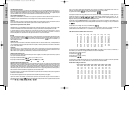
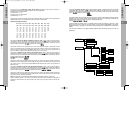
Busy Lock On/OffBusy Lock
Marked Idle On/OffMarked Idle
Scan Mode Normal Scan Tx
Prionity Scan Tx
Prionity Select Scan
Priority Only Tx
Scan Speed Time 50
~
500 msec
Scan Delay Time 1
~
30 sec
Lock Back Time 1
~
10 sec
Scan Set
On
Off
Prionity Channel 1
~
16Priority Scan
On/OffTx Delay
On/OffClear To Talk
On/OffRoger Beep
On/Off2-Tone Alarm set
Off
On
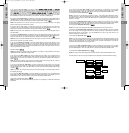
Microphone Hook
On/OffAudio Compander
Hook Off Scn Off
On
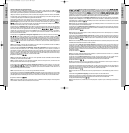
Display Option Setting Channel Display Format
Slide Set Slide On
Slide Off
Light Off
Dim Mid
Back Light Set
Name Character Display
Channel No. Display
Frequency Display
Dim High