3
retain a flat frequency response from the monitor. (See additional information in Installing Your Monitors section
on page 4.)
Connecting Your System
POWERING ON
All connections should be made, all faders and controls should be set at their minimum levels, and all other
equipment should be powered on prior to powering on your V8 monitors.
The power On/Off switch is located on the rear panel and is internationally marked to indicate the operational
status. ( — ) = ON and ( O ) = OFF. A yellow LED illuminates the trademarked KRK Triangle on the front baffle
when power is applied.
NOTE: MAKE SURE THAT THE VOLTAGE INDICATOR FOUND IN THE MIDDLE PORTION OF THE IEC MAINS
CONTROL IS SET TO THE CORRECT VOLTAGE SETTING FOR YOUR VOLTAGE.
CHANGING VOLTAGE
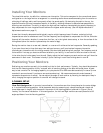
To change the voltage, remove the power cord, pry off the fuse block with a small flathead screwdriver (look for
indent on the left inside of the power cord insert). Slide the circuit board out of the fuse block, rotate 180º and
reinstall the fuse block. Please note when making fuse changes, the fuses will have to be replaced. (see
Changing Fuses section below) Make sure and align the white arrow with the raised arrow located on the
power entry module before reinstalling. Check to see if the correct voltage can be read from left to right in the
voltage window before powering up.
CHANGING FUSES
Under normal operation the fuses should not blow. A blown fuse usually indicates an overload or fault condition.
To change the fuse, remove the power cord, pry off the fuse block with a small flathead screwdriver (look for
indent on the left inside of the power cord insert) and change the blown fuses.
• 100~120VAC use 4 amp 250V 5mm x 20mm fuses
• 220~240VAC use 2 amp 250V 5mm x 20mm fuses
If the fuses blow immediately upon power up, this indicates a fault condition and the monitor should be
returned to KRK for repair.
NEUTRIK
®
COMBO CONNECTOR


