SPK-C613 - Installing the Open-back Ceiling Speakers 9
Figure 5: Installing the Open-back Ceiling Speakers
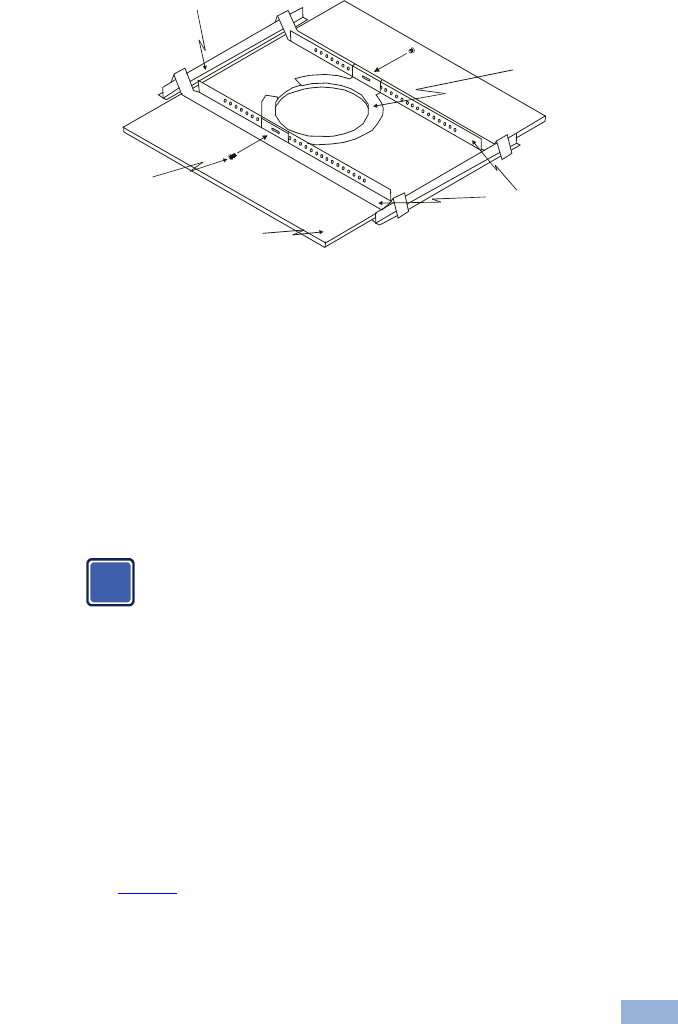
2. Place the tile rails on the tile and snap them into the two tabs on the C-ring.
Align the rails so that the ends extend over the T-channel grid.
3. Insert a screw through each tab on the C-ring to secure the rails.
4. Connect the speaker wires to the speaker terminals.
5. Insert the speaker into the opening and tighten the screws.
When tightening the screws, the tabs automatically turn outward, thus
clamping the speaker to the wall from its rear side.
Do not over-tighten the screws. It may cause damage to both the
speakers and the surface.
6. Push the grille firmly into the slot in the speaker baffle.
Check that the grille is securely seated.
To remove the grille, insert two bent paper clips into the holes in the grille and carefully
pull it down. Repeat this around the perimeter of the grille until it is completely removed
5.4 Array Installation
When installing SPK-C613 in an array installation layout, you have to define the
distance between speakers as well as the layout pattern (square or hexagonal).
The distance between speakers is set according to the speakers’ dispersion angle
(see
Figure 6), the uniformity of the coverage desired and the budget.
T-channel Grid
Support Ring
Screws
Ceiling Tile
Tile Rails
C-ring


