


SPK-C411 / SPK-C412 - Installing the Closed-back Ceiling Speakers 7
7
Do not nail or staple the speaker wires.
If you are mounting the speakers onto a ceiling tile, remove the ceiling tiles where
you plan to install the speakers. Use the template to trace and then cutout the
speaker hole over an empty box.
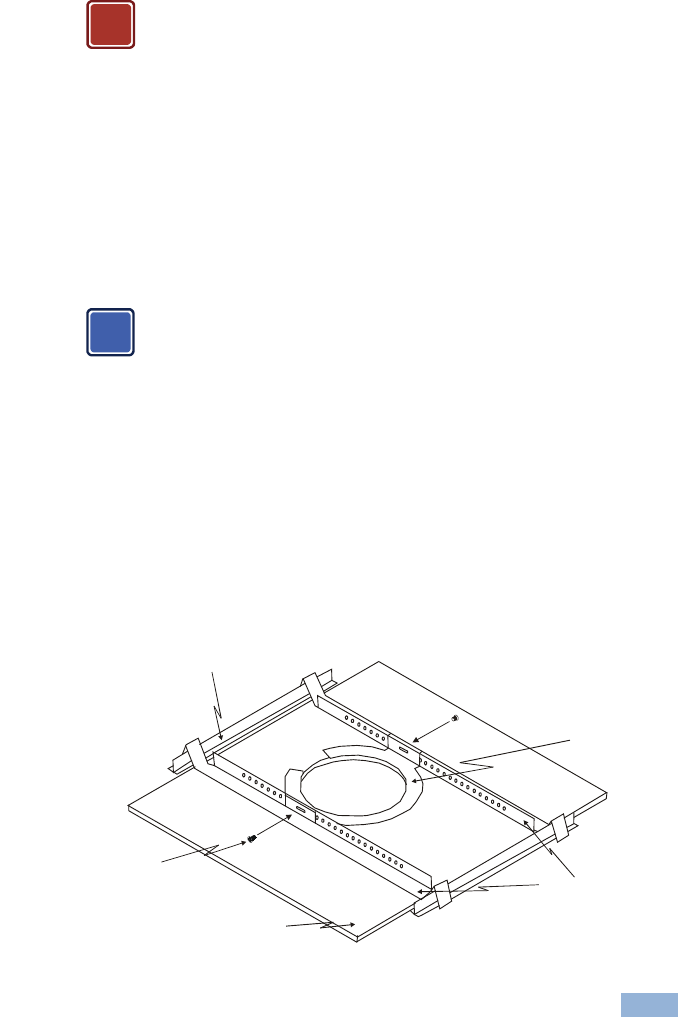
The closed-back ceiling speakers are supported by the ceiling mounting kit (two C-
rings and two pairs of tile rails; the tile rails prevent the speakers from falling if the
tile itself comes out or falls apart, as their ends catch onto the T-grid). When
mounting onto the ceiling tiles, use both supports.
Be sure that the tiles can support the speaker. Smaller sized tiles or
fiberglass-type tiles cannot support the weight of the speakers.
When this is the case, the speakers will need additional support.
When mounting onto a sheetrock ceiling, the C-ring alone is used to reinforce the
ceiling material.
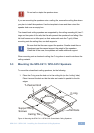
5.3 Mounting the SPK-C411 / SPK-C412 Speakers
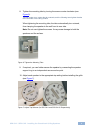
To mount the closed-back ceiling speakers, do the following:
1. Place the C-ring over the hole cut in the ceiling tile (on the “ceiling” side).
Place it around the hole so that the tabs are located in parallel to the tile
edges.
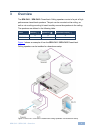
Figure 4: Mounting the SPK-C411 / SPK-C412 Closed-back Ceiling Speakers
!
i
T-channel Grid
Support Ring
Screws
Ceiling Tile
Tile Rails
C-ring