2. Run wiring to the wall opening(s). Be sure to comply with any codes that may apply in your
area.
3. (a) If you want to paint the decorative frame and the wall together,insert the frame and attach
with the dogs. DO NOT OVERTIGHTEN.
(b) If you will not be re-painting, you may immediately install the frame and speaker assembly.
The frame’s mounting dogs will "sandwich" the wall and frame together.The module is
installed with the screws and the grille is pressed into place.
K H W-5 OPERATING CONTROLS
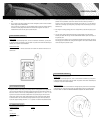
Tweeter Switch
If installing in an acoustically bright room, such as some bathrooms and kitchens, you may want
to adjust the tweeter level located on the front baffle. The position of this switch should always be
checked prior to speaker module installation.
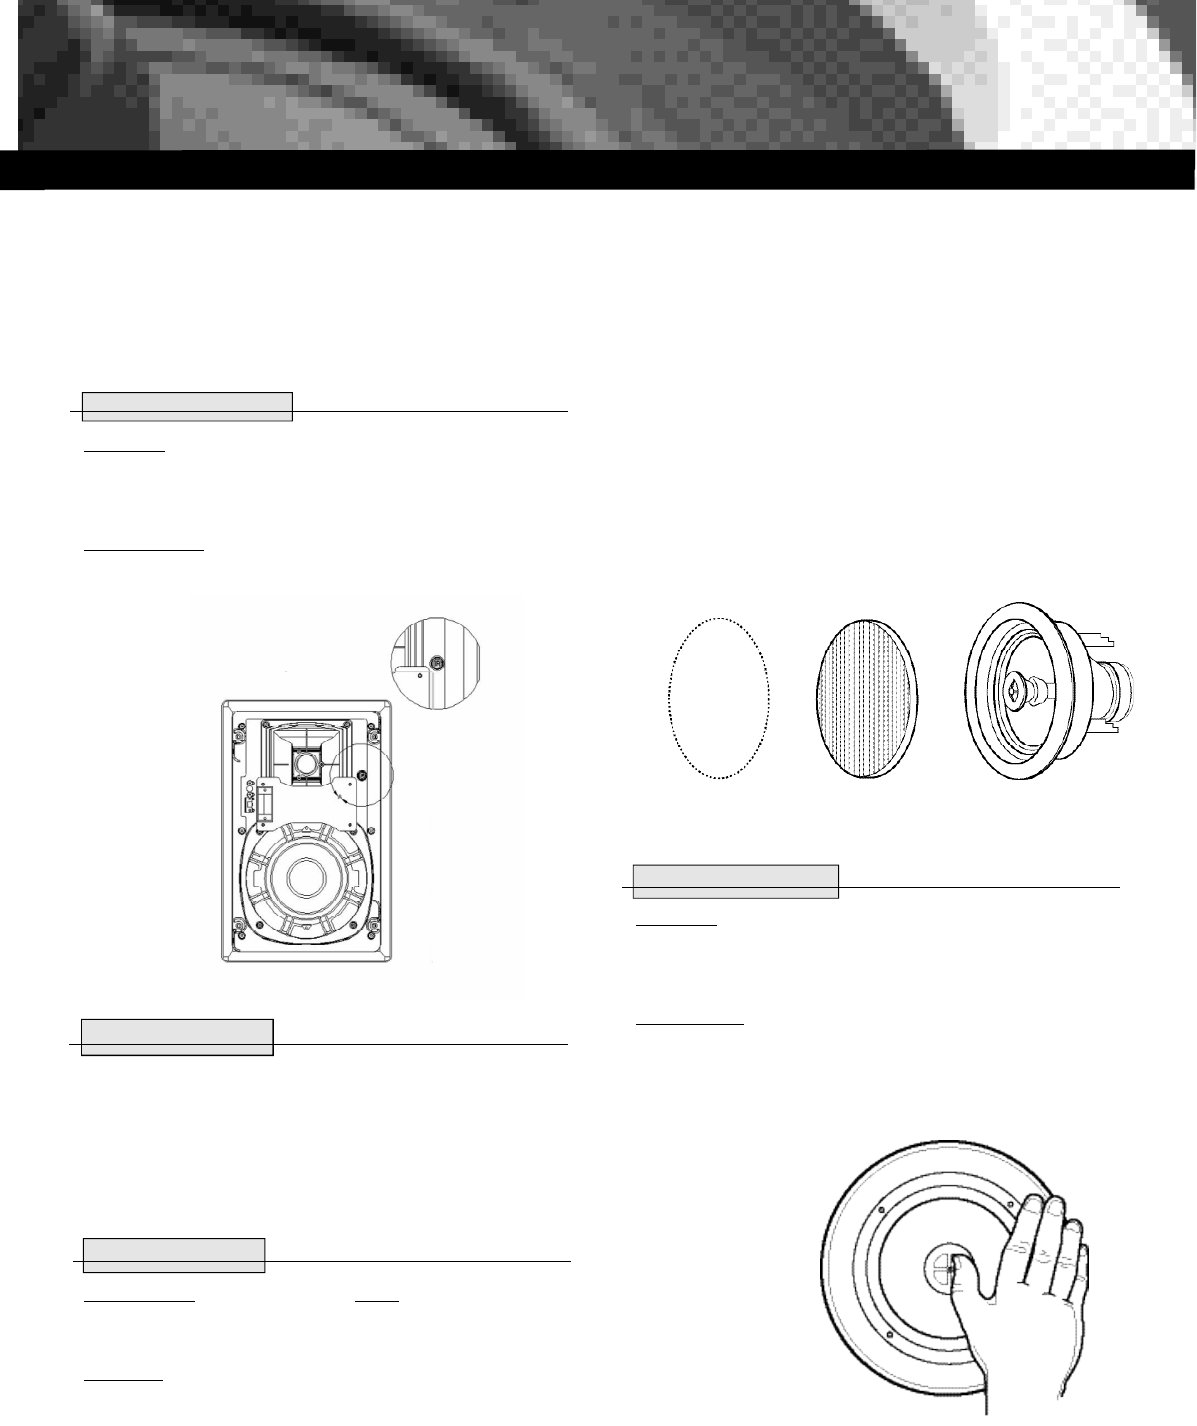
Infrared Sensor Mount
The KHW-5 features a
1
/2” infrared sensor locator on the baffle. The location of the knock-out is
shown below.
KHC-6 SPEAKER PLACEMENT
Designed to function in any ceiling or drop ceiling, Klipsch in-ceiling speakers are engineered for
years of performance. Minimum construction requirements call for drywall or other mounting sur-
faces to be at least
3
/8" thick. In drop ceiling installations, typical "drop in" 2’ x 4’ and 1’ x 1’ ceil-
ing tiles are composed of low density materials which can (a) visibly sag over time due to the
weight of the speaker and (b) vibrate audibly, detracting from the overall sound quality. Klipsch
recommends that in order to maximize the acoustic performance of your KHC-6 speakers you
replace the original mounting panel with
1
/2" to
3
/4" plywood or medium density fiberboard (MDF).
IC SPEAKER INSTA L L AT I O N
Contents Description Quantity
Speaker Modules 2
Grilles 2
Tools Required
#2 Phillips Screwdriver
Hole saw
1. Cut the appropriate diameter circle using the hole template provided. Cutout dimensions are
provided in the "Specification" section at the back of this manual. Sizes are minimum. If
accuracy of cut (a perfect circle) cannot be achieved, you may add up to
1
/4" to the radius. Be
careful not to cut through any existing wiring or plumbing. Avoid compromising any fire stops
between studs.
2. Run wiring to the ceiling opening(s). Be sure to comply with any codes that may apply in your
area.
3. (a) If you want to paint the decorative frame and the ceiling together,insert the speaker
assembly and attach with the dogs. DO NOT OVERTIGHTEN. Install the paint mask in place of
the grille and paint.
(b) If you won’t be re-painting, you may immediately install the speaker assembly.The frame’s
mounting dogs will "sandwich" the ceiling and frame together. The module is installed with the
screws and the grille is pressed in place.
KHC-6 OPERATING CONTROLS
Tweeter Switch
If installing in an acoustically bright room, such as some bathrooms and kitchens, you may want
to adjust the tweeter level located on the front baffle. The position of this switch should always be
checked prior to speaker module installation.
Swivel Horn Tweeter
The Klipsch KHC-6 features a swivel tweeter to aim high frequency sound.To aim sound directly
at the listening area, simply remove the grille, and gently adjust the horn to the desired angle.
DO NOT ATTEMPT TO TURN THE TWEETER STEM WHILE ADJUSTING THE SWIVEL TWEETER.
ARCHITECTURAL SPEAKERS


