


8
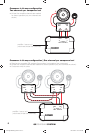
QSCOMPONENTSYSTEM
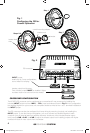
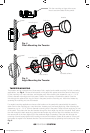
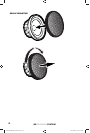
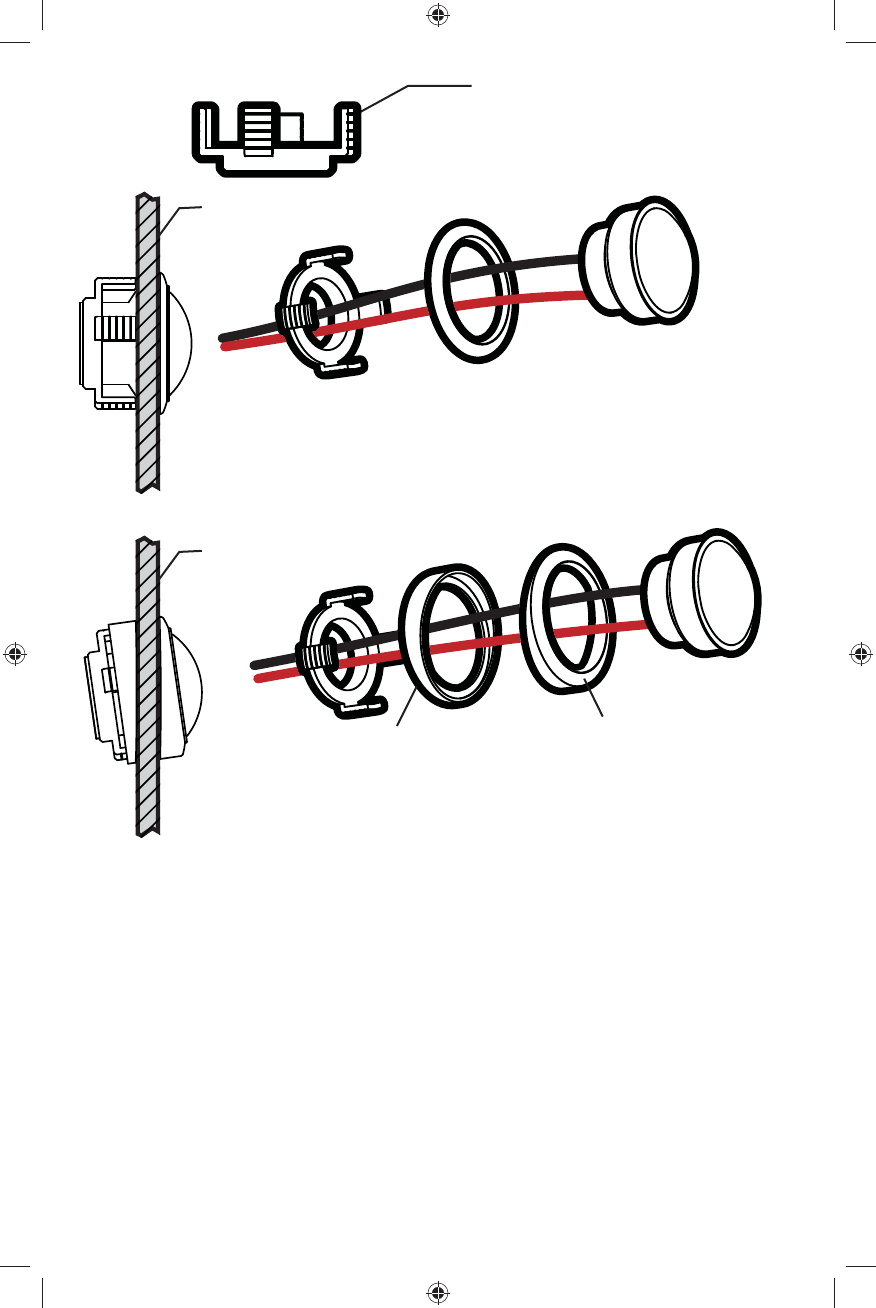
Fig. 4
Flush Mounting the Tweeter
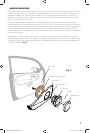
TWEETER MOUNTING
The tweeter can be mounted one of three ways: fl ush, angled, and coaxial mounting. For fl ush mounting
applications, see Fig. 4. Choose a fl at location on the panel with space behind the panel to allow room
for the mounting nut, motor structure, and tweeter post. After checking the clearances, cut a 1-13/16”
(46mm) diameter mounting hole in the panel. Position the mounting nut behind the panel. Feed the
wire through the optional fl ush ring, the hole in the panel, and the mounting nut. Mount the tweeter by
screwing the mounting nut onto the tweeter.
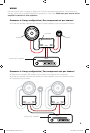
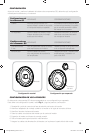
For angled mounting applications choose a fl at location on the panel with space behind the panel to
allow room for the mounting nut, motor structure, tweeter post, and back angle ring. After checking the
clearances, cut a 1-13/16” (46mm) diameter mounting hole in the panel. Place the front angle ring in front
of the panel. Then place the wire and tweeter through the front angle ring and into the panel. Next, place
the wire through the back angle ring, place the back angle ring over the rear of the tweeter, and line-up
the narrow part of the front angle ring for the preferred angle of operation. Place the wire through the
mounting nut and loosely tighten the mounting nut around the tweeter. Rotate all the parts in unison until
the tweeter is angled in the desired direction. Secure the assembly by tightening the mounting nut. See
Fig. 5.
mounting nut
Trim the mounting nut legs at the score
lines to accommodate thicker panels.
mounting nut
back angle ring
Fig. 5
Angle Mounting the Tweeter
front angle ring
rounded surface
inset surface
panel
panel
fl ush ring
tweeter
tweeter
2009 QS Multilingual h01.indd 82009 QS Multilingual h01.indd 8 11/21/2008 10:54:30 AM11/21/2008 10:54:30 AM