


4 5
PERFORMANCE
INSTALLATION
Measurements are based on the 4 ohm enclosures. Note: The use of a subsonic filter will significantly increase the power handling.
The power handling specifications in these charts are calculated using a 25Hz, 24dB per octave subsonic filter.
*Power Handling Watts RMS without subsonic filter: DS10L5-300, DS12L5-300, VS12L5-150, TS10L5-450
SOLO-BARICSUBWOOFERENCLOSURE
TSVented
The TS Series vented enclosure combines KICKER’s award winning Solo-Baric subwoofers
with computer-modeled and human fine-tuned enclosures to offer a level of bass
performance never before thought possible from a commercially available, ready-to-install
subwoofer system. The TS Series enclosure is available with a pre-loaded 10 inch
Solo-Baric L5.
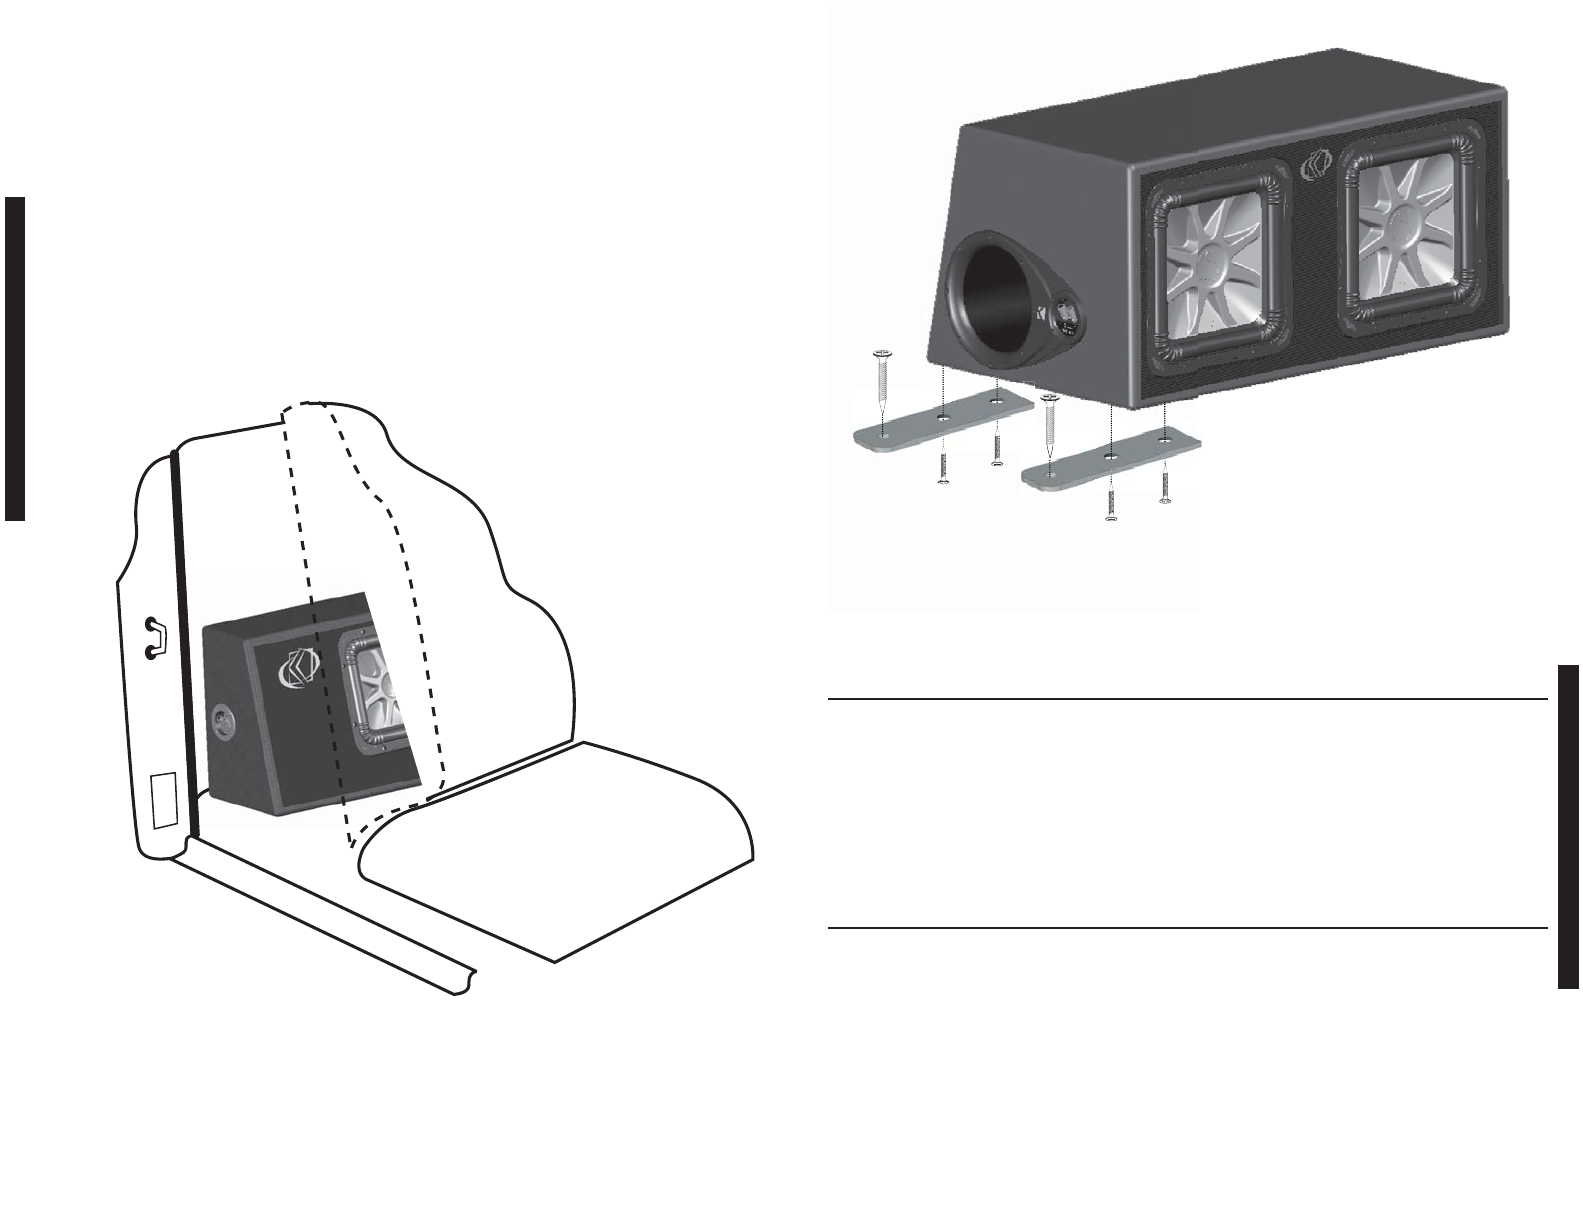
The Kicker TS Series enclosure is designed to fit behind the seat of a pickup truck, coupe
or wherever space is limited. This design is engineered to provide the best bass response
when firing into the back of the seat.
Plug your subwoofer speaker wire into the terminals, using the red connector as positive
and the black connector as negative. Hook the other end of the wire to your subwoofer
amplifier in accordance with its owner's manual.
Seat
Floor Board
Door Frame
Figure 3
Model:
Nominal Impedance [Zn], ohm [per enclosure]
Power Handling
* Watts, Peak (RMS)
Enclosure Top Surface Depth, in (cm)
Enclosure Bottom Surface Depth, in (cm)
Enclosure Height, in (cm)
Enclosure Width, in (cm)
VS12L5
2 or 4
1200 (600)
14 11/16 (37.2)
18 (45.7)
16 (40.6)
18 3/4 (47.6)
DS12L5
2 or 4
2400 (1200)
16 3/8 (41.5)
19 9/16 (49.7)
16 (40.6)
32 3/8 (82.2)
DS10L5
2 or 4
1800 (900)
15 (38.1)
18 (45.6)
14 (35.6)
28 (71.1)
TS10L5
2 or 4
900 (450)
6 11/16 (16.9)
10 (25.4)
15 (38.1)
21 1/2 (54.6)
Performance
Model:
Nominal Impedance [Zn], ohm [per enclosure]
Power Handling
* Watts, Peak (RMS)
Enclosure Top Surface Depth, in (cm)
Enclosure Bottom Surface Depth, in (cm)
Enclosure Height, in (cm)
Enclosure Width, in (cm)
Mount Brackets to the bottom of the enclosure using
the supplied smaller screws. Securely attach the
enclosure to the vehicle with the supplied larger screws.
Figure 4
SafetyWarning
To avoid potential injury, or possible death, from forward movement of the enclosure during
abrupt stops or accidents, the enclosure must be properly installed and securely fastened to
your vehicle. You are solely responsible for securely fastening the enclosure in your vehicle.