


10
|
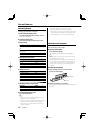
English
General features
Switching Display
Changing the information displayed.
1 Enter Switching Display mode
Press the [DISP] button for at least 1 second.
"DISP SEL" is displayed.
2 Select the Display item
Push the Control knob towards right or left.
In Tuner source
Information Display
Program Service name or Frequency
(FM)
"FREQ/PS"
Radio text, Program Service name or
Frequency (FM)
"R-TEXT"
Frequency (MW, LW) "FREQ"
Clock "CLOCK"
In CD & External disc source
Information Display
Disc title "D-TITLE"
Track title "T-TITLE"
Play time & Track number "P-TIME"
Clock "CLOCK"
In Audio file source
Information Display
Music title & Artist name "TITLE"
Album name & Artist name "ALBUM"
Folder name* "FOLDER"
File name "FILE"
Play time & Music number "P-TIME"
Clock "CLOCK"
In Standby/ Auxiliary input source
Information Display
Source name "SRC NAME"
Clock "CLOCK"
3 Exit Switching Display mode
Press the [DISP] button.
⁄
• When the music number exceeds 1000, only the last 3
digits of its number are displayed.
• When you select the clock display, the display setting of
each source will be changed to the clock display.
• Music title, Artist name, and Album name cannot be
displayed in WAV file.
• If the selected display item does not have any
information, alternative information is displayed.
• * When playing music from iPod, the folder name display
may show something different such as playlist or artist
name depending on the music selection procedure.
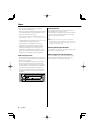
Theft Deterrent Faceplate
The faceplate of the unit can be detached and taken
with you, helping to deter theft.
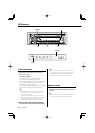
Removing the Faceplate
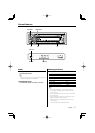
Press the Release button.
The faceplate unlocks, allowing you to detach it.
¤
• The faceplate is a precision piece of equipment and can
be damaged by shocks or jolts.
• Keep the faceplate in its faceplate case while detached.
• Do not expose the faceplate (and the faceplate case) to
direct sunlight or excessive heat or humidity. Also avoid
places with too much dust or the possibility of water
splashing.
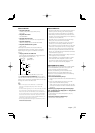
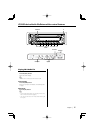
Reattaching the Faceplate
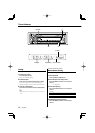
1 Align the projections on the unit with the
grooves on the faceplate.
Projections
Grooves
2 Push the faceplate in until it clicks.
The faceplate is locked in place, allowing you to use
the unit.