


11
Display
DVD VCR TV SOUND
ADJUST
AUDIO/VIDEO CONTROL RECEIVER
SETTING
MASTER VOLUME
CONTROL
DOWN UP
CD TAPE/CDR
SOURCE NAME
INPUT DIGITALINPUT ANALOG
SPEAKERS ON/OFF
SURROUND MODE
PHONES
SURROUND ON/OFF
FM/AM TUNING
STANDBY
FM/AM PRESET FM MODE
MEMORY
INPUT ATT
FM/AM
DIGITAL
SURROUND
STANDBY/ON
LC
S.WFR
LS RS
CH-
S
LFE
SPK
PRO LOGIC ΙΙ DSP H.PHONE
AUTO MUTING
TUNED
STEREO
VOLUME
INPUT ATT
SLEEP
DIGITAL AUTO
ANALOG
DIGITAL
LINEAR PCM
R
UP
DOWN
UP
DOWN
INPUT
ANALOG
INPUT
DIGITAL
Source
selecting
buttons
SETTING
CONTROL
UP 5/DOWN ∞
FM MODE
A/V CONTROL
RECEIVER
STANDBY/ON
AUDIO
TV/CATV
VCR
DVD
TEST
EFFECT
MENU
ENTER
RETURN
SOUND
SLEEP
CENTER
REAR L
SUBWOOFER
PTY–PTY SEARCH–PTY
CD
–
DISC
REC PAUSE
TAPE/CDR CD DVD
FM/AM
FM MODE
TV/VIDEO
SURROUND
ON/OFF
MODE
MUTING
VCR CH
TV/CATV CH
TV VOLUME
VOLUME
TV SOUND VCR
ANALOG
/DIGITAL
REARR
100
TV CATV
1
4
7/P
10
2
5
8
0
3
6
9
10
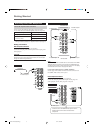
REMOTE CONTROL RM-SRX5020J
REW
FF
ANALOG/
DIGITAL
Source
selecting
buttons
SETTING
Basic Settings
Basic Operations / Basic Settings
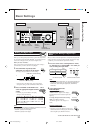
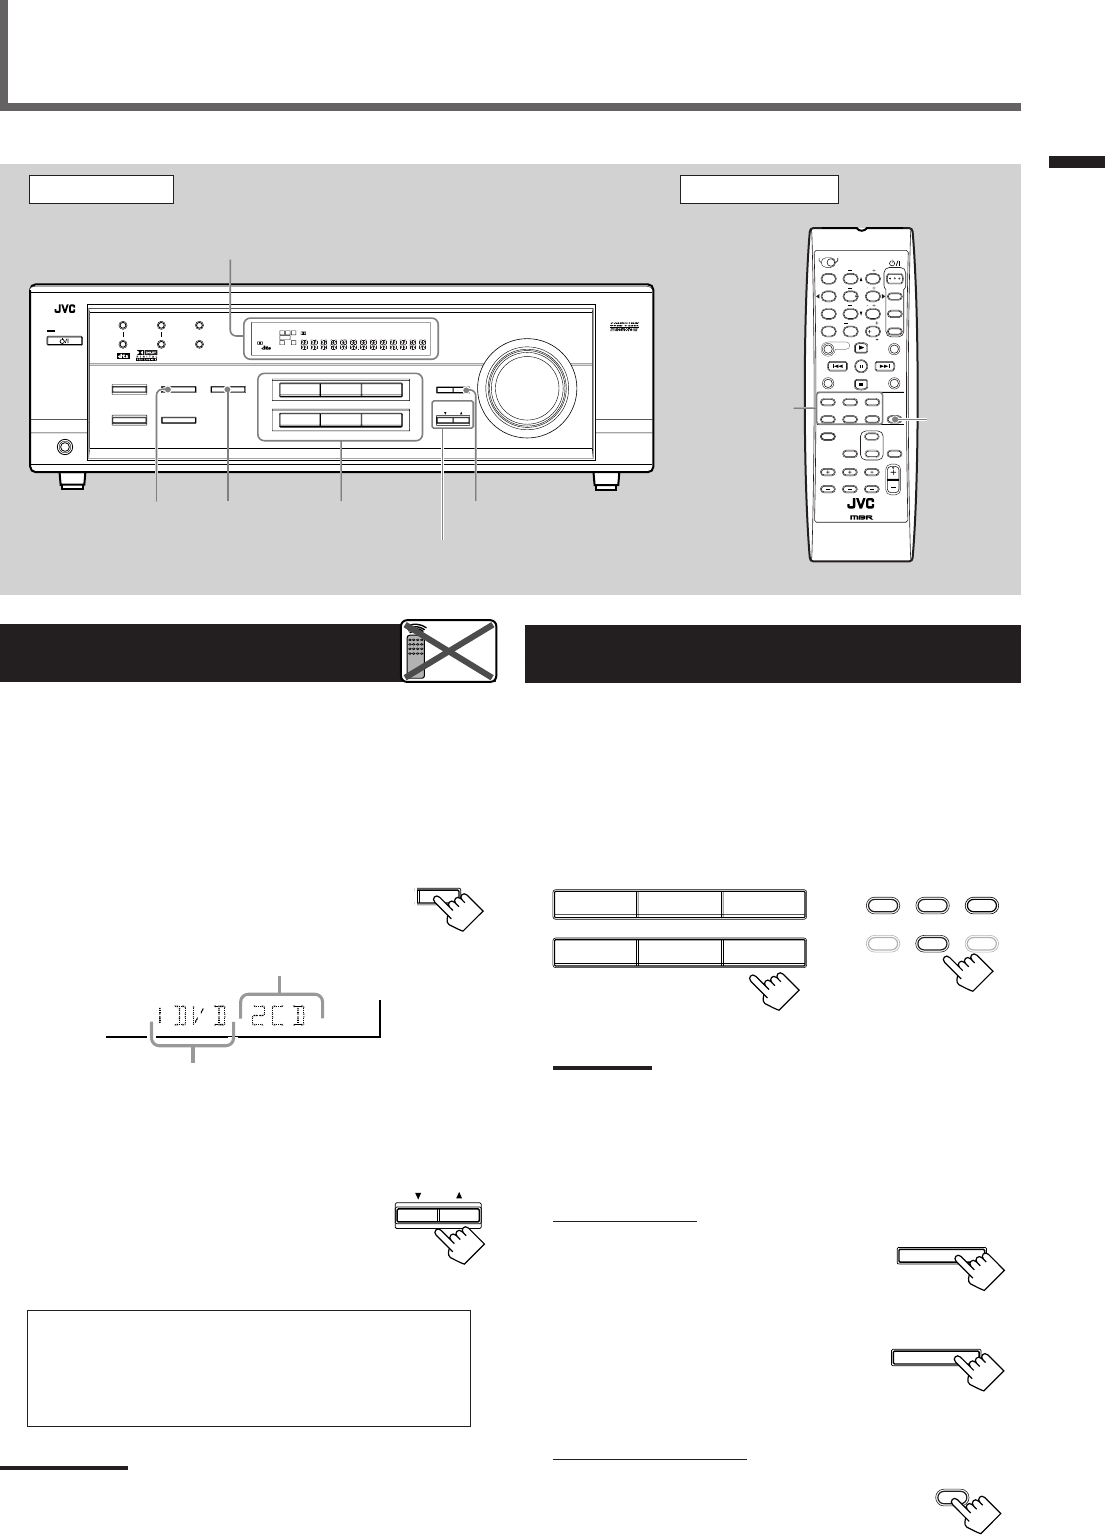
Front Panel Remote Control
S.WFR
LS RS
CH-
S
LFE
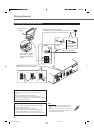
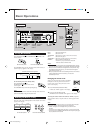
DIGITAL 2 terminal setting
DIGITAL 1 terminal setting
CONTROL
DOWN UP
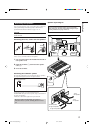
TO BE CONTINUED TO THE NEXT PAGE
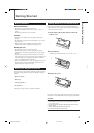
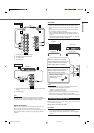
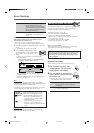
Selecting the Analog or Digital Input
Mode
When you have connected digital source components using both the
analog connection (see page 6) and the digital connection (see page
7) methods, you need to select the input mode correctly.
1
Press one of the source selecting buttons—DVD,
TV SOUND, CD, or TAPE/CDR*—for which you
want to change the input mode.
Note:
*
Among the sources listed above, you can select the digital input
only for the sources which you have selected the digital input
terminals for. (See “Setting the Digital Input (DIGITAL IN)
Terminals.”)
2
Select digital input mode.
On the front panel:
Press INPUT DIGITAL.
“DIGITAL AUTO” appears on the display
and the indicator for the detected signals also
lights up.
To change the input mode back to analog
input, press INPUT ANALOG.
“ANALOG” appears on the display for a
while.
From the remote control:
Press ANALOG/DIGITAL.
• Each time you press the button, the input mode
alternates between the analog input (“ANALOG”)
and the digital input (“DIGITAL AUTO”).
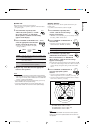
Setting the Digital Input
[DIGITAL IN] Terminals
When you use the digital input terminals, register what components
are connected to which terminals (DIGITAL 1/2) so that the correct
source name will appear when you select the digital source.
Before you start, remember...
There is a time limit in doing the following steps. If the setting is
canceled before you finish, start from step
1
again.
1
Press SETTING repeatedly until
“DIGITAL IN” appears on the display.
The display changes to show the current setting.
* “1DVD 2CD” is the initial setting. If you have already
changed the setting, another combination will be shown.
2
Press CONTROL UP 5/DOWN ∞ to
select the appropriate digital terminal
setting.
• Each time you press the button, the display
changes to show the following:
1 DVD 2 CD j 1 DVD 2 TV j 1 DVD 2 CDR j
1 CD 2 DVDj 1 CD 2 TV j 1 CD 2 CDR j
1 TV 2 DVDj 1 TV 2 CD j 1 TV 2 CDR j
1 CDR 2 DVDj 1 CDR 2 CD j 1 CDR 2 TV j
(back to the beginning)
Note:
When shipped from the factory, the DIGITAL IN terminals can be used
as the digital input for the following components.
– DIGITAL 1 (coaxial): For DVD player
– DIGITAL 2 (optical): For CD player
Remote
NOT
DVD VCR TV SOUND
CD TAPE/CDR
SOURCE NAME
FM/AM
On the front panel
From the remote control
TAPE/CDR CD DVD
FM/AM TV SOUND VCR
INPUT DIGITAL
INPUT ANALOG
INPUT ATT
ANALOG
/DIGITAL
EN08-17.RX-5020/5022V[J]_f 01.12.7, 8:48 AM11