


I
mportant Safety Notes
• Proper selection of mount-
ing hardware and installation
of the wall brackets are the
responsibility of the customer.
• This product is not intended
for ceiling mounting.
Two Number 8 roundhead or
panhead screws should be
used for each loudspeaker.
The screwhead should be
between 5/16" (8mm) and 1/4"
(6.3mm) in diameter, and the
screw should be at least 2"
(50mm) in length.
When installing screws in any
wall, it is always preferable to
screw them into a wall stud. If
none is available, it is impor-
tant to always use properly
selected wall anchors.
Attach two of the four self-
adhesive rubber pads that
came with the loudspeaker to
the back of the enclosure in
the two bottom corners so
that the cabinet is spaced
evenly from the wall. Select a
suitable mounting location on
a wall. (The ceiling is not a
suitable mounting location.)
Drill two pilot holes, appropri-
ately sized for the specific
self-tapping screw or wall
anchor that you will be using.
A template is included with
your loudspeaker that indi-
cates the proper locations for
the pilot holes. In the event
that the template is missing,
refer to this chart:
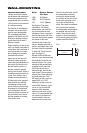
Model Distance Between
Pilot Holes
L810 6" (152mm)
L820 8-1/2" (216mm)
LC2 14-1/2" (368mm)
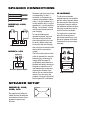
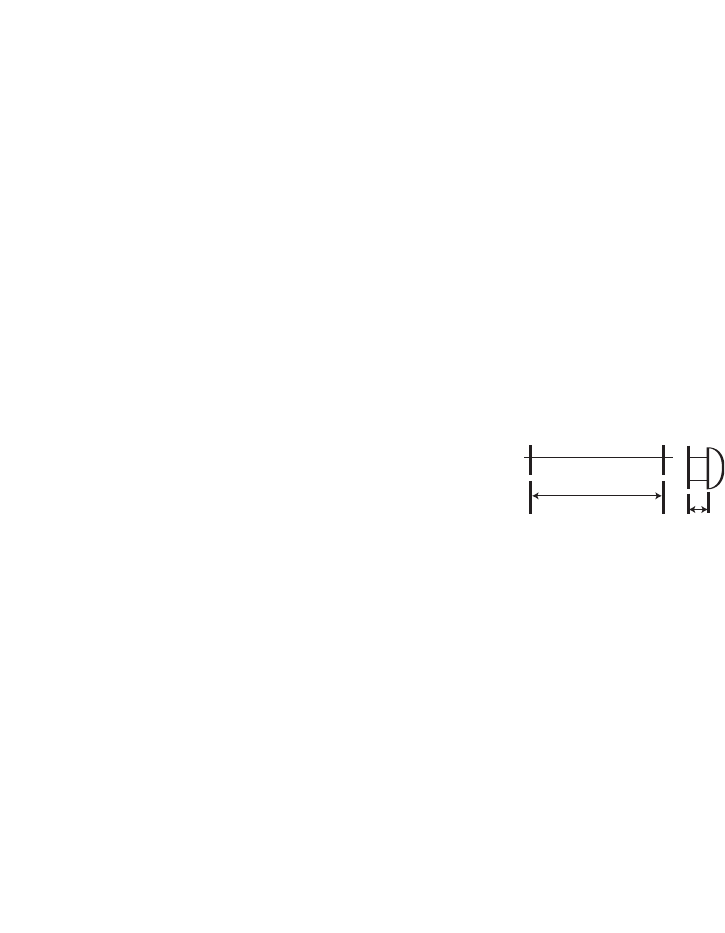
See Figure 1. The holes
should be 2-1/4" (57mm)
below where you want the
top of the enclosure to be
positioned. Use a carpenter’s
level to ensure that the holes
are even and that the speaker
will mount on the level.
Install the two screws into
either a wooden wall stud or
anchor, and tighten them until
the back of each screwhead
is about 1/8" (3mm) from the
wall. See Figure 2.
Models L810 and L820 may
also be corner-mounted using
the keyholes located on the
bezeled corners. For corner
mounting, fold the mounting
template in half, place the
fold in the corner at the
desired height, and use the
outer holes. If the template is
missing, for corner mounting
drill each pilot hole 7-3/4"
(197mm) from the corner for
model L810, or 9-11/16"
(246mm) from the corner for
model L820. However, if your
corner is not precisely 90
degrees, these measure-
ments may not work. In that
case, it is recommended that
you contact a professional
custom installer, who can
determine the correct loca-
tions for the pilot holes. Install
the loudspeaker by slowly
moving the cabinet toward
the screws so that the screw-
heads clear the larger circu-
lar portion of the two key-
holes. Once both screwheads
have entered the keyholes,
the loudspeaker should gently
be lowered onto the screw
shafts. Check that the loud-
speaker is firmly locked onto
the screws by gently pulling the
speaker down and forward.
Fig. 1 Fig. 2
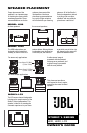
WALL-MOUNTING
See Chart
1/8"
(3mm)