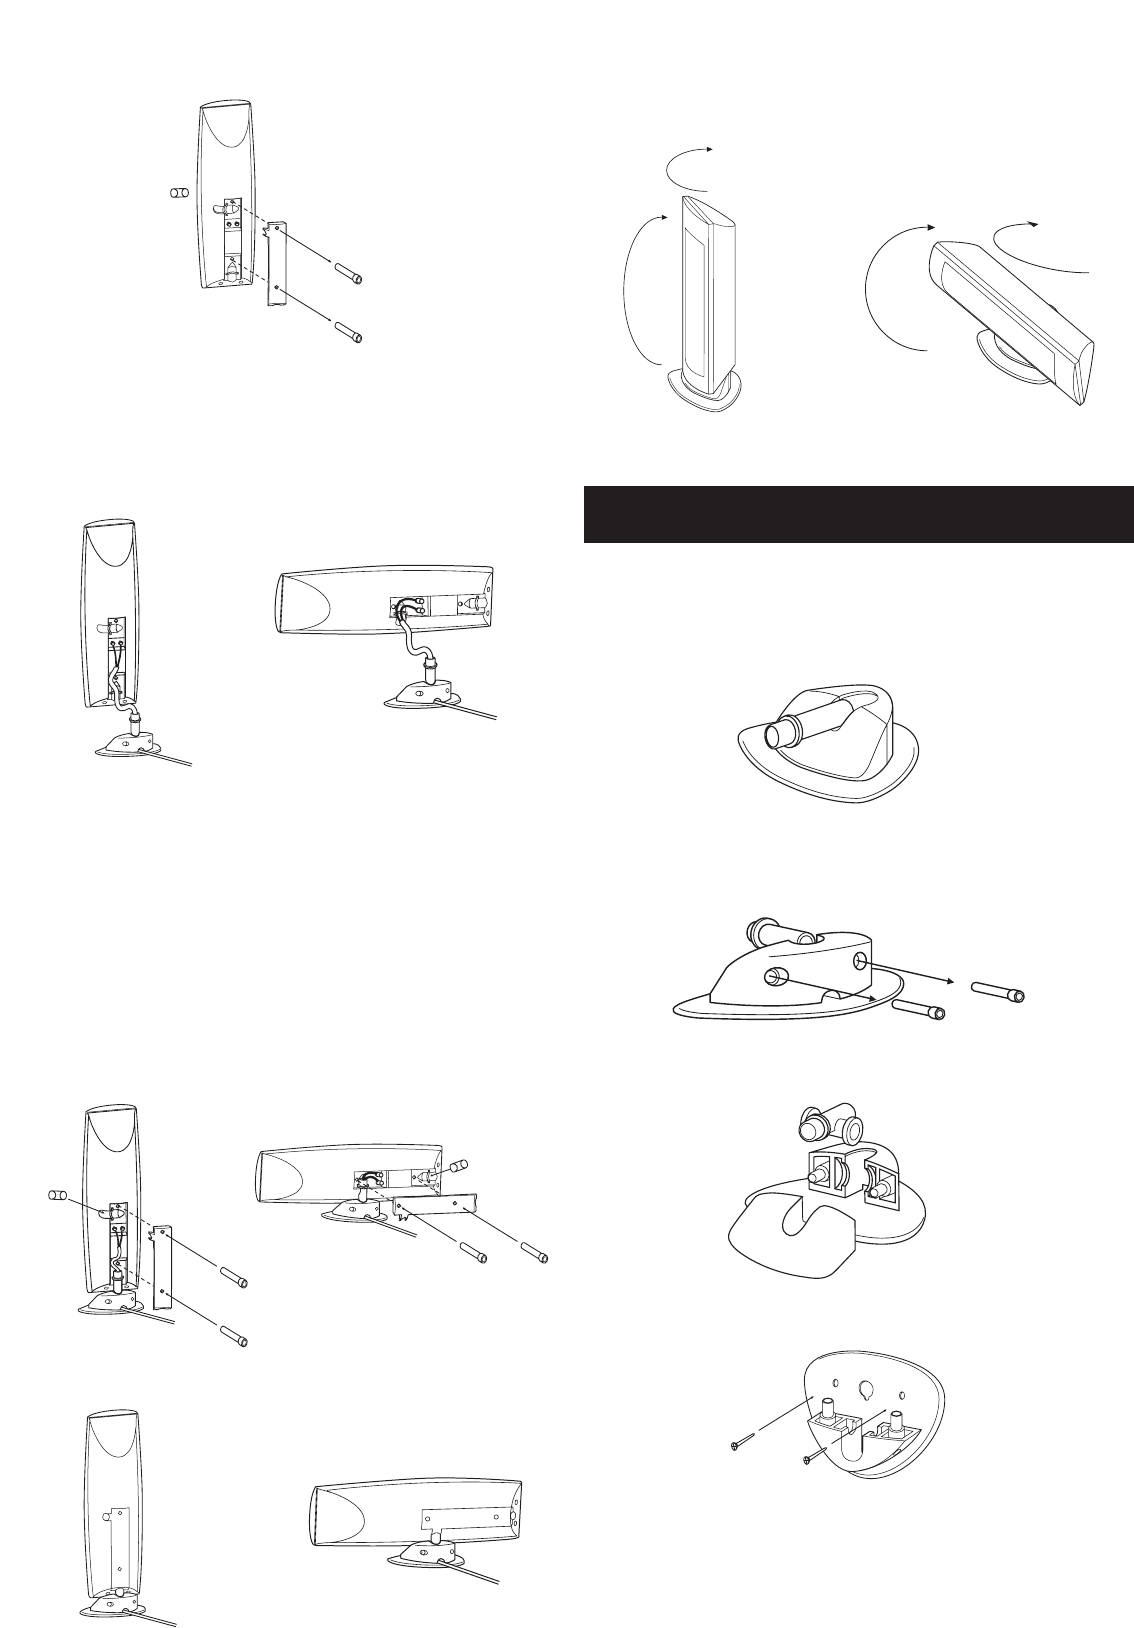
2. The foot can be attached to the speaker at two different positions.
The first position allows the speaker to be used vertically (normal for
satellites), while the second allows it to be used horizontally (normal
for the center channel). Note the blanking plug which fills the
unused pivot hole on the rear of the speaker.
3. Connect the cable to the speaker terminals. Observe correct
polarity. Speaker cable is usually colour-coded (red or white for
positive) or provided with an identifying stripe or rib on the positive
conductor. Connect the positive conductor to the red speaker
terminal.
4. Insert the pivot into one or other of the two pivot holes in the
speaker, depending on whether you wish to use the speaker
vertically or horizontally.
5. Fit the blanking plug into the unused pivot hole. Re-fit the rear
cover on the speaker and tighten the fixing screws.
Attach the foot to the speaker
1. Remove the two screws and take off the rear cover plate from
the speaker. Use the hex key supplied to loosen the screws.
Adjust the angle of your speaker
1. You can tilt your speaker up or down on its foot and you can
also rotate it. If you experience difficulty tilting or rotating your
speaker, try loosening the fixing screws for the pivot cover plate on
the foot.
6. Your speaker should now look like this.
Feed speaker cable through the foot
1. The foot supplied with your Oreus satellites and center channel
can also be used as a wall bracket. The foot is supplied assembled.
IF YOU WANT TO MOUNT YOUR SPEAKER ON THE WALL
2. Remove the two fixing screws and lift the pivot cover plate off
the foot. Use the hex key supplied to loosen the screws.
3. Lift out the pivot.
4. Attach the base to the wall using suitable screws.
5. CAUTION:
please remember that your Oreus speakers are heavy and must
be adequately secured to the wall to avoid the risk of injury being
caused should they fall. Use longer fixing screws and suitable wall
plugs if necessary.
4


