


INFINITY CLASSIA 3
Figure 4.
Step 1.
Mark the positions on the wall where you would like to place the
mounting screws.
Step 2.
Fasten two 1-1/2,"#8 wood screws to the wall using the markings placed
in Step 1 as your guide.Leave an 11/16" space between the wall and
screwhead.If a wall stud is not available,use an appropriate anchor.
Step 3.
Place the speaker on the wall by aligning the keyholes on the back of
the speaker to the screwheads on the wall.Once positioned properly,
the speaker should slide down slightly and become secure.
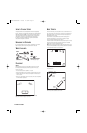
INSTALLING SPIKED FEET
C336
Four metal spikes are supplied for use when using the outboard feet and
the speaker is to be placed on a carpeted surface to decouple the speaker
from the floor and prevent unwanted damping.To insert the spikes,gently
lay the speaker on its back (not its front or side) on a soft, nonabrasive
surface, unscrew the four rubber-tipped feet and store in a safe place.
Each spike then screws into the threaded insert. Make sure all four spikes
are screwed in completely for stability.
NEVER drag the speaker to move it,as this will damage the spikes,the feet,the
wood cabinet itself,and/or the floor. Always lift the speaker and carry it to its
new location.
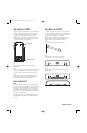
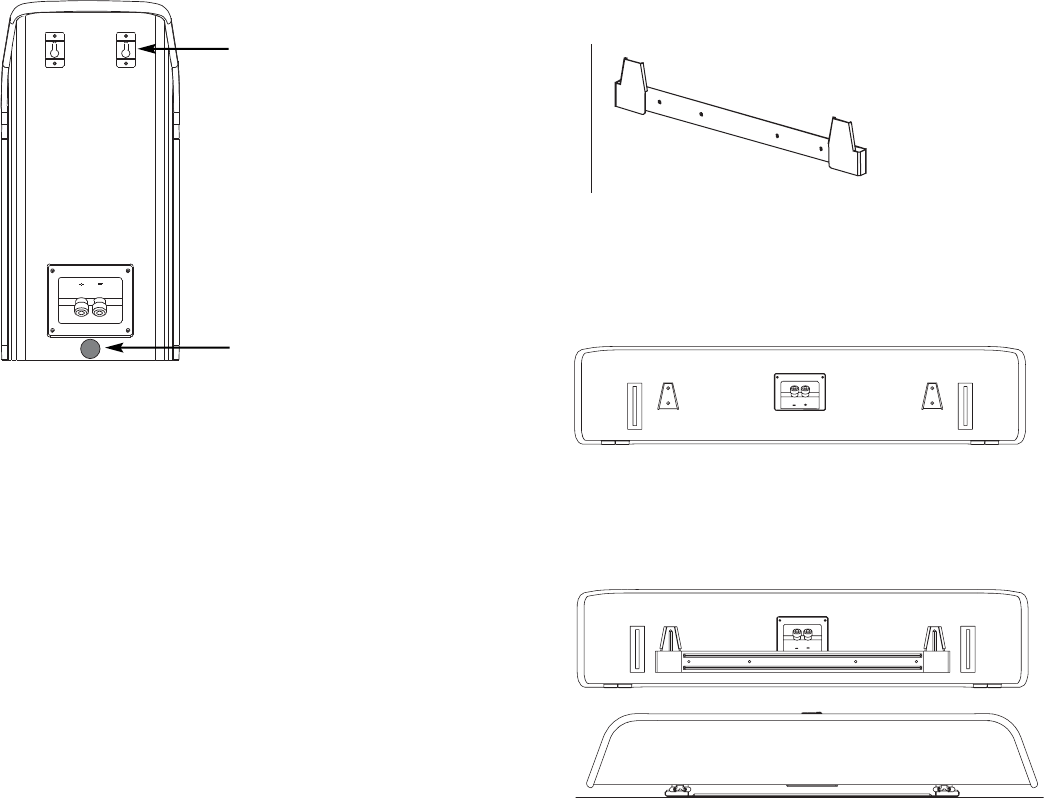
WALL-MOUNTING THE C205
The C205 is designed to be mounted directly to a wall. Each speaker has
two keyholes on the back,and will require (2) 1-1/2,"#8 wood screws
with a .33" (8.4mm) screwhead fastened to a wall stud.If a wall stud is
unavailable,install an anchor appropriate for a 1-1/2,"#8 screw.
NOTE:The customer is responsible for the correct selection and use of
mounting hardware (available through hardware stores) that will ensure
the proper and safe wall-mounting of the speakers.
Keyhole mounts
Attach rubber bumper
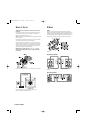
WALL-MOUNTING THE CC225
The CC225 is designed to be mounted directly to a wall.The bracket has
four holes on the back,and will require (4) 1-1/2,"#8 wood screws with
a .33" (8.4mm) screwhead fastened to wall studs.If wall studs are unavail-
able,install anchors appropriate for a 1-1/2,"#8 screw.
NOTE:The customer is responsible for the correct selection and use
of mounting hardware (available through hardware stores) that will
ensure the proper and safe wall-mounting of the speakers.
Step 1.
Attach the wall bracket to the wall at the desired location.
Step 2.
Securely fasten the two cleats to the rear of the speaker,
using two included 1/4"-20 panhead screws per cleat.
Step 3.
Carefully slide the cleats on the rear of the speakers over the tabs
of the wall bracket.
Top view
INFP2010Classia-OM 12/4/07 11:39 AM Page 3