Ver 2.0
12
1212
12
~ÄëçäìíÉ=ÑáÇÉäáíó
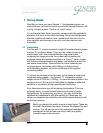
use the supplied jumpers to connect the rear tweeters either to the
midrange or the front tweeters. Depending on the amplifier used, one
or the other will sound better.
These jumpers are made using the same internal wire connect the
drivers of the Genesis 1.1. However, you should also try using
jumpers made of the same wire as you use for your speaker cables.
For example, if your speaker cables are Cardas Golden Reference,
then get the same for your jumpers.
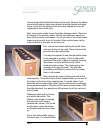
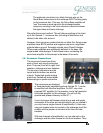
Next, the crossover box should be hooked up to the midrange/tweeter
wings. From left to right, match the cross-over box connectors to the
mid-panel connectors. Again, a set of jumpers is provided to help you
get started. These are made of the Genesis internal hook-up wire, and
are high quality OFC conductors with Kimber™ banana plugs. You
could also try having jumpers made of the same wire as your speaker
cables.
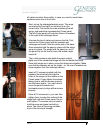
Using either set of jumpers, when the banana plugs are used to attach
the jumpers to the binding posts, remove completely the gold nut on
the binding posts if it is not used. The sound will improve with the
removal of unnecessary metal. Keep the nuts safely in case you will
be using spades for termination in the future.
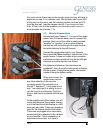
1.6 Remote Control
The Genesis remote control for the Servo-
Controlled Bass amplifier has two modes of
operation. To operate the G1.1 woofer amplifier,
press the MODE button until the red LED lights.
The remote control is used to turn on, and set up
the volume, and other parameters on the woofer
towers. The display on the amplifier will always
flash to identify the function being adjusted.
The high-pass “HP” filter determines how low the
woofers will play. Set this initially to 16Hz. Then,
adjust the low-pass “LP” filter (how high a
frequency that the woofer plays). Set this to
100Hz using the buttons marked "LP". Use the
button marked "VOL" to adjust the bass gain to
15, to start with.
If you are using the Servo-Bass Interconnect, use the “PHS” buttons
to adjust the phase to 0 (zero). If you are using the output from the


