


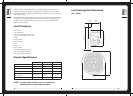
10
11
10
Installation Guide
1. Check clearance around the mounting area before installation, ensuring the area is
free from obstruction, and there is adequate depth for the speaker.
2. Check that the area chosen for mounting the speaker is flat. If the area is curved, it
may not be possible to fit the speaker without “twisting” the frame.
3. If the installation area is only slightly curved, use the extra thick closed cell foam
gasket provided.
4. Using the supplied mounting template, mark the correct diameter on the mounting
surface.
5. Use a suitable cutting tool to remove the marked surface, and drill four holes for the
screws to pass through.
(NOTE: Confirm you are happy with badge position relative to mounting holes)
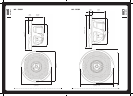
6. Connect the wires before mounting the speaker. Be sure to observe the correct
polarity.
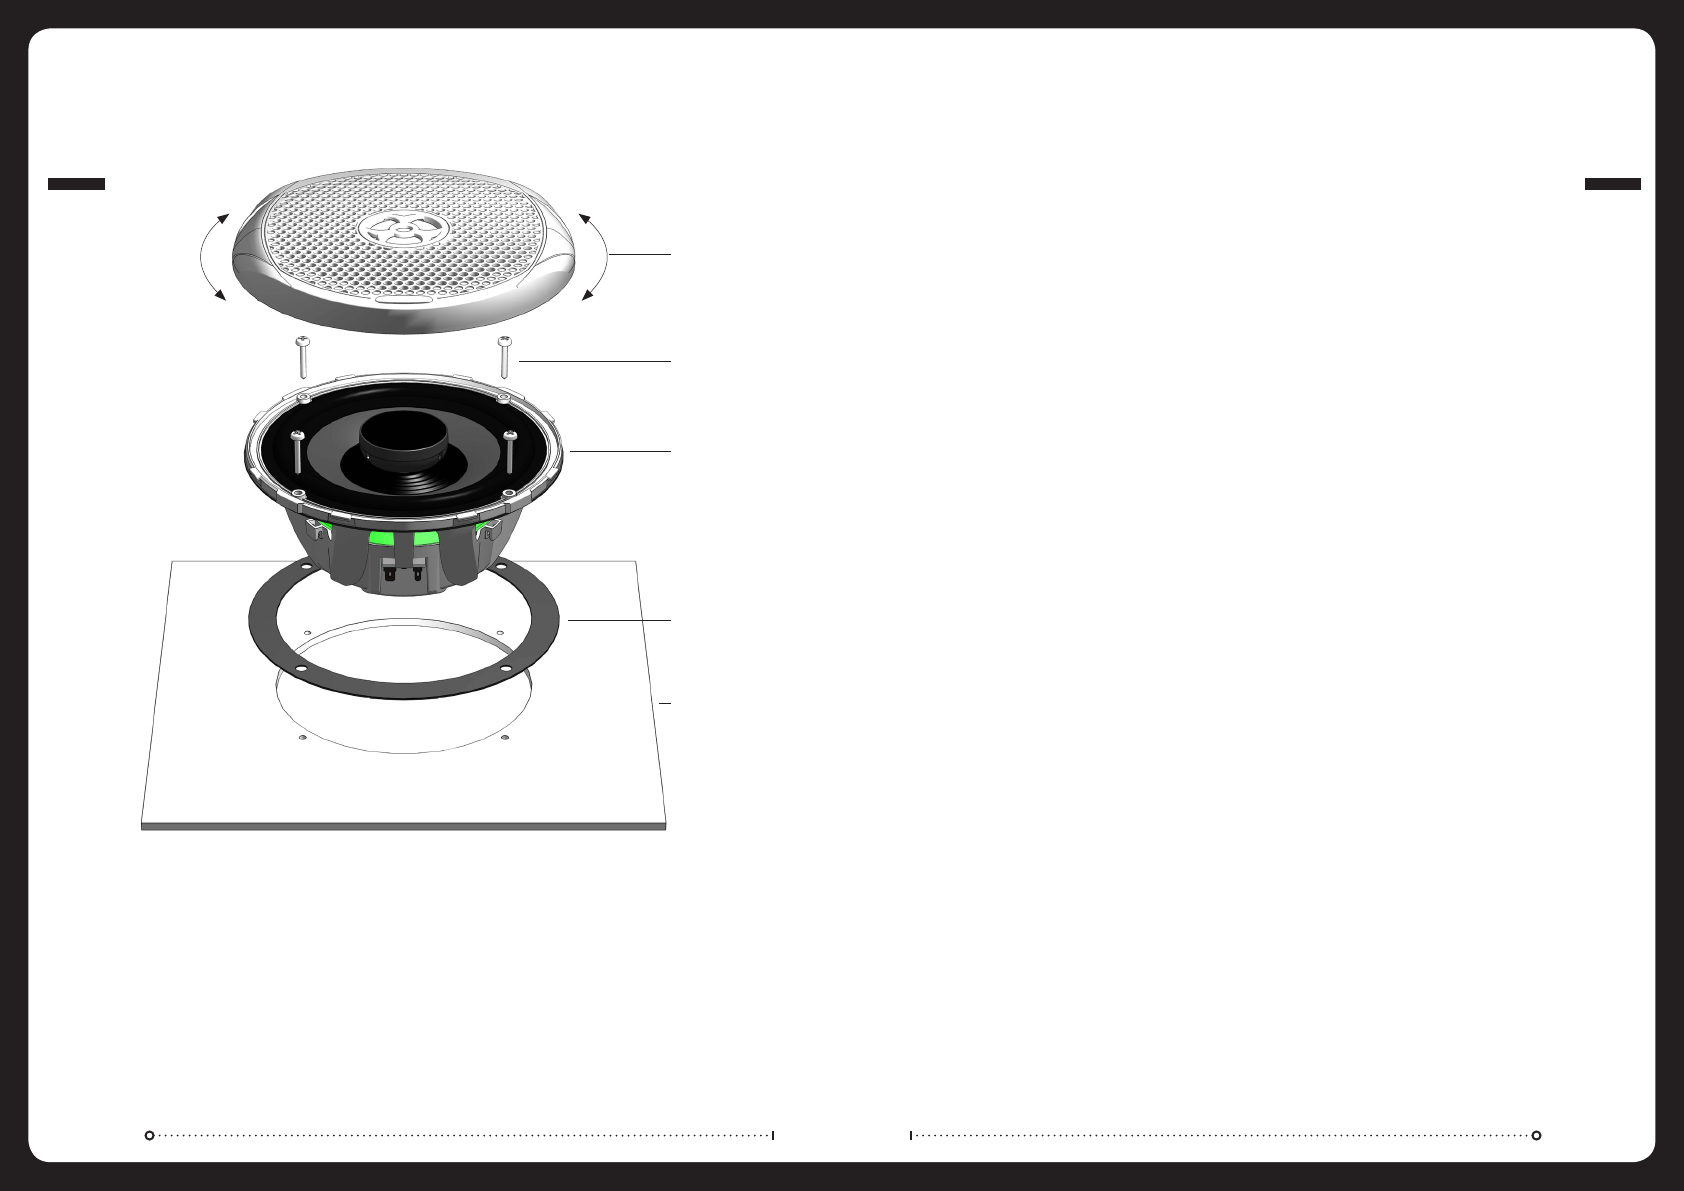
7. With the grille removed, mount the speaker using the four stainless steel screws, and
the stainless retainer clips supplied. DO NOT over tighten the screws, especially if the
mounting area is not flat.
8. Twist the grille into position.
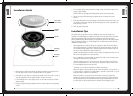
Installation Tips
Any speaker will only perform to its best capabilities, when correctly placed in the
listening area. FUSION Engineers recognise that unlike a home or motor vehicle installation,
there are an extremely wide range of marine environments where speakers may be
placed. FUSION Full Range Marine Speakers are optimised to perform in the widest possible
range of mounting locations, but a little thought and care with placement will always be
rewarded with better sound.
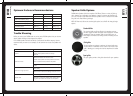
• Highfrequenciesaredirectional.Placingthespeakerslowdownintheboatwilllose
some of this information. (To improve dispersion of the high frequencies, the grille on
your FUSION Full Range Speaker has a uniquely designed “phase correction” feature in
the centre, for best performance with the grille on.)
• Speakersshouldbeplacedtosimulatea“soundstage”,bybeingplacedwhereyouare
able to hear both speakers in a stereo situation.
• Bassisdependantontheareabehindthespeaker.Toosmallanareawillrestrictbass,
too large will compromise bass performance.
• Placingaspeakersuchthatitisveryclosetoanopenarea(wheresoundfromthe
back of the loudspeaker has a very short path to compete with sound from the front
of the loudspeaker) produces the least bass.
• Ifpossible,tryandmaketheareabehindaspeakeranenclosure.
Where the speaker is directly exposed to the outside environment, it is best if this is
a sealed enclosure. (Especially if the loudspeaker is exposed to “wash down”, as a vent
might allow water to collect in the enclosure.)
Where the speaker is not so exposed (an inside cabin for instance), a better bass
performance can be had if the enclosure is a ported or vented type. To help you achieve
the best possible result see the optimum enclosure design recommendations. These are
by volume only, and for the ported option, an optimum vent size/length is given.
008
Installation Guide
009
Installation Tips
Grille, Twist
Into Position
Stainless
Screws
Speaker
Mounting
Gasket
Mounting
Surface