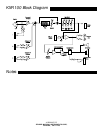
recording or sound reinforcement mixer. In addition, this
output can be used to drive another KXR 100 as a slave amp.
This is done by connecting a standard guitar cord from the
Effects Send jack of the master amp to the Effects Return jack
of the slave amp.
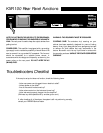
H. Effects Return jack- This balanced jack inputs signal to the
Master Volume control, which drives the power amp section.
It automatically disconnects the preamp when used. This jack
is useful with the effects loop feature, or when using the KXR
100 as a slave amp.
1. Master Volume control- This control adjusts the level of the
signal coming out of the preamplifier section. This control is
used in conjunction with the Channel Volume controls to set
the overall sound level of the amplifier. In order to maximize
headroom and minimize noise, instruments with low-level
output will require a high Channel Volume setting and a low
Master Volume setting, while other instruments may require a
lower Channel Volume and higher Master Volume setting. It
is recommended that the Master Volume control be set as
high as possible for maximum DELTACOMP’ compressor
range.
J. Record Out jack- Two RCA style jacks provide an
unbalanced, mono signal for recording. This signal is derived
from the preamp and is at line level, similar to that of the
Effects Send jack. The level is not affected by the Master
Volume Control.
K. Headphone jack- This jack allows the use of stereo
headphones for private listening. When this jack is used, the
internal speaker is disconnected. WARNING: BE CAREFUL
WHEN USING HEADPHONES, AS EXCESSIVE VOLUME
WILL DAMAGE YOUR HEARING.
L. Power Indicator- When this LED is illuminated, the KXR
100 is receiving power.
M. Power Switch- This switch turns the KXR 100 or Off.
When the switch is off, the amplifier is completely shut down.
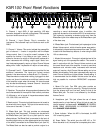
A. Channel 1 Input (XLR)- A high sensitivity, XLR style
connector designed for use with microphones. This balanced
input can handle as much as 1V R.M.S.
B. Channel 1 Input (Phone)- Plug-in connection for
instruments. This balanced input can handle as much as 8V
R.M.S.
C. Channel 1 Volume- This control adjusts the preamplifier
gain of channel 1. It works in conjunction with the Master
Volume control (item 1) to set the overall loudness of the
amplifier for channel 1 only. Being a true “gain” control, it
allows for the use of a variety of microphones, keyboards or
other instruments with differing output signal levels. Low-
level instruments generally require a higher Channel Volume
setting while “hotter” keyboards will require a lower setting.
D. Channels 2 and 3 - These channels are provided for two
additional instruments. The inputs and volume controls
operate in the same manner as items B and C in Channel 1.
These channels are muted when nothing is plugged into their
inputs, and thus will contribute no additional residual noise
to the amplifier output when left unused. All three channels
may be used simultaneously, however Channel 1 should be
used first if only one input is needed.
E. Equalizer- The equalizer allows precise adjustments of the
tonal characteristics of the amplifier. Each control provides a
12 dB boost or cut to bands of frequencies centered about
100, 338,1588, and 4000 Hz.
F. Reverb control- This control adjusts the amount of reverb to
be mixed with the dry signal. The input to the reverb circuitry
is the sum of channels 1, 2 and 3.
G. Effects Send jack- This jack provides an unbalanced
output signal from the preamp. This output can be used with
the Effects Return jack (item H) as a patch point for mono
effects devices. The Effects Send is connected to the input of
the effect (digital delay or other effects device) and the output
of the effect is connected to the Effects Return jack (item H).
The Effects Send can also be used to provide a signal to a
KXR 100 Front Panel Functions


