Introduction
These instructions apply to the following products:
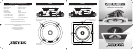
• P200Z Round Ceiling Loudspeaker System
• P200ZQ Square Ceiling Loudspeaker System
Unpacking and Inspection
Carefully unpack your loudspeaker. Each carton contains the following:
• 1 × Baffle and speaker assembly
• 1 × Metal grille
• 1 × Paint Shield (to protect the speaker during painting)
• 1 × Cardboard mounting template
We suggest you retain the packing for future use. The speaker is supplied
with the grille removed and stored separately. We suggest that you keep
the grille in its plastic bag (and preferably in the carton), away from the
work area until you are ready to fit it.
Before You Start
If you have any doubts about your ability to install this loudspeaker
correctly, you should consider the services of a custom installer before
you start cutting into walls or ceilings.
In addition to ceilings, this speaker can be mounted into standard 4 inch
deep stud walls and is designed to occupy this depth.
Determine the final locations for all speakers before cutting the first
hole, since the position of each speaker may affect the others, either
aesthetically or acoustically. Check for pipes, house wiring, or other items
inside walls that might be damaged when you cut holes.
Pre-wiring
Please note the following points when wiring the speakers:
• Speaker wire should be rated to comply with applicable local safety
codes such as UL or CL-2.
• Use only stranded wire no thinner than AWG 16. For runs longer than
100 feet, we recommend using at least AWG 14.
• When pulling wire, take care not to pull the wire too fast to prevent
stretching the wire or scorching the insulation as a result of friction.
• Leave 2 to 3 feet of excess loudspeaker wire at both ends; it is easier
to trim off excess wire than to splice additional wire.
• When securing the wire inside the walls, be careful not to pierce its
insulation with nails or staples.
For best performance and easier troubleshooting, always ‘home run’
wiring when installing multiple speakers rather than connecting from one
speaker to the next. Make certain that each power amplifier channel can
drive the combined load impedance if it is connected to more than one
speaker.
Installation
1. Reconfirm that there is clearance between each edge of the planned
cutout and wall studs or floor joists.
2. Fasten the supplied cardboard template to the wall or ceiling with
tape or thumbtacks/drawing pins.
3. Use either the inner or outer section of the template, whichever is
easier for you.
4. Trace the cutout guide with a pencil.
5. Before making the final cutout, make a smaller ‘test cutout’ in the
center of the penciled outline. Reach inside the test hole to verify that
there are no obstructions.
6. Score the drywall/plasterboard with a razor knife and use a keyhole
saw to complete the cut. Remove debris from the exposed edge of
the wall or ceiling.
7. Having run the speaker wire, secure it to a location adjacent to the
cutout to prevent its weight from pulling it loose from the speaker
terminals.
8. We recommend that you install flame-retardant sound-absorbing
material such as ceiling insulation behind the woofer to reduce sound
transmission into the room above/adjacent.
9. Insert the speaker wires into the connectors, making sure ‘+’ and ‘–’
polarity are correct.
10. Insert the speaker frame into the cutout; it should go into the cutout
easily, without forcing. You may need to swing some or all of the
small mounting clamps back in their retracted positions first (see
diagram).
11. Tighten the four mounting screws on the bezel. When you first turn
these screws, the mounting clamps will automatically swing out from
their retracted positions. As you continue turning the screws, these
will then clamp against the rear surface of the wall or ceiling. Avoid
using excessive force to prevent deforming or cracking the speaker’s
mounting frame.
Pivoting Tweeter
You may pivot the tweeter of the ceiling speaker up to 15 degrees off-axis
to direct treble towards the intended listening area. Sometimes the ceiling
speaker is mounted close to side walls; the sound can be improved by
aiming the tweeter into the room to reduce reflections from the nearby
wall.
Specifications
P200Z P200ZQ
Shape Round Square
Frequency response 52Hz-20kHz
Nominal impedance 8Ω
Sensitivity (1W/1M) 89dB/1W @ 1m
Rated power input 10-80W
Woofer diameter Dia. 8" (203mm)
Cone material Silver Coated Paper
Surround material Rubber
Tweeter diameter Dia. 1" (25.4mm)
Diaphragm material Aluminium
Hole cut-out dimension Dia. 9 Ei " (238mm ) 10" (253mm) sq.
Outer frame dimension Dia. 10 Er " (273mm) 11 Qr " (286mm) sq.
Minimum clamp thickness Ei " (9.5mm)
Maximum clamp thickness 1 Qw " (38mm)
Weight 4 Qw lb (2kg) approx.