


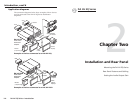


DA AV EQ Series • Installation and Rear Panel
DA AV EQ Series • Installation and Rear Panel
Installation and Rear Panel, cont’d
2-7
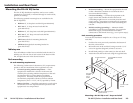
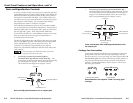
c. Tighten the screws.
d. Replace the DA inside the surface (repeat step 4).
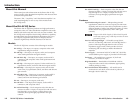
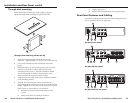
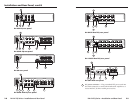
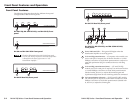
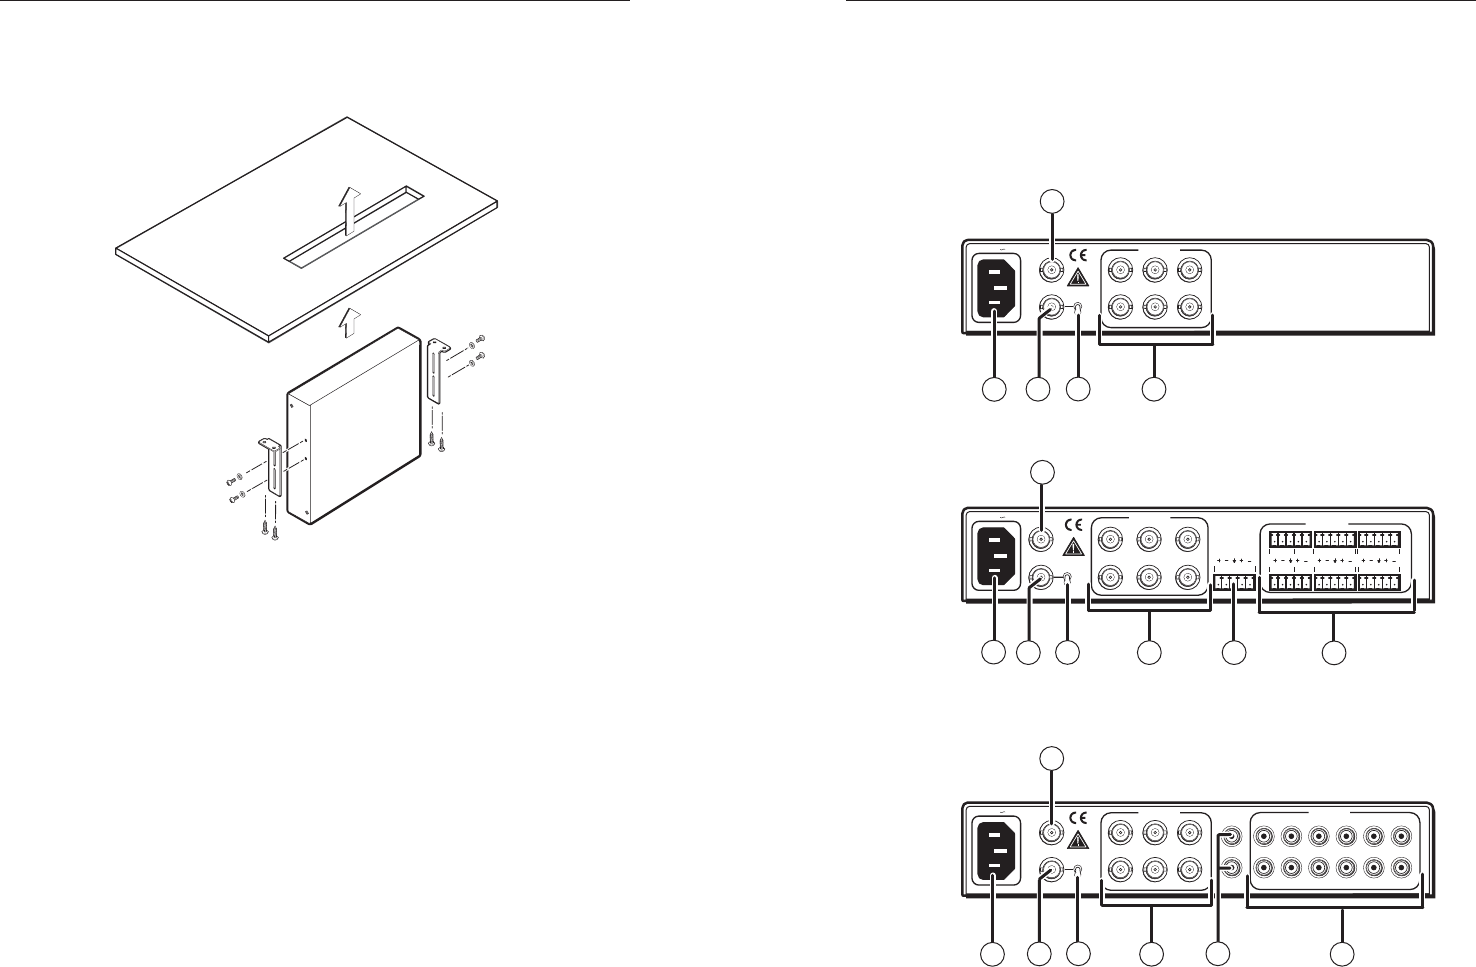
Rear Panel Features and Cabling
The following diagrams show the rear panel configurations of
the 10 models in the DA AV EQ series.
100-240V 0.2A
50/60 Hz
LOOP-THRU
INPUT
75 Ohm
HIGH Z
246
135
OUTPUTS
DA 6V EQ
1
2
4
6
12
DA 6V EQ rear panel
100-240V 0.2A
50/60 Hz
246
135
75 Ohm
HIGH Z
LOOP-THRU
INPUT
OUTPUTS
DA 6AV EQ
INPUT
OUTPUTS
LR
LR
1
2
LR
LR
LR
3
4
LR
LR
5
6
1
2
4
6
12
10
8
DA 6AV EQ rear panel
100-240V 0.2A
50/60 Hz
LOOP-THRU
INPUT
75 Ohm
HIGH Z
R
246
13
654321
5
L
INPUT
OUTPUTS
OUTPUTS
DA 6AV RCA EQ
1
2
4 9
11
12
6
DA 6AV RCA EQ rear panel
2-6
Through-desk mounting
Mount the DA AV EQ through a desk or table, using the
optional through-desk mounting kit (part #70-077-02).
Through-desk mounting the DA AV EQ
1. Mark the opening through which the unit will be
mounted — approximately 1.8" by 8.9" (4.6 cm by 22.6 cm).
2. Cut out the material from the installation area with a
jigsaw.
3. Drill pilot holes 1/4" (6.4 mm) deep and 3/32" (2 mm) in
diameter in the desk or table at the locations of the
mounting bracket screws. The holes should be drilled
from the underside or inside (concealed side) of the
furniture where the amplifier will be located.
4. Using the four provided wood screws, attach the brackets
to the mounting surface.
5. Slide the unit up and down or back and forth in the
mounting brackets until the face of the DA is at the desired
height. Tighten the screws that secure the bracket in place.
If the screws are inaccessible to a screwdriver,
a. Mark the location of the brackets relative to the
screws.
b. Remove the DA from inside the furniture.