


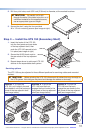
Step 3 — Install the UTS 150 (Secondary Shelf)
1. Insert the hooks of the UTS 150
into the front posts and rear studs
of the top adjacent shelf, then
push the UTS 150 upward to lock
it in place (see image at right).
2. Secure the #8-32 thumb nuts to
the rear studs of the top adjacent
shelf.
3. Repeat steps above to add more UTS 150
shelves to the expandable shelf system.
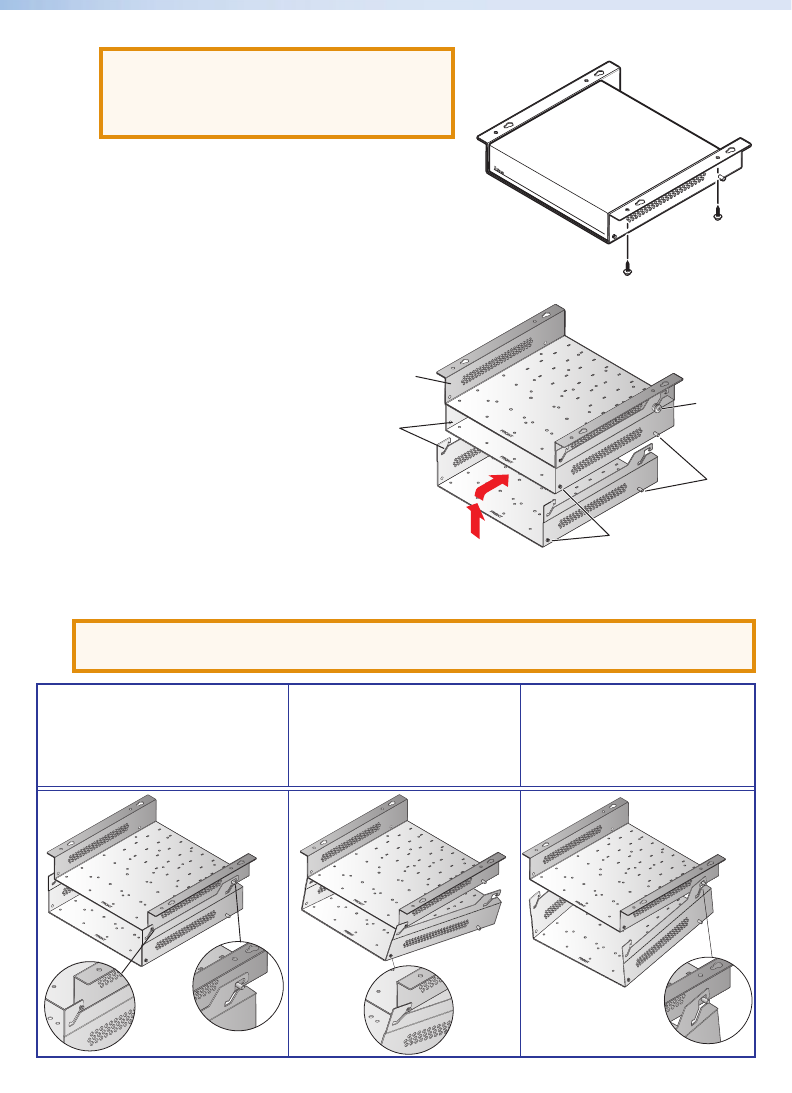
Servicing options
The UTS 150 may be adjusted to three different positions for servicing cables and mounted
devices.
ATTENTION: Before pivoting the UTS 150, disconnect all cables from any device(s) on
the UTS system. Not doing so may bend and damage the cables or device(s).
Position 1: To lower the
UTS 150, pull it slightly forward
and release it onto the posts and
studs of the top adjacent shelf
(see image below).
Position 2: To pivot the
UTS 150 from the front,
engage the front hooks to the
front posts of the top adjacent
shelf (see image below).
Position 3: To pivot the
UTS 150 from the back,
engage the rear hooks to the
rear studs of the top adjacent
shelf (see image below).
© 2013 Extron Electronics — All rights reserved. All trademarks mentioned are the property of their respective owners. www.extron.com
68-2357-50
Rev. A
02 13
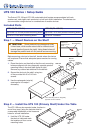
2. Drill four pilot holes, each 3/32 inch (2.38 mm) in diameter, at the marked locations.
ATTENTION: Be careful not to drill
through the table. If the table is too thin or of
a different material for the supplied screws,
use an appropriate type and length.
3. Secure the shelf, using the four provided
#8 x 1/2 inch mounting screws (see image at right).
Rear
studs
UTS 100
UTS 150
Front
posts
#8-32
thumb nut