


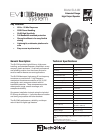
Packing List
Listed and illustrated below are the parts in-
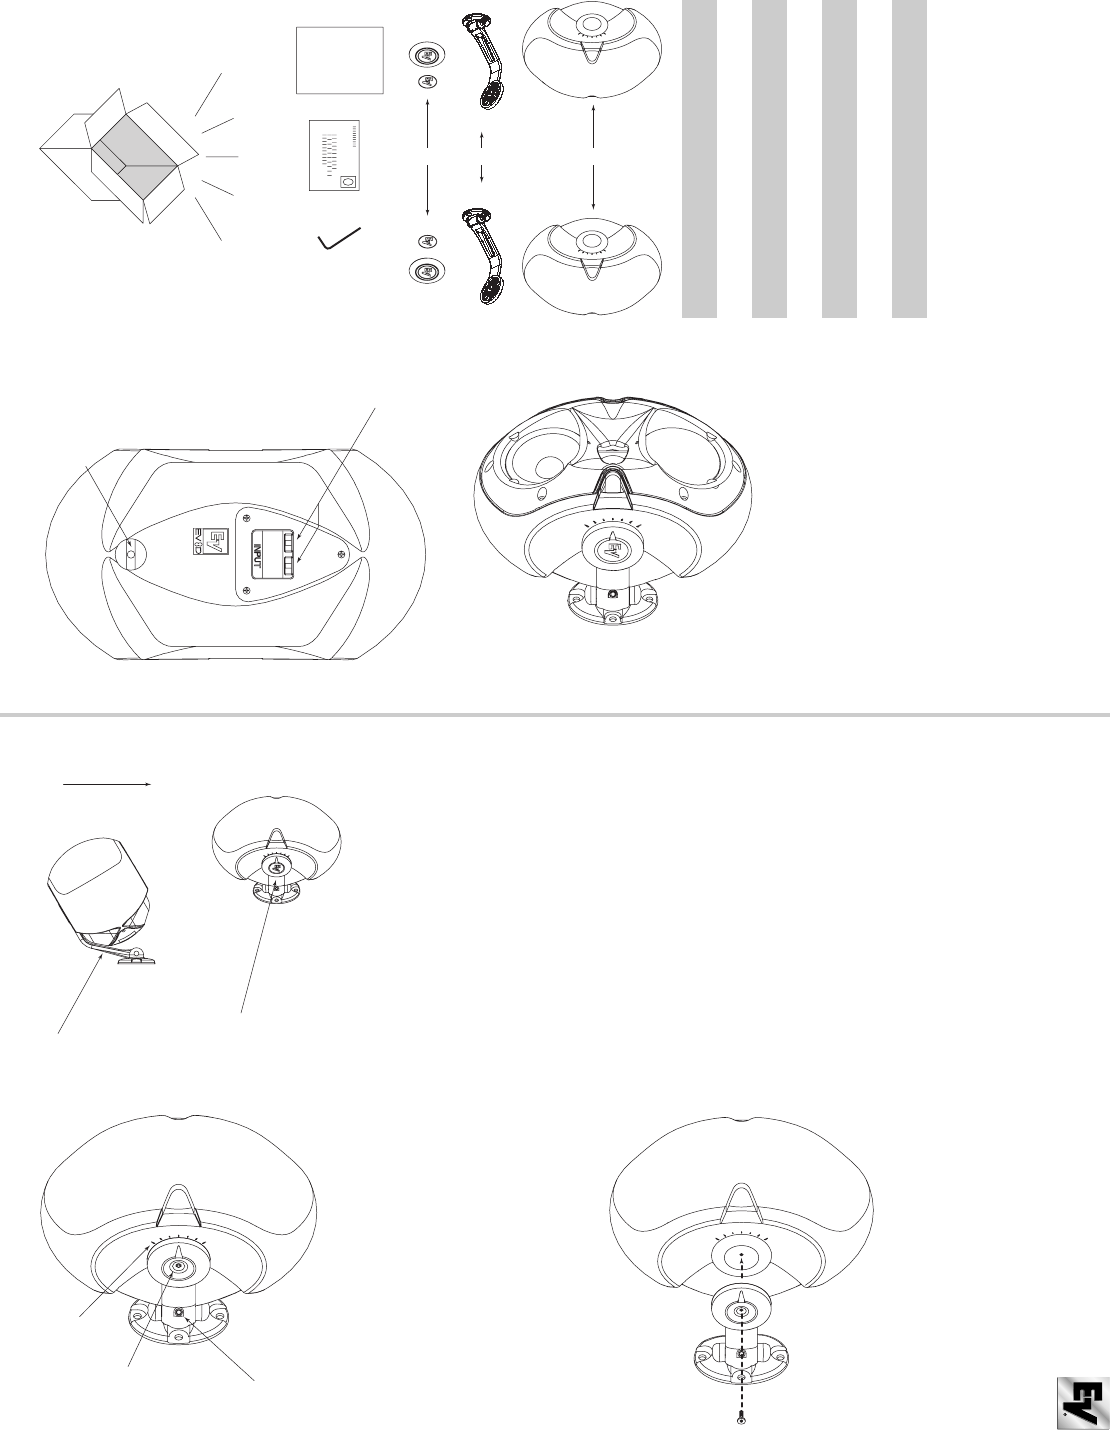
cluded in each boxed pair of EVID™ speakers.
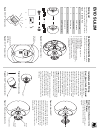
Product Feature Identification
Illustrated below are the major components
of the EVID™ Series full-range speakers.
EVID SL6.2M
A 2 Speaker system
B 2 SAM™ assembly
C 2 Large logo cap
C 2 Small logo cap
D 1 Data sheet/Instructions
E 1 Warranty card
F 1 SAM™ mounting tool
Figure Quantity Part
A
B
C
EDF
Figure 1: EVID™ components
Input wire
connectors
Connection eyebolt
for seismic
security cable
Figure 3: EVID™ features (back)
A. Shielded woofer
B. Coherent Coverage Waveguide horn
C. Low-frequency port
D. Treated woofer cone
E. Durable zinc-plated steel grille (not shown)
F. Cast aluminum Strong-Arm-Mount™ (SAM™)
G. Over 100 degrees of swing; 90 degrees
of rotation
H. Simple keyed socket head adjustments
I. Titanium dome tweeter with neodymium
magnet structure
A
I
H
G
F
(E)
D
C
B
Figure 2: EVID™ features (front)
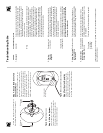
Installation and Wiring
Step 1: Mount the SAM™ Bracket
The SAM™ bracket can be mounted on
either side of the speaker, enabling optimal
configuration for any installation. First,
determine whether the bracket should be
mounted on the left or right side of the
speaker (do not bolt the speaker to the
bracket). It is best to mount the bracket on
the side away from the direction in which
the speaker will be aimed. This ensures
that the full sweep angle is available for
aiming on that side and provides easier
access to the sweep tightening bolt on the
wall bracket (see step 2). For safety,
make sure the mounting surface can
support more than the speaker's
weight! Use only industry-accepted fasten-
ers and mounting methods when mounting
the bracket. Consult an expert if you are
not sure.
For standard vertical installation mount
the SAM™ bracket as shown in Figure 4.
For horizontal mounting configurations,
mounting the bracket on the bottom side
(as in Figure 5) is easiest and safest, and
allows the speaker to be mounted closer to
the ceiling.
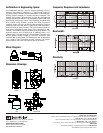
Step 2: Mount the Speaker to the
SAM™ Bracket
Attach the speaker to the SAM™ bracket
with the socket head bolt, as shown in
Figure 6.
Secure the speaker with the provided
security tool by tightening the two socket
head bolts as shown. After selecting the
proper horizontal angle, secure the swing
axis as shown by tightening bolt A. Next,
select the proper vertical angle with the
aid of the angle markers as shown in
Figure 7. Then secure the rotation axis by
tightening bolt B.
SAM™
Ceiling
Figure 5: SAM™ mounted on bottom
SAM™
Figure 4: SAM™ mounted on side
Figure 6: Attach SAM™
Bolt A
(swing)
Bolt B
(rotation)
15˚ angle markers
Figure 7: Tighten socket-head bolts