The EVID™ mounting system has been
designed so that,if necessary,the installation can
be done from beneath the ceiling.In some cases
with a suspended ceiling grid,however,it may
be easier to access from both the top and bot-
tom of the ceiling tile during the installation
process.Typical installation hardware needed for
either suspended ceilings or sheetrock ceilings is
included.The ceiling speaker assembly is held in
place by mounting tabs that securely grip the
ceiling material.Input wiring is attached to a
removable terminal block connector that can be
pre-wired if necessary before speaker installation
to speed up the installation process.
INSTALLATION NOTE: USE OF OPTIONAL
ROUGH-IN ACCESSORIES
For most installations,no additional hardware is
needed.However,a two-step installation proce-
dure that is sometimes used for installation into
sheetrock ceilings can be made easier by the
use of the optional RR and RPK series of rough-
in accessories before the ceiling material is
installed.The rough-in accessories provide a
cutout guide when many holes are to be made
in a production-line style installation and to
ensure the speakers are positioned correctly as
the holes are cut in the sheetrock.Depending
on the requirements,two types of rough-in
accessories are available.
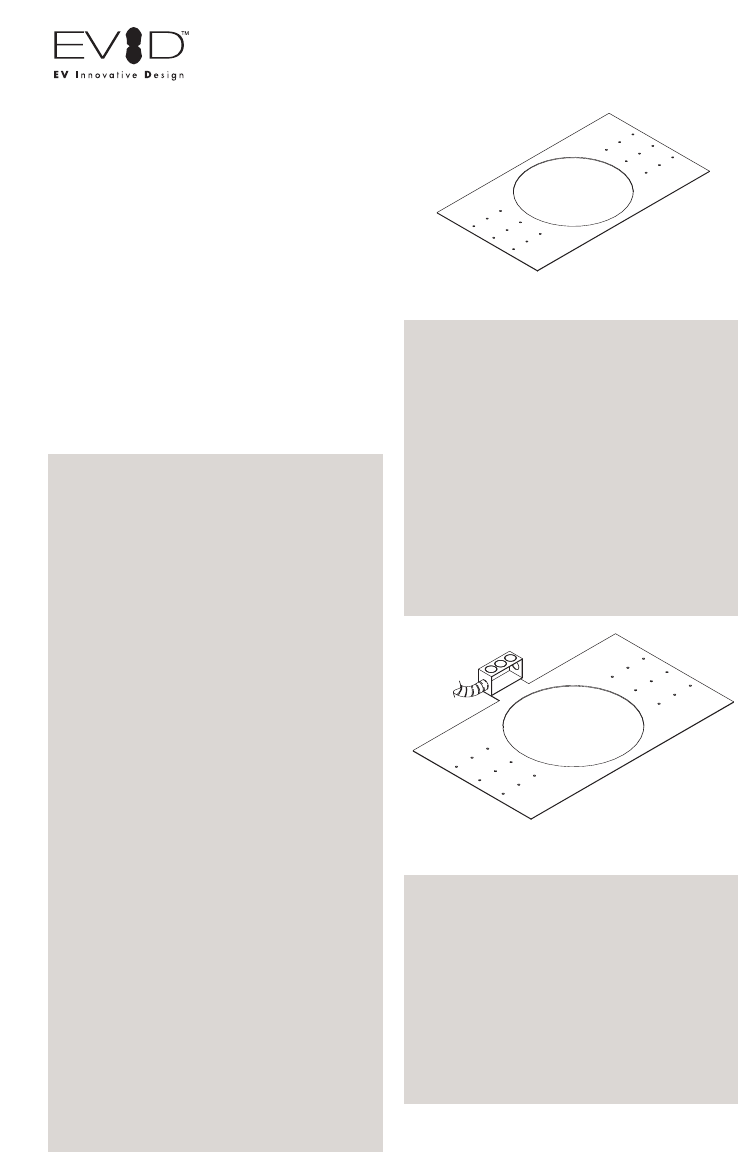
RR Series Mounting Plates
RR series plates are made of flat sheet metal with
holes to attach to the joists or trusses of a build-
ing structure.The holes are drilled for nails or
screws at 16 inches (406 mm),20 inches (508
mm) and 24 inches (610 mm) on-center.The
installer can drill other holes as needed up to a
maximum of 24-3/4 inches (630 mm) apart.The
sheetrock installs over the plate,and the plate pro-
vides a template for a blind cutout of the hole in
the sheet r
oc
k.The ceiling material is generally
cut with a router-type cutting tool,using the plate
ring as a cutout guide.The mounting plate is illus-
tr
ated in Figure 4.
RPK Series Kits
The RPK series rough-in kit contains a RR series
plate with a standard 2 gang electrical box
mounted on the top with an attached short
length of flexible conduit which connects to the
ceiling speaker conduit clamp on the speaker’s
rear terminal cover.This accessory allows for rigid
conduit to be run to the box on the rough-in
plate before the speaker or any sheetrock is
installed.After the sheetrock is installed the speak-
er can be wired up and mounted all from below
the ceiling.The RPK mount system is shown in
Figure 5.
INSTALLATION NOTE: CONTROLLING
VIBRATION
Because of their high performance,EVID ceiling
loudspeaker
s can g
enerate substantial vibration,
which can cause buzzing in loose sections of
the ceiling str
uctur
e.
Depending on the c
harac-
ter of the ceiling tile and related components,
dampening material may need to be used under
the tile r
ails or the edg
es of the tiles to eliminate
rattles.
4 EVID™ Ceiling Series Installation and Operation Manual
Installation and Wiring
Figure 4: Speaker mounting plate
Figure 5: RPK mounting system


