Electro-Voice EVF/EVH User Manual 35
5.0 EVF and EVH Rigging System (cont’)
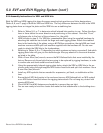
5.24 Assembly Instructions for VRK and HRK kits
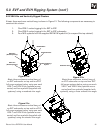
Both the VRK and HRK rigging kits share the same mounting hole positions and letter designations.
Tables 5, 6, and 7 apply to both the VRK and HRK kits. The only difference between the kits is the HRK
rigging plates have an integral tie plate and the VRK kits use a stabilizing bar.
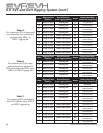
1. Refer to Tables 5, 6, or 7 to determine which lettered hole position to use. Follow the direc-
tions in these tables for arrow direction and positioning on the cabinet. Note that “Front”
will always refer to the front of the enclosure (i.e., the grille).
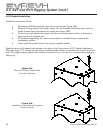
2. HRK kits skip to step 3. For VRK kits, preassemble them using the supplied hardware by
attaching the stabilizer bar to both the large and small rigging plates. Attach the stabilizer
bars to the back side of the plates, using a #2 Phillips screwdriver, the eight M5 pan-head
machine screws and M5 split-lock washers supplied with the hardware kit. You are now
ready to attach the VRK kits to the loudspeakers.
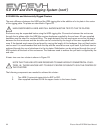
3. Referring to Tables 5, 6 or 7 (depending on which systems are being connected), find which
rigging-plate letter will give you the desired angle. Also pay attention to the arrow direction
as listed in the table.
4. With a 6-mm Allen (hex) wrench, remove the M10 flathead bolts that were installed by the
factory. Remove only those bolts that are going to be replaced by rigging hardware, in order
to remain safe and avoid audible enclosure leaks.
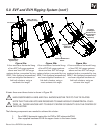
5. Using the appropriately lettered rigging-plate holes, attach the VRK or HRK kits to the en-
closure sides using the eight supplied M10 button-head bolts and split-lock washers. Use a
6-mm Allen (hex) wrench.
6. Install any M10 eyebolts that are needed for suspension, pull back, or stabilization at this
time.
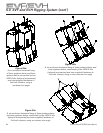
7. Ensure that all M10 bolt points in the enclosure have an M10 flathead bolt, an M10 eyebolt
or an M10 button-head bolt where the rigging plates attach. Do not hang any cluster with
missing M10 bolts!
8. Check all M10 and M5 fasteners and eyebolts to ensure they are tight.
9. You are now ready to hoist the cluster and make the final attachments to the building struc-
ture.


