


ENGLISH
ENGLISH
Getting Started Getting Started
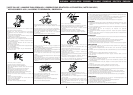
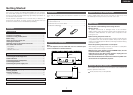
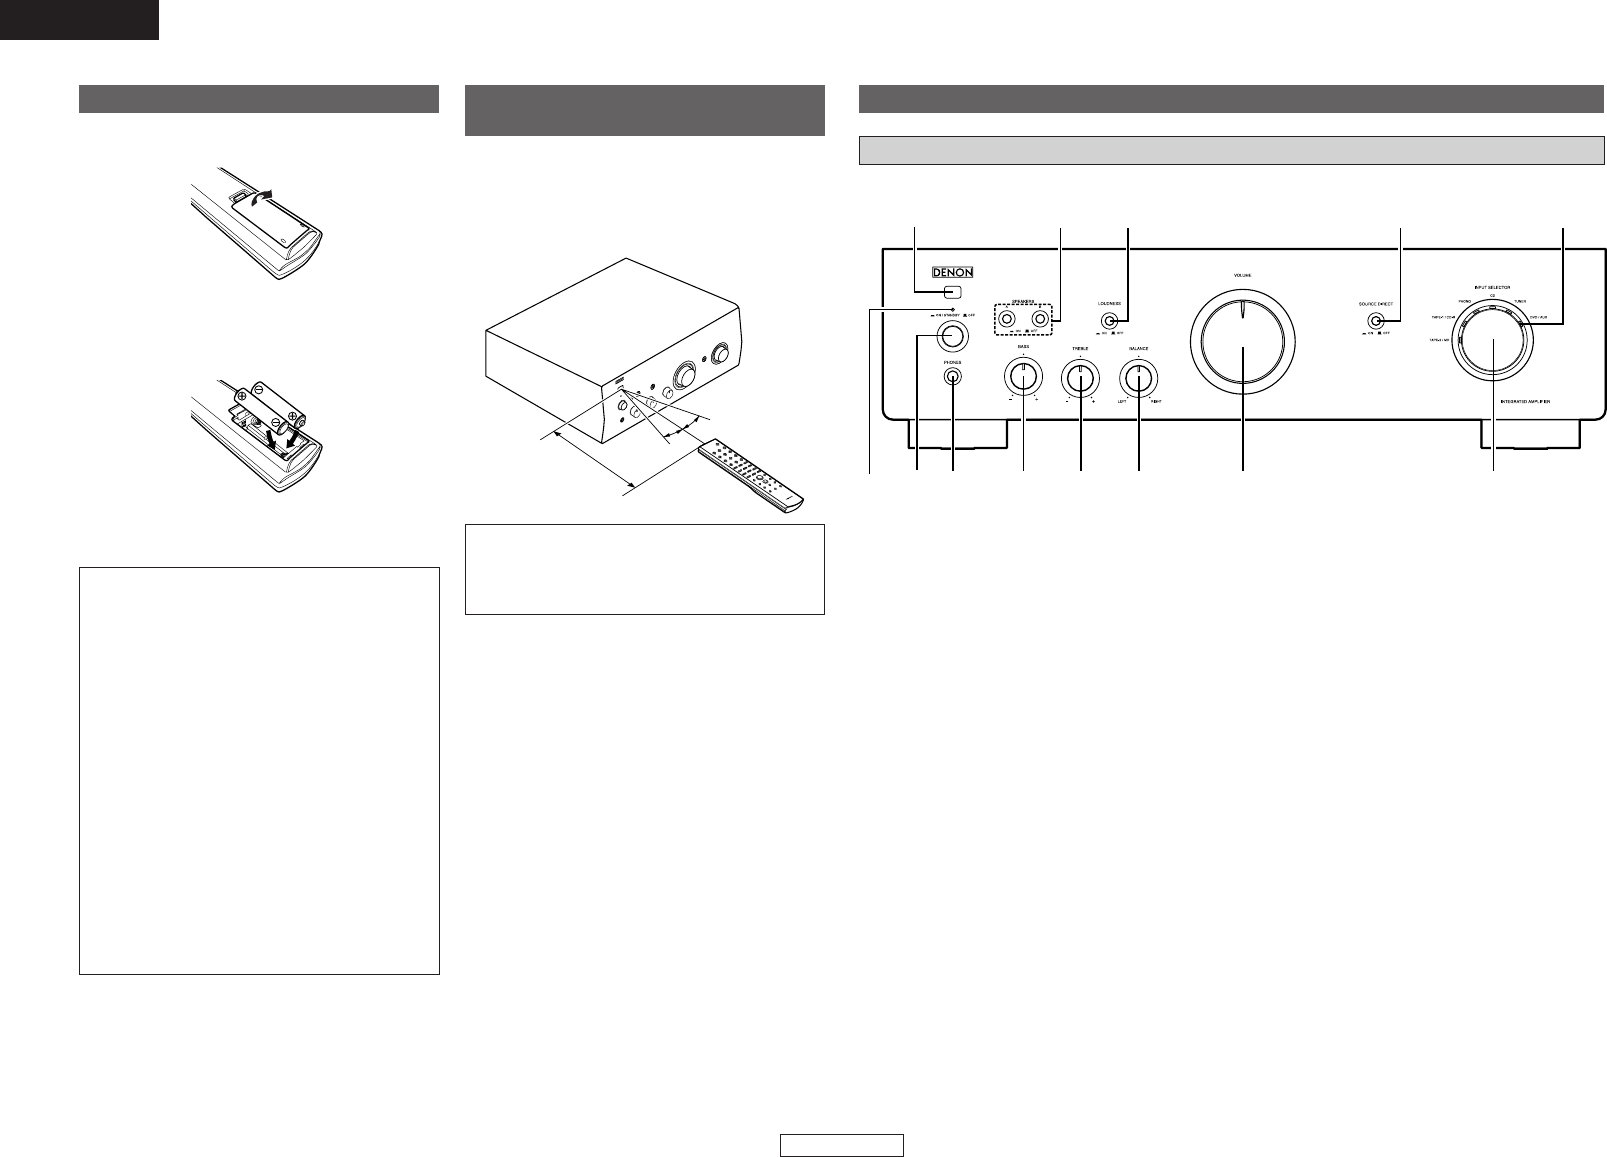
Part names and functions
Front panel
PMA-500AE
weq r t y u i
o!0
!1!2!3
q Power indicator
Changes as shown below according to this
unit’s status.
• For several seconds after the power is turned
on: Red (blinking)
• When the power is on: Green
• When in standby: Red
• When the power is off: Off
w Power switch (¢ON/STANDBY £OFF )
When set to “¢ ON/STANDBY”, the power
turns on, and when set to “£OFF”, the power
turns off.
e Headphone jack (PHONES)
r BASS control knob
t TREBLE control knob
y BALANCE control knob
u VOLUME control knob
i INPUT SELECTOR knob
Use this to select the source that you wish to
listen to.
o Input indicator
The selected input is shown with an orange
indicator.
!0 SOURCE DIRECT switch
When set to “¢ON”, the signals do not pass
through the tone adjustment circuitry (bass,
treble, balance and loudness), resulting in
playback with higher sound quality.
When set to “£OFF”, the sound can be
adjusted to your tastes.
!1 LOUDNESS switch
When listening with the volume turned low, set
this to “¢ON” to amplify the bass and treble
sound that is hard to hear when the volume is
low and achieve a more natural sound.
!2 SPEAKERS A/B switches
• When A (or B) is set to “¢ON”, sound is
produced from the speakers connected to the A
(or B) speaker output terminals.
• When both A and B are set to “¢ON”, sound
is produced from the speakers connected to
both the A and B speaker output terminals.
• When both A and B are set to “£OFF”, no
sound is produced from the speakers. Use this
when listening over headphones.
!3 Remote control sensor
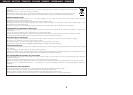
Notes on batteries:
• Replace the batteries with new ones if the set
does not operate even when the remote
control unit is operated nearby the unit. (The
attached batteries are only for verifying
operation.)
• When inserting the batteries, be sure to do so
in the proper direction, following the “<” and
“>” marks in the battery compartment.
•To prevent damage or leakage of battery fluid:
• Do not use a new battery together with an
old one.
•Do not use two different types of batteries.
• Do not short-circuit, disassemble, heat or
dispose of batteries in flames.
• If the battery fluid should leak, carefully wipe
the fluid off the inside of the battery
compartment and insert new batteries.
• Remove the batteries from the remote if it will
not be in use for long periods.
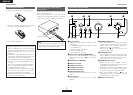
Operating range of the remote
control unit
• Point the remote control unit at the remote
sensor when operating it.
• The remote control unit can be used from a
distance of up to about 8 meters, at a horizontal
angle of up to 30° with respect to the sensor.
Approx. 8 meters
30°
30°
NOTE:
• It may be difficult to operate the remote
control unit if the remote sensor is exposed to
direct sunlight or strong artificial light.
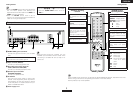
Inserting the batteries
q Remove the remote control unit’s rear cover.
w Set two R03/AAA batteries in the battery
compartment in the indicated direction.
e Put the rear cover back on.
2