–
16
–
EN
Getting started
•Turn on the power of the TV, amplifier and any other com-
ponents which are connected to the DVD player.
• Make sure the TV and audio receiver (commercially avail-
able) are set to the correct channel.
Press the POWER ON button.
• “P-ON” will appear briefly on the display panel.
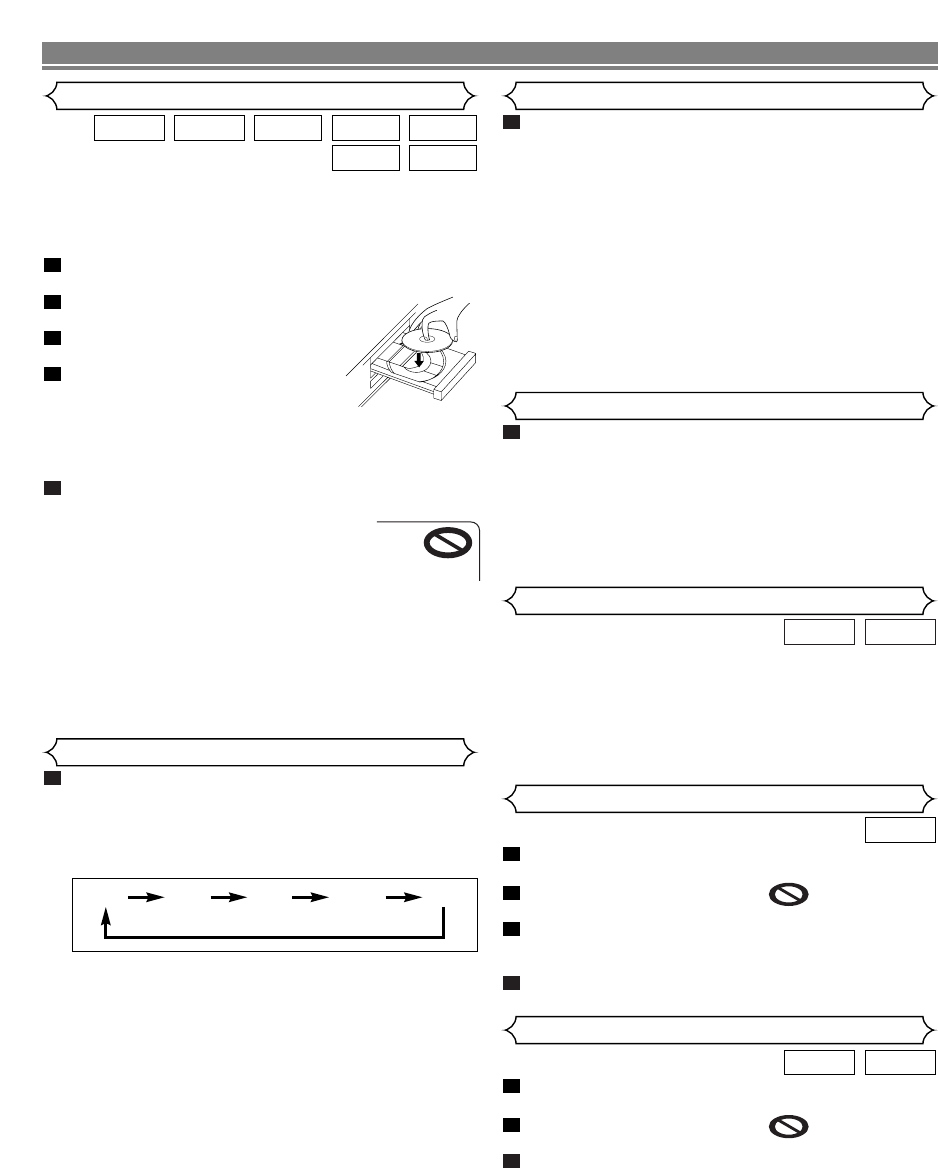
Press the OPEN/CLOSE button
to open disc loading tray.
Place the disc in the tray, with the
label facing up.
Press the PLAY button.
• The tray will close automatically,
then playback will start from the first
chapter or track of the disc. If the playback does not
start automatically, press the
PLAY button.
• When you play back the DVD with a title menu, it may
appear on the screen. In this case, refer to “Title menu”.
Press the STOP button to stop playback.
NOTES:
•A “prohibited icon” may appear at the
top-right corner on the TV screen during
operation, warning that a prohibited
operation has been encountered by the
DVD player or the disc.
•With DVDs that use some titles for playback program
signals, playback may start from the second title, or it
may skip these titles.
• During the playback of two layered disc, pictures may
stop for a moment.This happens when the 1st layer
switches to the 2nd layer. This is not a malfunction.
•
The operation may vary when you play back DVDs with disc
menu. Refer to the manual accompanying the disc for details.
5
4
3
2
1
WMAJPEG
MP3
Super
Audio CD
CDDVD-ADVD-V
Press the MENU button.
• The DVD main menu will appear.
If the feature is not available, symbol may
appear on the TV screen.
If disc menu is available on the disc, audio lan-
guage, subtitle options, chapters for the title and
other options will appear for selection.
Press the Cursor buttons (K / L / s / B) to select an
item, and the ENTER button to confirm the selection.
4
3
2
1
DVD-V
DISC PLAYBACK
Basic Playback
Disc Menus
DVD may contain menus to navigate the disc and access spe-
cial features. Press the appropriate Numeric buttons or use the
Cursor buttons (K / L / s / B) to highlight your selection in the
DVD main menu and press the ENTER button to confirm.
NOTE:
•
Unless otherwise stated, all operations described in this
manual are based on remote control use. Some operations
can be carried out using the menu bar on the TV screen.
DVD-ADVD-V
General Features
Press the TOP MENU button.
• The title menu will appear.
If the feature is not available, symbol may
appear on the TV screen.
Press the Cursor buttons (K / L / s / B) to select an
item, and the ENTER button to confirm the selection.
• Playback will begin at the selected title.
3
2
1
DVD-ADVD-V
Title Menu
HDMI Setup
Press the HDMI button on the front panel to select
the HDMI output mode.
The output mode changes as follows every time
the HDMI button is pressed.
• The HDMI indicator on the front panel lights up when
HDMI output mode is on.
480P (Default):Video output from the HDMI OUT jack at 480p.
720P: Video output from the HDMI OUT jack at 720p.
1080: Video output from the HDMI OUT jack at 1080i.
1080P: Video output from the HDMI OUT jack at 1080p.
OFF:
No video outp
ut from the HDMI OUT connector.
NOTES:
• Video and audio signals may distorted temporarily
when switching to/from the HDMI output mode.
•
Use a display equipment with an HDMI-compatible port.
•
Progressive video signal will not be output from the COM-
PONENT VIDEO OUT during the HDMI output mode.
•
The HDMI indicator on the front panel flashes when you
select the HDMI output mode but there is no HDMI cable.
• If you turn on the pure direct mode, both video and
audio signals thru the HDMI output will be cut off (press
the
PURE DIRECT button again to recover).
•You can check the HDMI connection status by pressing
the DISPLAY button during playback with the HDMI
output mode (refer to page 22).
• If the TV is not compatible with newly selected HDMI
output mode, the actual output mode will be kept the
one before changing the selection.When this occurs,
the newly selected mode will appear on the front panel
display (see page 10) while the actual output resolution
will be indicated by performing the on-screen display as
described on page 22.
1
1080 1080P OFF480P
720P
Pure Direct Mode
Press the PURE DIRECT button on the front panel
to output an analog audio signal only (no analog
video and HDMI signals will be output and the dis-
play will be turned off). The higher quality sound
will be achieved.
NOTES:
• When pressed the buttons below, the pure direct mode
will be released.
OPEN/CLOSE button (on both the remote and the front
panel), SETUP or DISPLAY button (on the remote),
ON/STANDBY or PURE DIRECT button (on the front
panel).
• The PURE DIRECT button will not function while dis-
playing the setup menu.
• If you turn on the pure direct mode while selecting HDMI
mode, both video and audio signals will not be output.
1
Press the DIMMER button on the front panel to
select the desired brightness of the front panel dis-
play. (BRIGHT, DIMMER or OFF)
• The default setting is BRIGHT.
NOTES:
• The brightness of the front panel display can be adjust-
ed from the setup menu. Details are on page 28.
• When you turn on the power next time, the brightness
of the front panel display will be as set in setup menu.
1
Brightness of the Front Panel Display


