


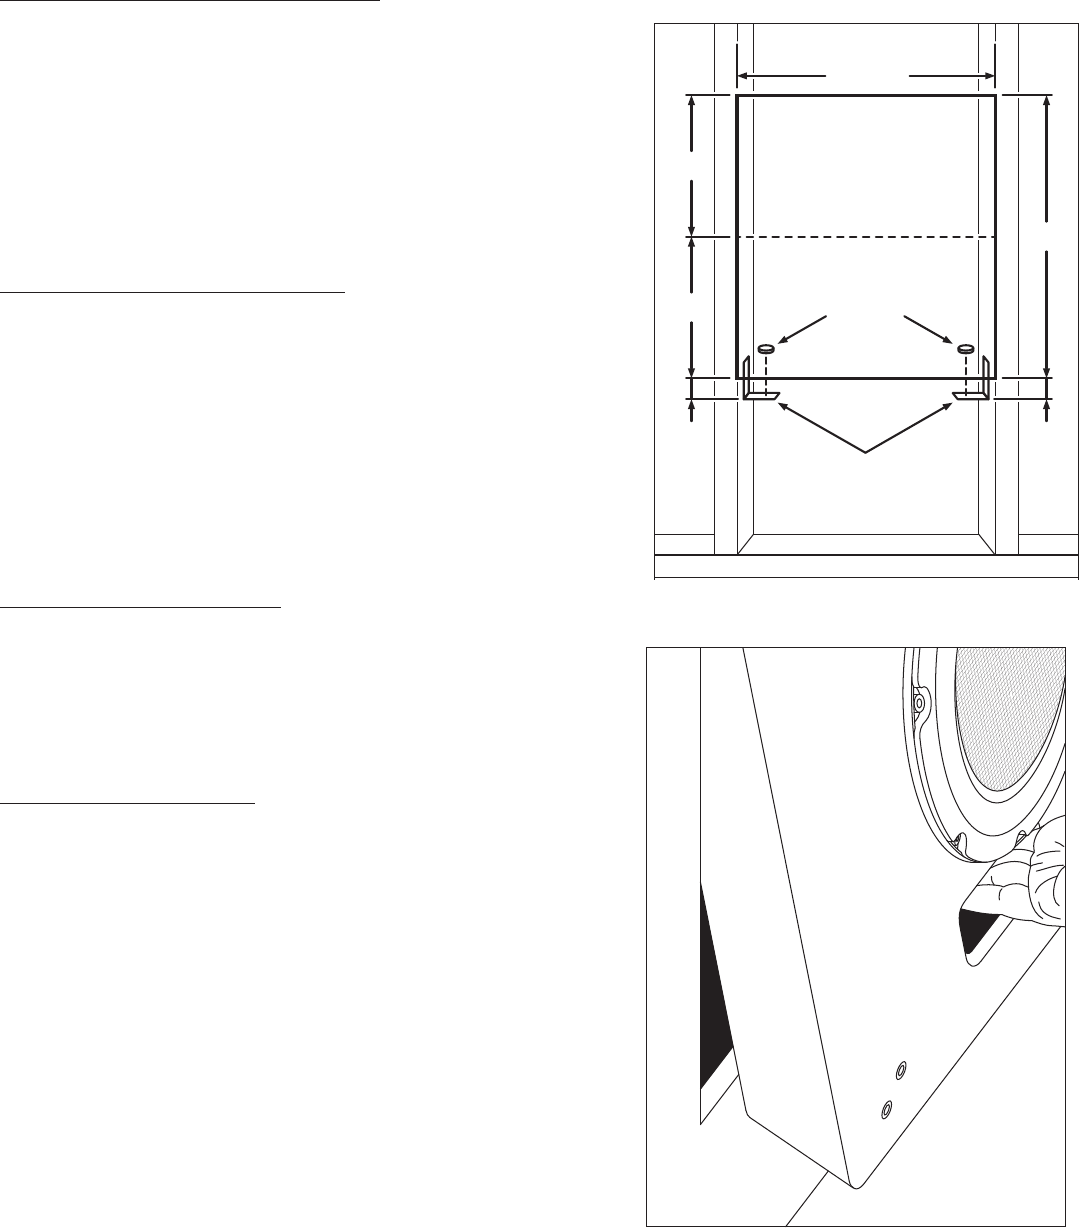
Figure 1
1' 4"
14-1/2"
8"
8"
1-1/2"
"L" Brackets
Pads
1-1/2"
Figure 2
Congratulations on your purchase of the VS8IG In-Wall Grill Kit for the VS8 universal low-profile subwoofer. The VS8IG kit expands the
versatility of the VS8 subwoofer by enabling trouble-free in-wall installation of your subwoofer in new construction or retrofit applications,
clearing valuable floor space and creating an installation that is almost invisible. The VS8IG mounting kit is suitable for use in 3/4" or 5/8"
thickness drywall material, and requires no adhesive for installation.
Note: When mounting the subwoofer in a wall, you will achieve the best results if you design the layout of the complete system on paper
before cutting into the walls. Be certain there are no electrical wires, water pipes or heating ducts in the planned installation area, and check
local wiring code requirements before you lay out or install your subwoofer. Read and observe all instructions and cautions in this document.
Part 1: Determine the Installation Location
When determining the position of your subwoofer in the wall of a rectangular
room, choose a location along the longest wall, about a 1/3rd of the way along
the wall from a corner. Installing the subwoofer closer to a corner will result in
stronger bass output. The subwoofer should be mounted low on the wall for the
most discreet installation. As an aesthetic suggestion, we recommend centering
the subwoofer grill face frame at the same level as the center of the electrical
boxes in the room. Mounting the subwoofer behind furniture will not have any
negative impact on its sound.
Before installing your subwoofer into the wall, make certain the subwoofer will
fit between the wall studs. A properly framed wall will have a 14-1/2" space
between studs. The VS8 subwoofer cabinet has a width of 14" and a depth of
2-3/4", which allows it to be installed between standard 2x4 studs.
Part 2: Prepare the wall for installation
Locate the studs to the left and right of the desired subwoofer placement, using
a stud finder or other means. Use a level to mark a plumb line to identify the
inside face of each stud (See figure 1). If you are not sure of the location of the
stud using this method, use a small diameter drill bit and drill a small hole to
determine the composition of the wall.
Measure from the floor to the center of an electrical box and transfer that
measurement to the location for the subwoofer. Use a level to extend this center
line to the left and right inside stud face. From the center line, measure up 8" and
mark a level line. Again, from the center line measure down 8" and mark a level
line. (See figure 1) This will create a 14-1/2" (W) x 16" (H) cutout pattern for the
in-wall subwoofer. Double-check the accuracy of the hole markings, using the
wooden face-frame as a guide before making any cuts. Finally, use a drywall saw
and cut along the lines to create the opening for your subwoofer.
Part 3: Connect the Subwoofer
Note: See VS8 manual for wiring configurations.
For wiring the VS8 subwoofer, 16 gauge or larger wire is recommended for
runs less than 50 feet, and 14 gauge or larger wire is recommended for longer
runs. Be aware that many municipalities require the use of CL2 rated speaker
cable for installations in walls and ceilings per the local building code. Leave
enough cable that you can easily connect the subwoofer. Connect the wire to
the subwoofer at this time.
Part 4: Install the Subwoofer
Step 1: The installation kit includes “L” brackets to assist during installation of
your subwoofer. Before installing the “L” brackets, attach the small round pads.
Inside the wall, measure down 1-1/2" from the bottom of the opening and attach
an “L” bracket to the face of the left and right studs (see figure 1).
Step 2: Lift the subwoofer and tilt the top backward into the wall opening. Slide
the subwoofer upward into the opening then push the bottom back into the
opening. Allow the subwoofer to rest on the “L” brackets.
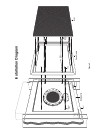
Step 3: Remove the grill from the wooden face-frame and set it aside. With the
wooden face-frame in hand, use the port to lift the subwoofer (see figure 2). Align
the holes in the face-frame with the four threaded inserts in the VS8 subwoofer
cabinet, and insert the four face-frame screws (silver color) through the holes
in the face-frame into the matching threaded inserts in the VS8 cabinet. Thread
the screws loosely into the threaded inserts (do not tighten yet).
Step 4: Align the subwoofer face frame in the wall opening and tighten the four
screws, drawing the subwoofer to the face frame. If any looseness is noted,
remove the face frame and install foam tape pads (such as foam weatherstripping
tape) onto the subwoofer cabinet to provide a tighter grip.
Step 5: Place the white speaker grill onto the face frame using the installed grill
mounting posts (see figure 3). Installation is complete.