


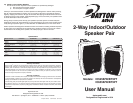

Congratulations on the purchase of your Dayton Audio
®
IO-Series Indoor/Outdoor Speakers.
These rugged, all-purpose speakers are designed to deliver reliable, high-quality audio while with-
standing harsh outdoor environments. They feature weather-resistant construction, high-quality
components, and exclusive acoustic design and tuning by Dayton Audio for outstanding perfor-
mance and value.
● Robust polypropylene cone woofer with rubber surround
● 1” Metallized Mylar Dome Tweeter
● Optimized crossover for perfectly balanced sound
● Available in black or white finish; 70V versions available
Please read these instructions completely before you begin your installation.
1) Parts Inventory
Your speaker kit should include the following:
● 2 Dayton Audio Indoor/Outdoor Speakers with Grilles
● 2 color-matched mounting yoke brackets
● 4 Endcap Screws
2) Installation Tools
The Dayton Audio speakers can be installed with the following simple tools:
● Pencil
● #2 Phillips screwdriver
● Wire cutters & wire stripper/crimp tool
● Drill & drill bits
● Stud finder**
** Optional tools to make the installation easier.
3) Speaker Location
Because of their well-behaved off-axis response and excellent dispersion, your new Dayton
Audio speakers are less critical to position than most loudspeakers. Simply place them 5-8
feet apart wherever you desire music for the best possible performance. If you will be install-
ing your speakers outdoors, select locations facing your listening area that are protected from
rain, snow, and direct sunlight for extended product life.
4) Speaker Installation
Once you have selected the location for your speakers, you are ready to install them.
CAUTION: Be certain that there are no electrical wires, water pipes, or heating ducts
in the planned installation area before you begin drilling. If there is an electrical
outlet nearby, turn off the circuit breaker to avoid possible injury.
Your Dayton Audio indoor/outdoor speakers are compact, but substantial in weight. They
should be mounted into solid structure, not drywall. If drywall mounting is required, use high-
strength anchors designed for heavy loads such as light fixtures. To avoid personal injury,
please make sure the location you choose for mounting your indoor/outdoor speakers can
safely support their weight.
To mark the proper locations for drilling, remove the yoke-style mounting brackets from the
rear of the speaker enclosures by removing the endcap screws, which are the large, round
plastic dials at either end of the speaker. Place the yoke bracket against the mounting surface
and choose the holes you want to use for mounting. Then use a pencil to mark the hole loca-
tions on the mounting surface prior to drilling. Remove the yoke bracket before drilling the
holes, in order to avoid damage to the yoke bracket.
After drilling the mounting holes, install the yoke bracket firmly to the mounting surface using
the supplied mounting hardware.
5) Speaker Cable
Don’t compromise sound quality by using thin, inexpensive speaker wire. We recommend
using a high quality oxygen free copper two-conductor speaker cable. For low-impedance
applications (8 ohms) and runs less than 50 feet we recommend 16 gauge cable, and for
longer runs we recommend 14 gauge or larger cable. (Wire size is less important for 70-volt
distributed audio applications but may still affect performance.) Note that most municipalities
require the use of CL2 rated speaker cable for cable runs through walls and ceilings. Leave
enough excess speaker cable so you can stand comfortably on the floor or ladder while con-
necting the speaker cable to the speakers. If mounting the speakers outdoors, you may wish
to fill the hole that the speaker wire passes through with a caulking material to prevent water
intrusion and cold air infiltration.
6) Speaker Connection
Remove about 8” of the cable jacket to expose the inner conductors. Strip 1/4” of insulation
from each conductor and connect to the speaker terminals. When connecting the wires to
the speakers, be sure to observe proper polarity for the best sound. Most CL2 rated speaker
cable has red and black conductors within the jacket, so connect the red wire to the red
speaker terminal and the black wire to the black speaker terminal. The red (+) terminal on the
back of the speaker should correspond to the red (+) terminal on the amplifier, and same for
the black terminal. The speaker terminals are of the push-type, so push in on each terminal to
allow the wire to be inserted. Torquing the terminal in any way is not necessary.
Note: If you have an 8-ohm model, no further configuration is necessary. If you are installing
a distributed 70-volt (70V) system, be sure to use the appropriate speaker model (70V ver-
sion) and use the selector knob on the rear of the speaker to choose the transformer tap that
provides the desired acoustic output. When the 70V model is used with a 70V system, do not
select the “8-Ohm” tap.
7) Final Installation
To install the speakers into their final location, place them into the yoke brackets and align the
threaded inserts in the enclosure for the endcap screws with the matching holes in the yoke
brackets, then install the endcap screws. Select an angle for the enclosure that will allow the
entire listening area to be within line-of-sight of the tweeter dome, which is visible through the
grille, and then tighten the endcap screws by hand. At this time, installation is complete.
CAUTION: Do not over-tighten the endcap screws. Too much torque may strip the steel
threaded insert or the plastic knob and the speaker will not seat securely in the yoke bracket or
may produce audible vibration. A snug fit is all that is necessary to assure proper performance.
8) Painting Speakers
If you choose to paint the speaker grill and/or housing, be sure to cover the woofer and
tweeter, which are not paintable. Also do not paint the terminals or threaded inserts. Remove
the grille for painting separately from the enclosure. Do not try to paint the frame and grill
assembly together -- the grill should always be painted separately. Do not apply heavy coats
of paint to the grill that might block the perforations in the grill and decrease audio output. Ap-
plication by spraying is recommended.
9) Troubleshooting
Should your speakers not work properly, check the following:
No sound from speakers or quiet/strange sound:
● Make certain you observed proper polarity for both speaker inputs. Check the
connections at the back of the receiver, and then at the speaker.
●
Most stereo receivers have an A/B speaker selector switch. Make certain that
this switch is in the proper position, and that the proper audio source is selected.
●
Mute feature or protection mode is activated. Check for short circuits in speaker wiring.
One speaker is playing while the other is not playing or plays quietly:
● Check the balance control on the receiver. Make sure it is centered.
●
Loose connection at either the receiver or the speaker. Double check connections.
● Bad speaker cable. Replace suspect speaker cable.
Receiver cuts on and off:
●
This could be caused by a short circuit between the positive and negative leads.
Check the connections at the back of the receiver, and then at the speaker; make
sure that no strands of wire from one connector are touching the other connector.