


Destiny 2 CD PLAYER
EXPLANATION OF CONTROLS
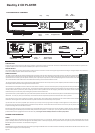
Skip Skip
Play Stop Back Forward
Disc Open/ Pause Display Window Repeat Display Standby
Tray Close
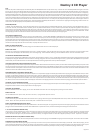
AC Mains Input Power On/Off R Audio L Digital Outputs
& Mains Fuse Switch Outputs Optical Coaxial
AUDIO OUTPUT
Connect one end of the interconnect cable to the CD Player’s audio output sockets and the other end to the sockets labelled CD or AUX or to other line inputs on the
amplifier. Do NOT connect it to the amplifier’s PHONO input if a phono circuit is installed.
DIGITAL OUTPUT
This output enables you to connect the CD player to a stand-alone D to A converter in order to change the signal into stereo analogue. The digital output can be accessed
via the co-axial SPDIF or optical Toslink socket on the rear panel.
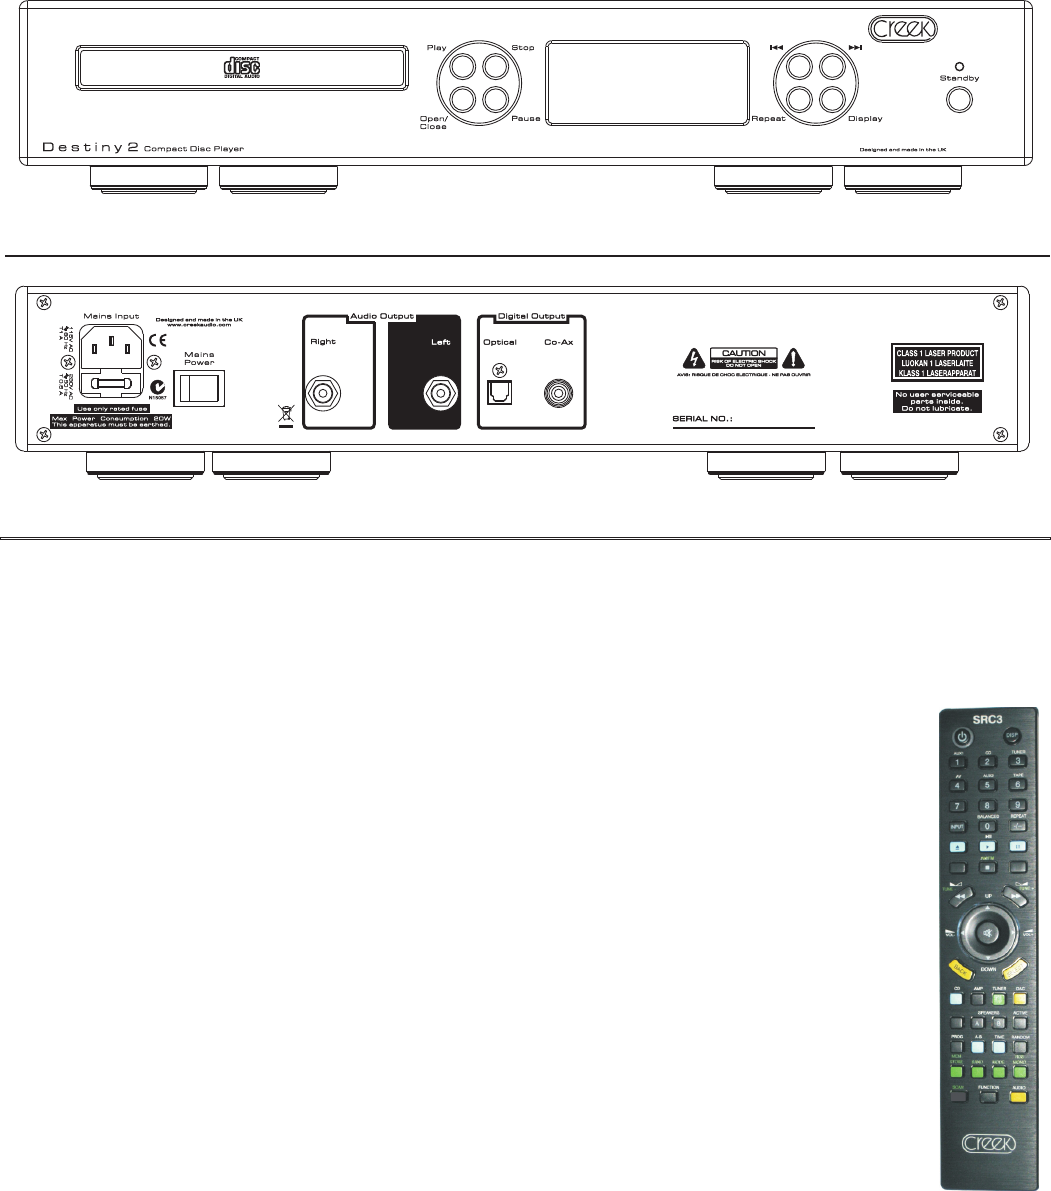
REMOTE CONTROL
The SRC3 is a System Remote Control Handset designed to operate the new and old Creek Destiny and Evolution products. The SRC3 has several buttons
that control future Creek products that will be redundant for the Destiny 2 amp. It can also operate older types of Creek products. It allows the user to
operate the volume control, input and speaker selection, active or passive pre-amp selection, mute and display brightness. Some functions on the SRC3
are reserved for other Creek models and are not enabled on the Destiny 2, such as balance and tone controls.
The coloured buttons allow the user to find the features dedicated to the device more easily. Press any of the amplifier specific black buttons to operate
the amplifier, blue buttons for the CD and green buttons for the tuner.
Several buttons have multiple functions to reduce the total number of buttons. This can be achieved by first pressing the product button just below the
circle of buttons in the middle, CD, Amp and Tuner. The remote will then be programmed to make the dark grey buttons work for that device only, until
another product button is pressed. So, if for example you want to select a specific track on the CD player, press the Blue CD button, then the numeric
button at the top. It is not necessary to press CD again if you want to select another track.
If you want to select a specific amplifier input, press the black amp button and then the numeric button at the top which is marked with the required input
label above - i.e. Aux1, CD, Tuner, AV, Aux2 and Tape. The remote will continue to operate amp functions until either CD or Tuner is pressed.
If you require the Tuner to go to a specific pre-set station, press the green Tuner button and then the desired pre-set number button. All tuner function
buttons are coloured green. The remote will continue to operate tuner functions until either Amp or CD is pressed.
Up and Down refers to CD track, amplifier input and tuner pre-set. Disp on the top right refers to Display and LED brightness for each product. It is
necessary to press one of the product buttons first before the Disp will work. Scan forward and back also refers to CD and Tuner plus any future Creek
amplifiers that might have a remote balance control.
Standby shuts down every device in the range that can go into Standby. N.B. Some Creek products so not have this feature. Please check the appropriate
manual. Waking up from Standby requires a button to be pressed for each product - i.e. wake up CD - press any CD button with the exception of the CD
product button as that only programmes the remote internally. Pressing the remote Standby button does not wake up the product.
CONTROL AND OPERATION
POWER
The mains On/Off switch is located on the rear panel next to the power cord. 1 is on and 0 is off. Switching on the power from the rear panel automatically places the CD
player in Standby mode and a blue LED will light over the Standby button. To wake up the player press any button on the front panel or press the CD button on the remote
followed by any CD function button. The LED indicator will go out.
DISPLAY
Display brightness can be adjusted from the front panel by pressing the DISPLAY button or the Blue CD button followed by the DISP button the SRC3 remote handset. There
are four levels of brightness, accessed sequentially.
Page Two