


18
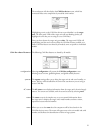
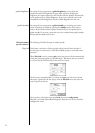
configuring amplifier
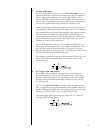
turn-on delay/amp no.
In a system that contains multiple Classé amplifi ers, you may set the
number of seconds of turn-on delay for each amplifi er, allowing each
to turn on in the order you have specifi ed, rather than all at once. is
number also acts as an ID when using the CAN-Bus. (Having several powerful
amplifi ers all turning on at the same time can sometimes stress the AC mains in
your home, potentially leading to nuisance tripping of circuit breakers).
For example, to set the delay for two seconds (and to designate a particular
amplifi er as #2):
• Place the amplifi er in standby (Standby LED on)
• Press and hold the Mode button until both Channel LEDs are
lit. When released, both LEDs will blink to indicate the turn-on
delay and current number of the amplifi er (e.g. once to indicate a
one second delay and amplifi er #1).
• If you want to change the current amplifi er number setting, press
and hold the Mode button again until both Channel LEDs are
on.
• While continuing to hold the Mode button, press the Select
button two times (the same number as the desired delay in
seconds and the amplifi er number);
• Release the Mode button. e amplifi er will confi rm your choice
by blinking the Channel LEDs twice.
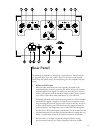
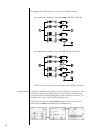
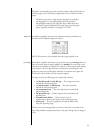
4. Make your preamp connections.
With the amplifi er in standby (or disconnected from the AC mains),
and using high quality interconnecting cables, make the appropriate
connections with the balanced or single-ended connectors (as confi gured in
Step 3).
Make sure all the connections are snug, even if it means gently squeezing
the outer shell of the RCA with pliers and reinserting it to tighten the
connection.
5. Make your speaker connections.
Make the connection between the output terminals of the amplifi er and
your loudspeakers, using high quality speaker wires.
Connect the black (–) terminals on the amplifi er to the black (–) terminals
on your speaker, and the red (+) terminals on the amplifi er to the red (+)
terminals on your speaker.
Make sure all the connections are snug and cannot be easily wiggled free,
but do not overtighten them. If you can give the speaker wires a reasonable
tug without movement, they are snug. Further tightening will not make a
better connection, and (taken to the extreme) may damage the connectors.
6. Double-check all your connections.
We understand that this step sounds redundant, but it is worth the extra
minute or two it might take just to ensure that all connections are correct
and secure before plugging the power cables to the AC outlets.