


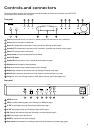
4
Setting up
This section provides information on connecting your DRX-701ES to your hi-fi and connecting your aerial.
Before connecting other devices to your DRX-701ES, switch both devices off. This helps prevent electrical charge damage.
You may also want to peel off the protective film from the LCD panel at this stage.
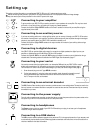
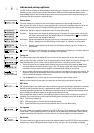
Connecting to your amplifier
To get sound from your DRX-701ES you need to connect it to your speakers via an amplifier. This may be a stand
alone unit or it may be built into your existing hi-fi system or powered speakers.
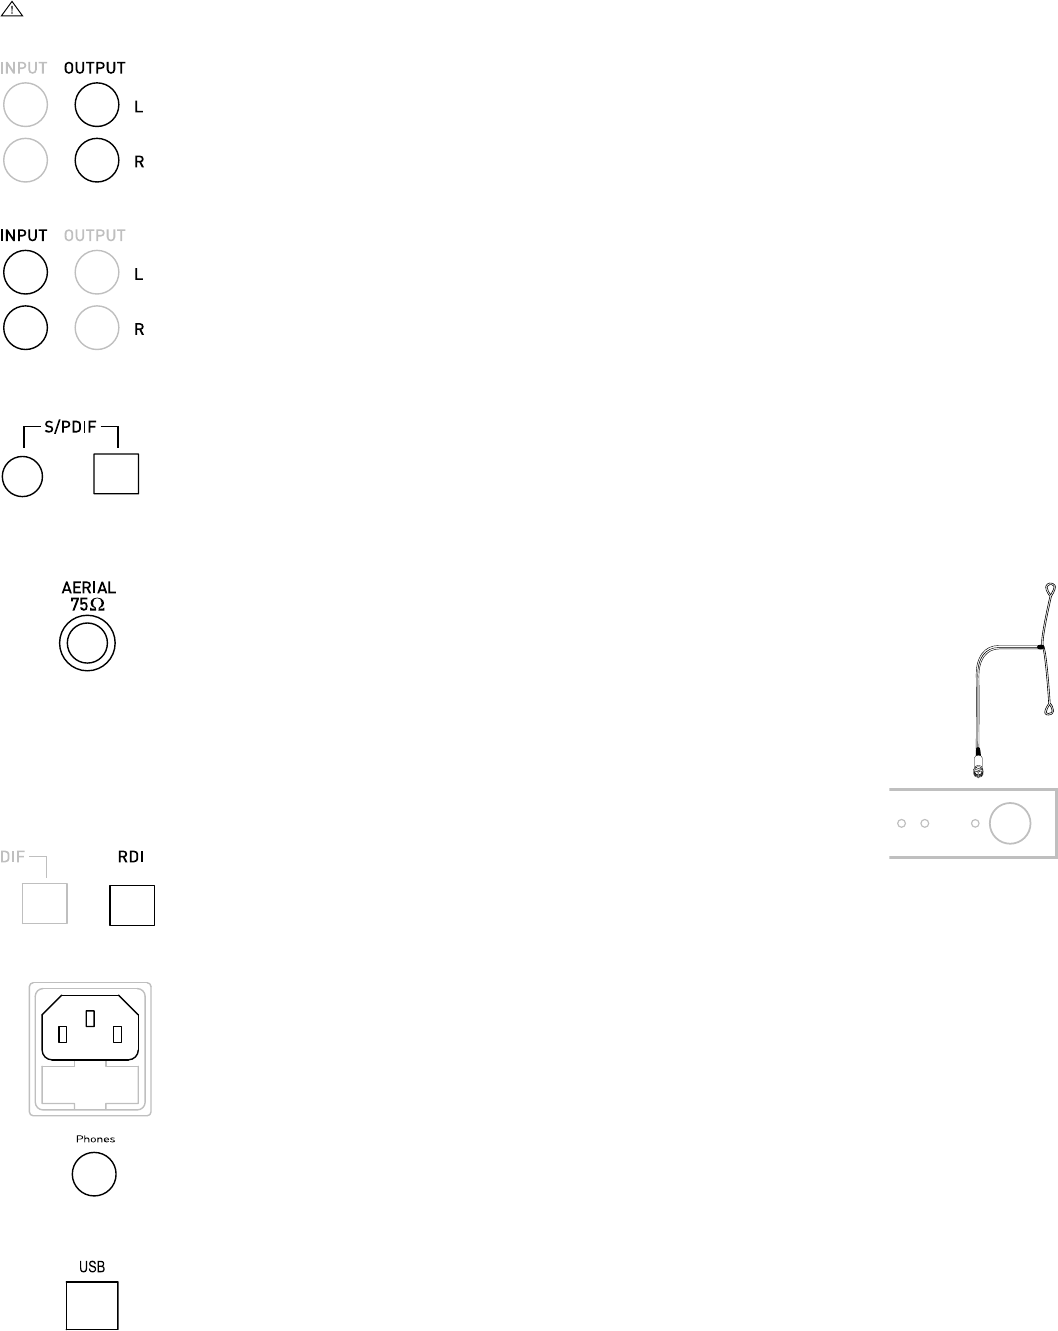
Connect the (L)eft and (R)ight OUTPUT sockets to the Tuner-in sockets on the back of your amplifier using the
supplied stereo phono cable.
Connecting to an auxiliary source
If you have an existing radio tuner, or other auxiliary device, you can connect it through your DRX-701ES to reduce
the number of connections to your amplifier. The auxiliary device output will then be passed through the analogue
outputs to your amplifier when your DRX-701ES is switched to standby or off.
Connect the (L)eft and (R)ight INPUT sockets to the output sockets on the back of your auxiliary device using a
stereo phono cable.
Connecting to digital devices
Your DRX-701ES can provide digital audio output for connection to digital speakers, the digital input on your
amplifier or digital devices such as MiniDiscs, CD-Rs or DAT recorders.
Connect the coaxial S/PDIF or the optical S/PDIF socket to the digital-in socket on your digital device using a
suitable cable. Connecting cables are available from PURE Digital, see Accessories, page 11.
Connecting to an external decoder
The RDI (Receiver Data Interface) optical connector provides access to raw multiplex data. This may be used in the
future to connect to an external decoder or computer for access to extra services. These services may not currently
be available in your area.
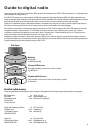
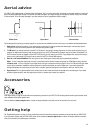
Connecting to your aerial
You need to connect either the supplied aerial or an alternative DAB aerial to your DRX-701ES to receive
digital radio transmissions. For information on the types of aerials available, see Aerial advice, page 11.
For information on how to find out about DAB coverage in your area, see Guide to digital radio, page 9.
1. Screw the aerial plug onto the F-type AERIAL connector.
2. For the best reception, if using the indoor aerial supplied, attach the aerial horizontally to a wall
using some adhesive tape and extend the arms on the end of the aerial wire vertically
into a ‘T’ shape on its side, as illustrated.
Connecting to the power supply
Once all audio connections are complete, as described above, connect the power cable to the power socket on the
rear panel of your DRX-701ES and the other end to a wall power outlet.
Connecting to headphones
The Phones socket on the front panel of your DRX-701ES enables you to plug in and use a pair of headphones
instead of using an external amplifier.
Connecting to a USB device
The USB connector enables software upgrades to be performed. Fill in the appropriate section of your warranty card
to automatically receive details of when software upgrades are available and instructions on how to install them or
check our website for the latest information.