4
CASCADE SPEAKER SYSTEMS
ASSEMBLY
It is strongly recommended that two people assemble the speakers
t
o minimize the possibility of damage or injury.
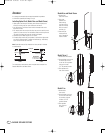
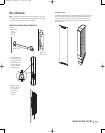
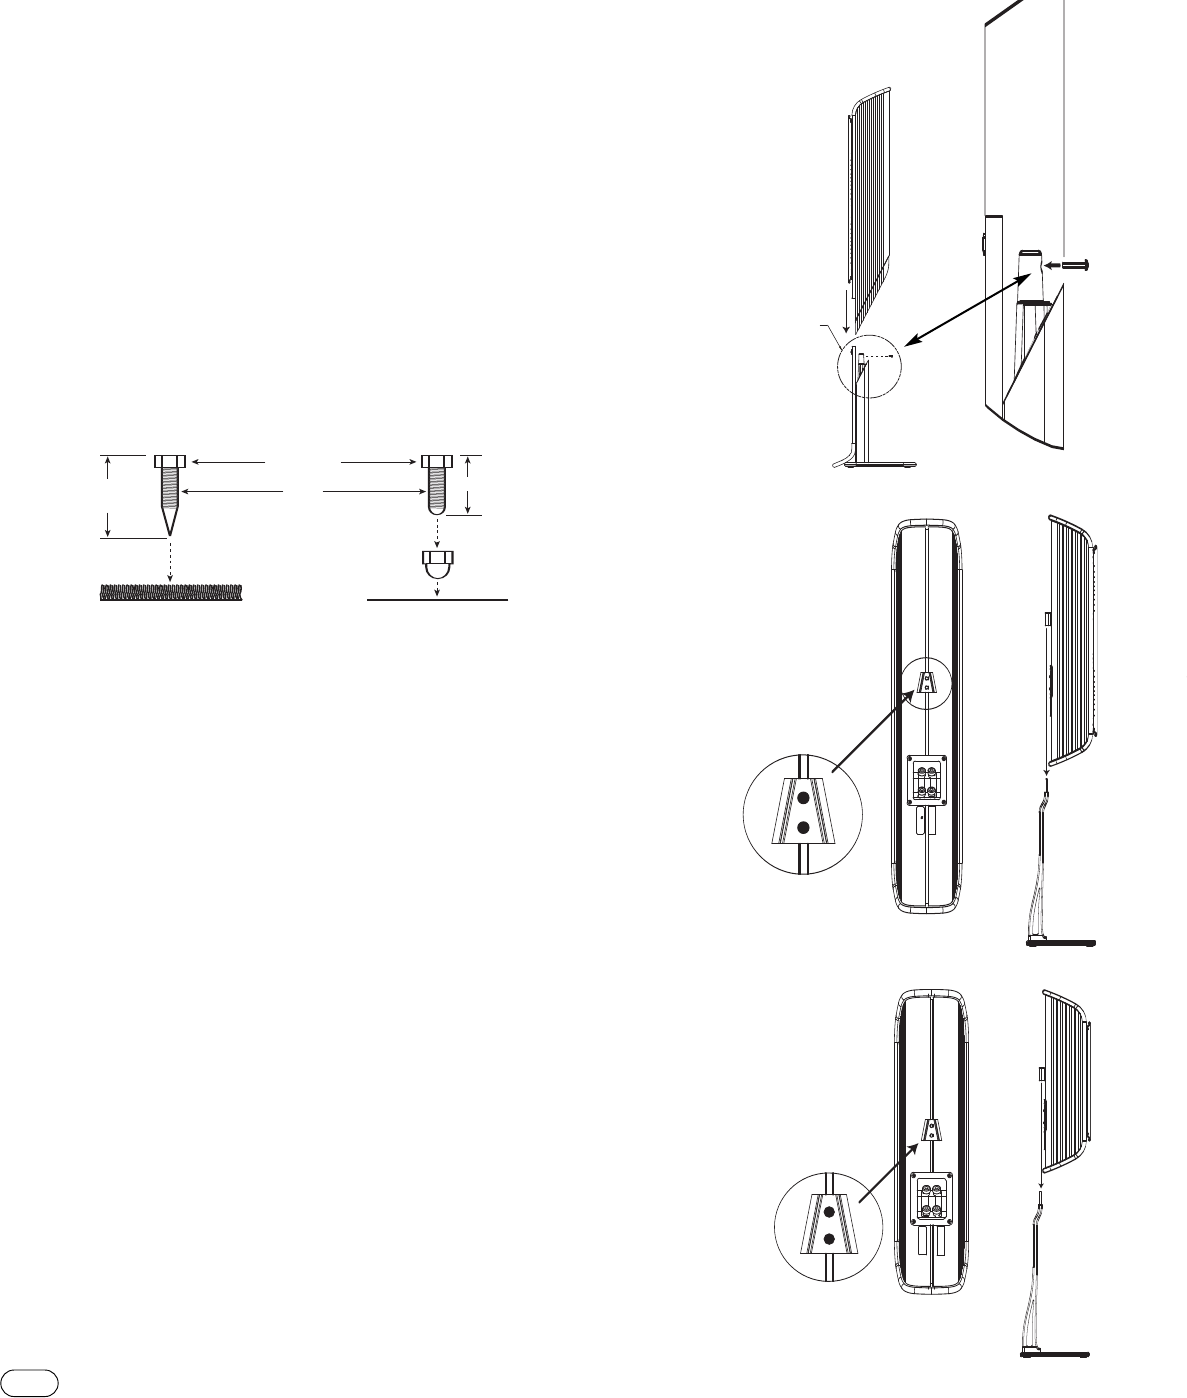
Installing Spiked Feet (Model Nine and Model Seven)
1. Open spike kit and locate the following items: feet (with spike/round
ends), four locking nuts, four nylon domes and one wrench.
2. Lay each stand on its side and locate the four threaded holes on the
bottom of the base.
3
. For carpets,screw the round end of a foot into each hole and fully hand-
tighten a nut onto each one.For hard-surface floors, screw the spike end
i
nto each hole instead and leave the rounded end exposed.
4. Carefully flip each base upright to sit on its feet.
5
. If needed, adjust the feet so each speaker is level and then
t
ighten each
nut with the enclosed wrench.To protect hard surfaces (e.g., wood floors),
slip a nylon dome onto each round end.
Note: Spiked feet must be fully threaded into holes provided in the base
to ensure stability.
This cross section shows how to install the spikes onto the bottom of a
Cascade Model Nine and Model Seven.
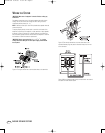
Model Nine and Model Seven
1. Remove floor
stand from carton.
2. Slide loud-
speaker onto
stand, making
sure the aligning
posts are lined up
with the receiver
terminal cup.
3. Insert #8 pan-
head screw into
rear of speaker to
s
ecure to stand.
Model Three V
1. Remove base from carton.
2. Securely fasten one cleat to
the middle set of holes
on the rear of the speaker
using two included
1/4"-20 panhead screws.
3. Slide speaker with
cleat over the base.
Model Five
1. Remove base
from carton.
2. Securely fasten one cleat
to the set of holes above
the terminal using two
inc
luded 1/4"-20
panhead scr
e
ws
.
3. Slide speaker
with cleat o
v
er
the base
.
Locking Nut
HARD-SURFACE
FLOORS
CARPETED
FLOORS
Foot
Round End
Spike End
Nylon Dome
(included for use
on wood floors)
5/8" min.
1
-1/8" max.
5/8"
SEE DETAIL
A
DETAIL
A
+
+
+
+
Cascade OM 8/22/05 10:51 AM Page 6


