


OPERATION
13
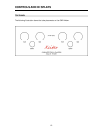
Your new CAD Xciter integrated amplifier is ready for operation after the AC power, speaker,
and interconnect cables and the vacuum tubes have been installed into their proper sockets.
Refer to the labeling on the chassis for placement and proper tube installation. Since the
amplifier circuitry is completely auto-biasing, no biasing adjustments are required – just plug and
play!
AC POWER REQUIREMENTS
The CAD Xciter is designed to work from house current AC mains. The design voltage is 120
Volts AC at 50/60 Hz (Foreign units 240 Volts AC at 50/60 Hz). Plug the provided AC power cable
into the AC Power jack on the rear panel of the unit.
SOURCE INPUTS
The CAD Xciter accepts 3 unbalanced stereo inputs via the RCA jacks on the rear panel.
Nominal input impedance is 100K Ohm and provides compatibility with common sources such as
CD/DVD players, DAC, Cinema, Tuner, and Tape. A shielded high quality interconnect cable is
important to reduce chances for hum or interference. Ask your Authorized Cary Audio Design
dealer for advice.
SUBWOOFER OUTPUTS
The CAD Xciter provides buffered low level outputs of the selected stereo source input via the
RCA jacks on the rear panel suitable for driving the low level input of amplified subwoofers. A
shielded high quality interconnect cable is important to reduce chances for hum or interference.
Ask your Authorized Cary Audio Design dealer for advice.
SPEAKER BINDING POSTS
The CAD Xciter will drive loudspeaker loads from as low as 4 ohms to a high of 16 ohms
without any adjustments. Please remember to keep the proper phase on each channel when
connecting the loudspeaker cables. Red is the positive and black is the negative lead. The
positive binding post (on both left and right channels) is located closest to the middle of the
chassis. Check your speaker cables periodically to make sure the connections are tight.
POWER ON / OFF SWITCH
The AC Power rocker switch for power on - power off is located in the lower left-hand corner of
the front panel. The CAD Xciter becomes fully operational once the AC Power cord is plugged
into the unit and into the wall AC outlet the Power On/Off switch is turned On. Push the “1” at
the top of the switch to turn the unit on. You will notice that blue back lighting behind the
Listening Level control on the front panel will illuminate. The vacuum tubes will light as well. Blue
LEDs will also illuminate the base of each 12AX7A tube. The unit is powered down (turned off)
simply by pushing the “0” at the bottom of the power switch. AC power is then removed from
the power supply in the CAD Xciter.