7
English
Installing Your 251
TM
Speakers
Figures 6A and 6B
Installing the hardware
A. Wood
B. Concrete
A. B.
3
⁄
32
inch (2.25 mm)
3
⁄
32
inch (2.25 mm)
1
1
⁄
2
inch (2.25 mm)
1
1
⁄
2
inch (2.25 mm)
1
⁄
4
inch (6.35 mm)
1
⁄
4
inch (6.35 mm)
1
1
⁄
2
inch (2.25 mm)
1
1
⁄
2
inch (2.25 mm)
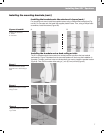
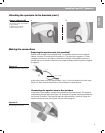
Figure 7
251 environmental speaker
mounted onto a deck railing or
table
Installing the brackets onto a deck railing or table
The 251
TM
speakers should be mounted in a vertical position to achieve the best musical
performance. Figure 7 illustrates how the mounted speaker will look once the installation is
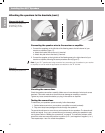
complete. To begin, mark four holes to indicate where you want to install the speaker bracket
(Figure 8). Then, drill four starter holes using a
3
⁄
32
inch (2,5 mm) drill bit (Figure 9).
Figure 9
Drilling four holes on a deck rail-
ing or table
Figure 8
Marking four holes on a deck
railing or table
Installing the mounting brackets (cont.)
Installing the brackets onto the exterior of a house (cont.)
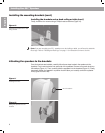
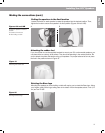
For mounting onto wood, install the supplied screws using a Phillips-head screwdriver (Fig-
ure 6A). For concrete use, first install the supplied plastic inserts. Then, using a Phillips-head
screwdriver, install the screws (Figure 6B).


