30
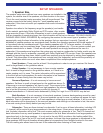
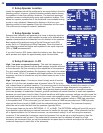
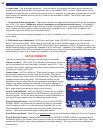
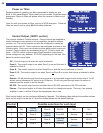
6. Input name - Five characters maximum. From the factory, the receiver will display source names that
match those printed on the back of the receiver and on the supplied SR10.1 remote. These names can be
changed to match the type of source that is being used. For example, if a cable box is connected on the SAT
input instead of a satellite receiver, the SAT name can be renamed to CABLE. The AM/FM Tuner name
cannot be changed.
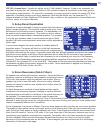
7. Component Video Assignment - The receiver includes 3 component video inputs that can be assigned to
any of the 7 A/V inputs. Component video is unassigned on all inputs from the factory. For example, if
there is a DVD player that has component video outputs, component input 1 can be assigned to the DVD
input. Connect the DVD player's component outputs to component input 1. When DVD is selected, the
component output will source from component input 1.
If the component video has been assigned for any input, transcoding from S to composite or composite to S
will continue.
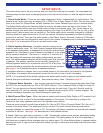
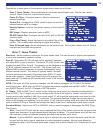
8. DVD-Audio input Assignment - DVD-Audio and Super Audio CD (SACD) introduce a third category of
audio: multi-channel analog. The receiver provides one set of multi-channel analog inputs that can be
assigned to any one A/V input except TAPE. When DVD Audio is selected as YES for a particular input, the
default listening mode is automatically changed to DVD-Audio with 7 speakers. (The number of speakers can
used be changed) When YES is selected for a particular input, any previously selected DVD-Audio input will
automatically be reset to NO. Selecting 5 speakers is direct pass through.
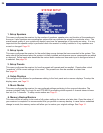
SETUP PRESETS
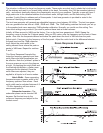
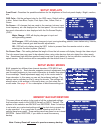
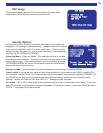
The Setup Presets menu describes how the presets will operate.
Volume in Preset - YES or NO. If the volume of the receiver should be
set to the preset level when the preset is recalled, select YES. If the
volume of the receiver should remain at the current listening level when
the preset is recalled, select NO.
Preset Names - AUTO or MANUAL. When saving a preset, the system
automatically generates a simple name for the preset. The generic
name consists of the source input and volume level. The name can be
changed before saving the preset. The automatic naming can be
defeated so that a custom title that was previously entered will not get
erased if the preset settings are re-saved. Turning auto naming off
(manual) allows that the name that is already present in the preset to
be re-used when a new preset is saved to that location.
Zone A Favorite Recall - AUTO or ENTER. A preset can be recalled in
one of two ways. Enter requires the ENTER button to be pressed to
recall the preset. AUTO will allow the preset to recall automatically as
you scroll through presets using the channel up/down buttons.
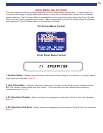
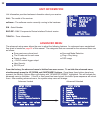
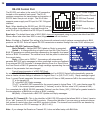
Zone A Favorite Presets - Press ENTER to bring up the FAVORITE
PRESET MENU. Any preset can be recalled by typing in its number.
Use this menu to mark or un-mark presets as favorites (Yes or No).
Favorite presets can be recalled when using the preset up and down
buttons. This menu can also be used to edit preset names.
Zone B Favorite Recall - Zone B has a sep
arate set of presets with the same options as the Zone A presets.
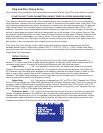
Zone B Favorite Presets - Press ENTER to bring up the FAVORITE PRESET MENU. Any preset can be
recalled by typing in its number. Use this menu to mark or un-mark presets as favorites (Yes or No). Favorite
presets can be recalled when using the preset up and down buttons. This menu can also be used to edit
preset names.
SETUP PPRESETS
1 VVolume iin PPresets YYes
2 PPreset NNames AAuto
3 ZZA FFavorite RRecall EENTER
4 ZZA FFavorite PPresets
5 ZZB FFavorite RRecall ENTER
6 ZZB FFavorite PPresets
↑↓ next iitem aadjust ←→
MENU mmain mmenu
ZONE 11 FFAVORITES
Preset 00 YYes
‘AM TTraffic ‘‘
↑↓ next iitem aadjust ←→
0..9 ++10 ppreset rrecall EENT
MENU ssystem ssetup
Preset 00 YYes
4 ZZA FFavorite PPresets


