


5
V-TONE GM110
2. CONTROL ELEMENTS
+ The following users manual will familiarize you with
the control elements of your new V-TONE and let
you learn all of its functions. After reading this
manual, store it somewhere where you can easily
find in the future, should you need to look up some
information.
1.3 Before you get started
1.3.1 Shipment
The V-TONE was carefully packed at the assembly plant to
assure secure transport.
Should the condition of the cardboard box suggest that your
V-TONE may have been damaged in transport, please inspect
the unit immediately and look for physical indications of damage.
+ Damaged equipment should NEVER be sent directly
to us. Please inform the dealer from whom you
acquired it immediately as well as the
transportation company from which you took
delivery. Otherwise, all claims for replacement/
repair may be rendered invalid.
1.3.2 Initial operation
Please make sure that your V-TONE is provided with sufficient
ventilation, and never place it on other amplifiers or in the vicinity
of a heater to avoid the risk of overheating.
+ Before plugging your V-TONE into a power socket,
please make sure you have selected the correct
voltage:
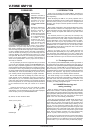
The fuse mount near the power cord connector has three
triangular markings. Two of these triangles are facing opposite
one another. Your V-TONE is set up for the voltage indicated
near these markings, and can be altered by turning the fuse
mount by 180 degrees. ATTENTION: This does not apply to
export models built for 120 V, for example!
+ If you use your V-TONE unit with a different voltage,
you must change the fuses accordingly. The correct
value of the fuses needed can be found in the
chapter SPECIFICATIONS.
+ Faulty fuses must be replaced with fuses of
appropriate rating, without exception! The correct
value of the fuses needed can be found in the
chapter SPECIFICATIONS.
Power is delivered via the cable that was delivered with the V-
TONE. All mandatory safety precautions have been adhered to.
+ Please make sure that all your equipment is
grounded at all times. For your own protection, you
should never tamper with the grounding of the cable
or the unit itself. The unit shall always be connected
to a mains socket outlet with a protective earthing
connection. You can eliminate humming problems
caused by grounding at the D.I. OUT by pressing the
GND switch (Groundlift, ).
1.3.3 Warranty
Please send the completely filled out warranty card within 14
days of purchase to us, as warranty claims may otherwise be
rendered invalid. The serial number of your V-TONE is located
on the rear. Alternatively, you may register online at
www.behringer.com.
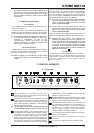
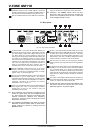
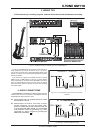
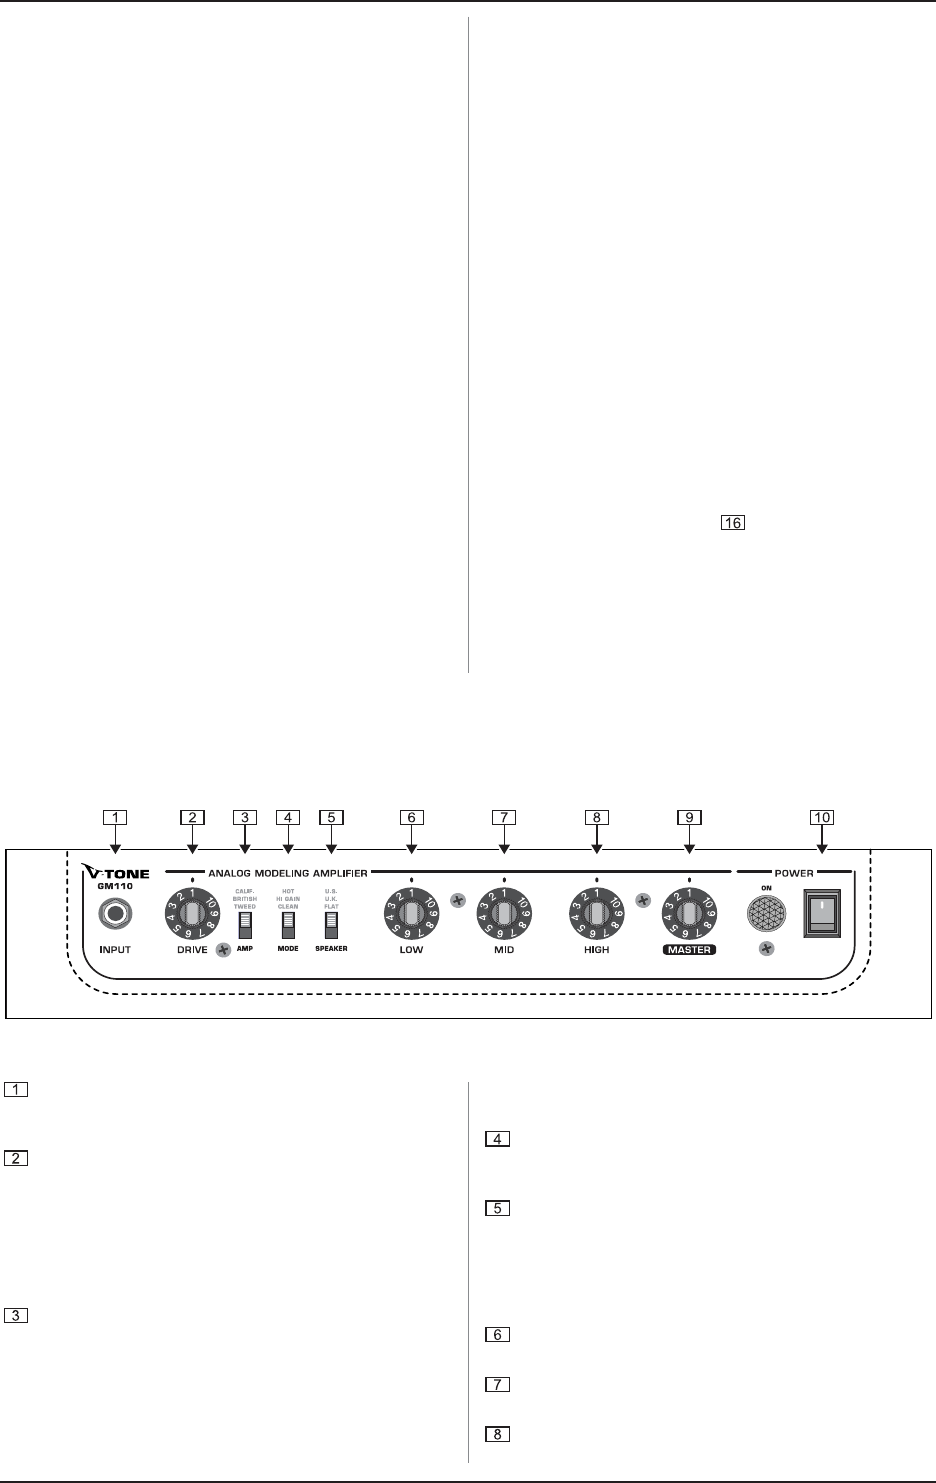
INPUT is the GM110s 1/4" jack input for your guitar. Use a
commercial 1/4" jack mono cable (not from a DIY shop, but
from a specialist music dealer).
The DRIVE control determines the amplification in the input
section. It allows you to finely tune the GM110 preset to the
output level of your guitar pick-up (depending on selected
amp, mode and speaker combination) in order to achieve
the desired degree of distortion.
+ Use the DRIVE control to set the desired sound and
use the MASTER control to set the desired volume!
The AMP switch enables you to emulate the basic sounds
from three guitar amp designs; these are based on classic
amp models and will be familiar to you from numerous
recordings. The TWEED setting delivers transparent
sounds, clear as a bell, with dynamic bass response. The
BRITISH setting has an aggression that comes straight from
the heart and is powerful with an unmistakable ability to
make itself heard. Fuller and more balanced, and yet subtly
differentiated, the CALIF(ORNIAN) setting is particularly
suitable for singing lead sounds.
With the MODE switch, you choose between one of three
possible gain settings (CLEAN, HI GAIN and HOT) to achieve
the basic sound selected with the AMP switch.
The SPEAKER switch provides you with simulations of
two classic guitar loudspeakers: 4x12"-loudspeakers in a
closed back enclosure (U.K.), and 2x12" loudspeakers,
open back (U.S.). In addition, we have also installed a
further frequency response correction (FLAT) that is
specially adapted to the GM110 enclosure.
The LOW control in the EQ section enables you to boost or
cut the bass frequencies.
With the MID control, you can boost/cut the midrange
frequencies.
The HIGH control governs the upper frequency range.
2. CONTROL ELEMENTS
2.1 Front panel
Fig. 2.1: Front panel control elements