


12 iNUKE NU6000/NU3000/NU1000
13 Quick Start Guide
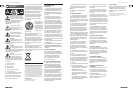
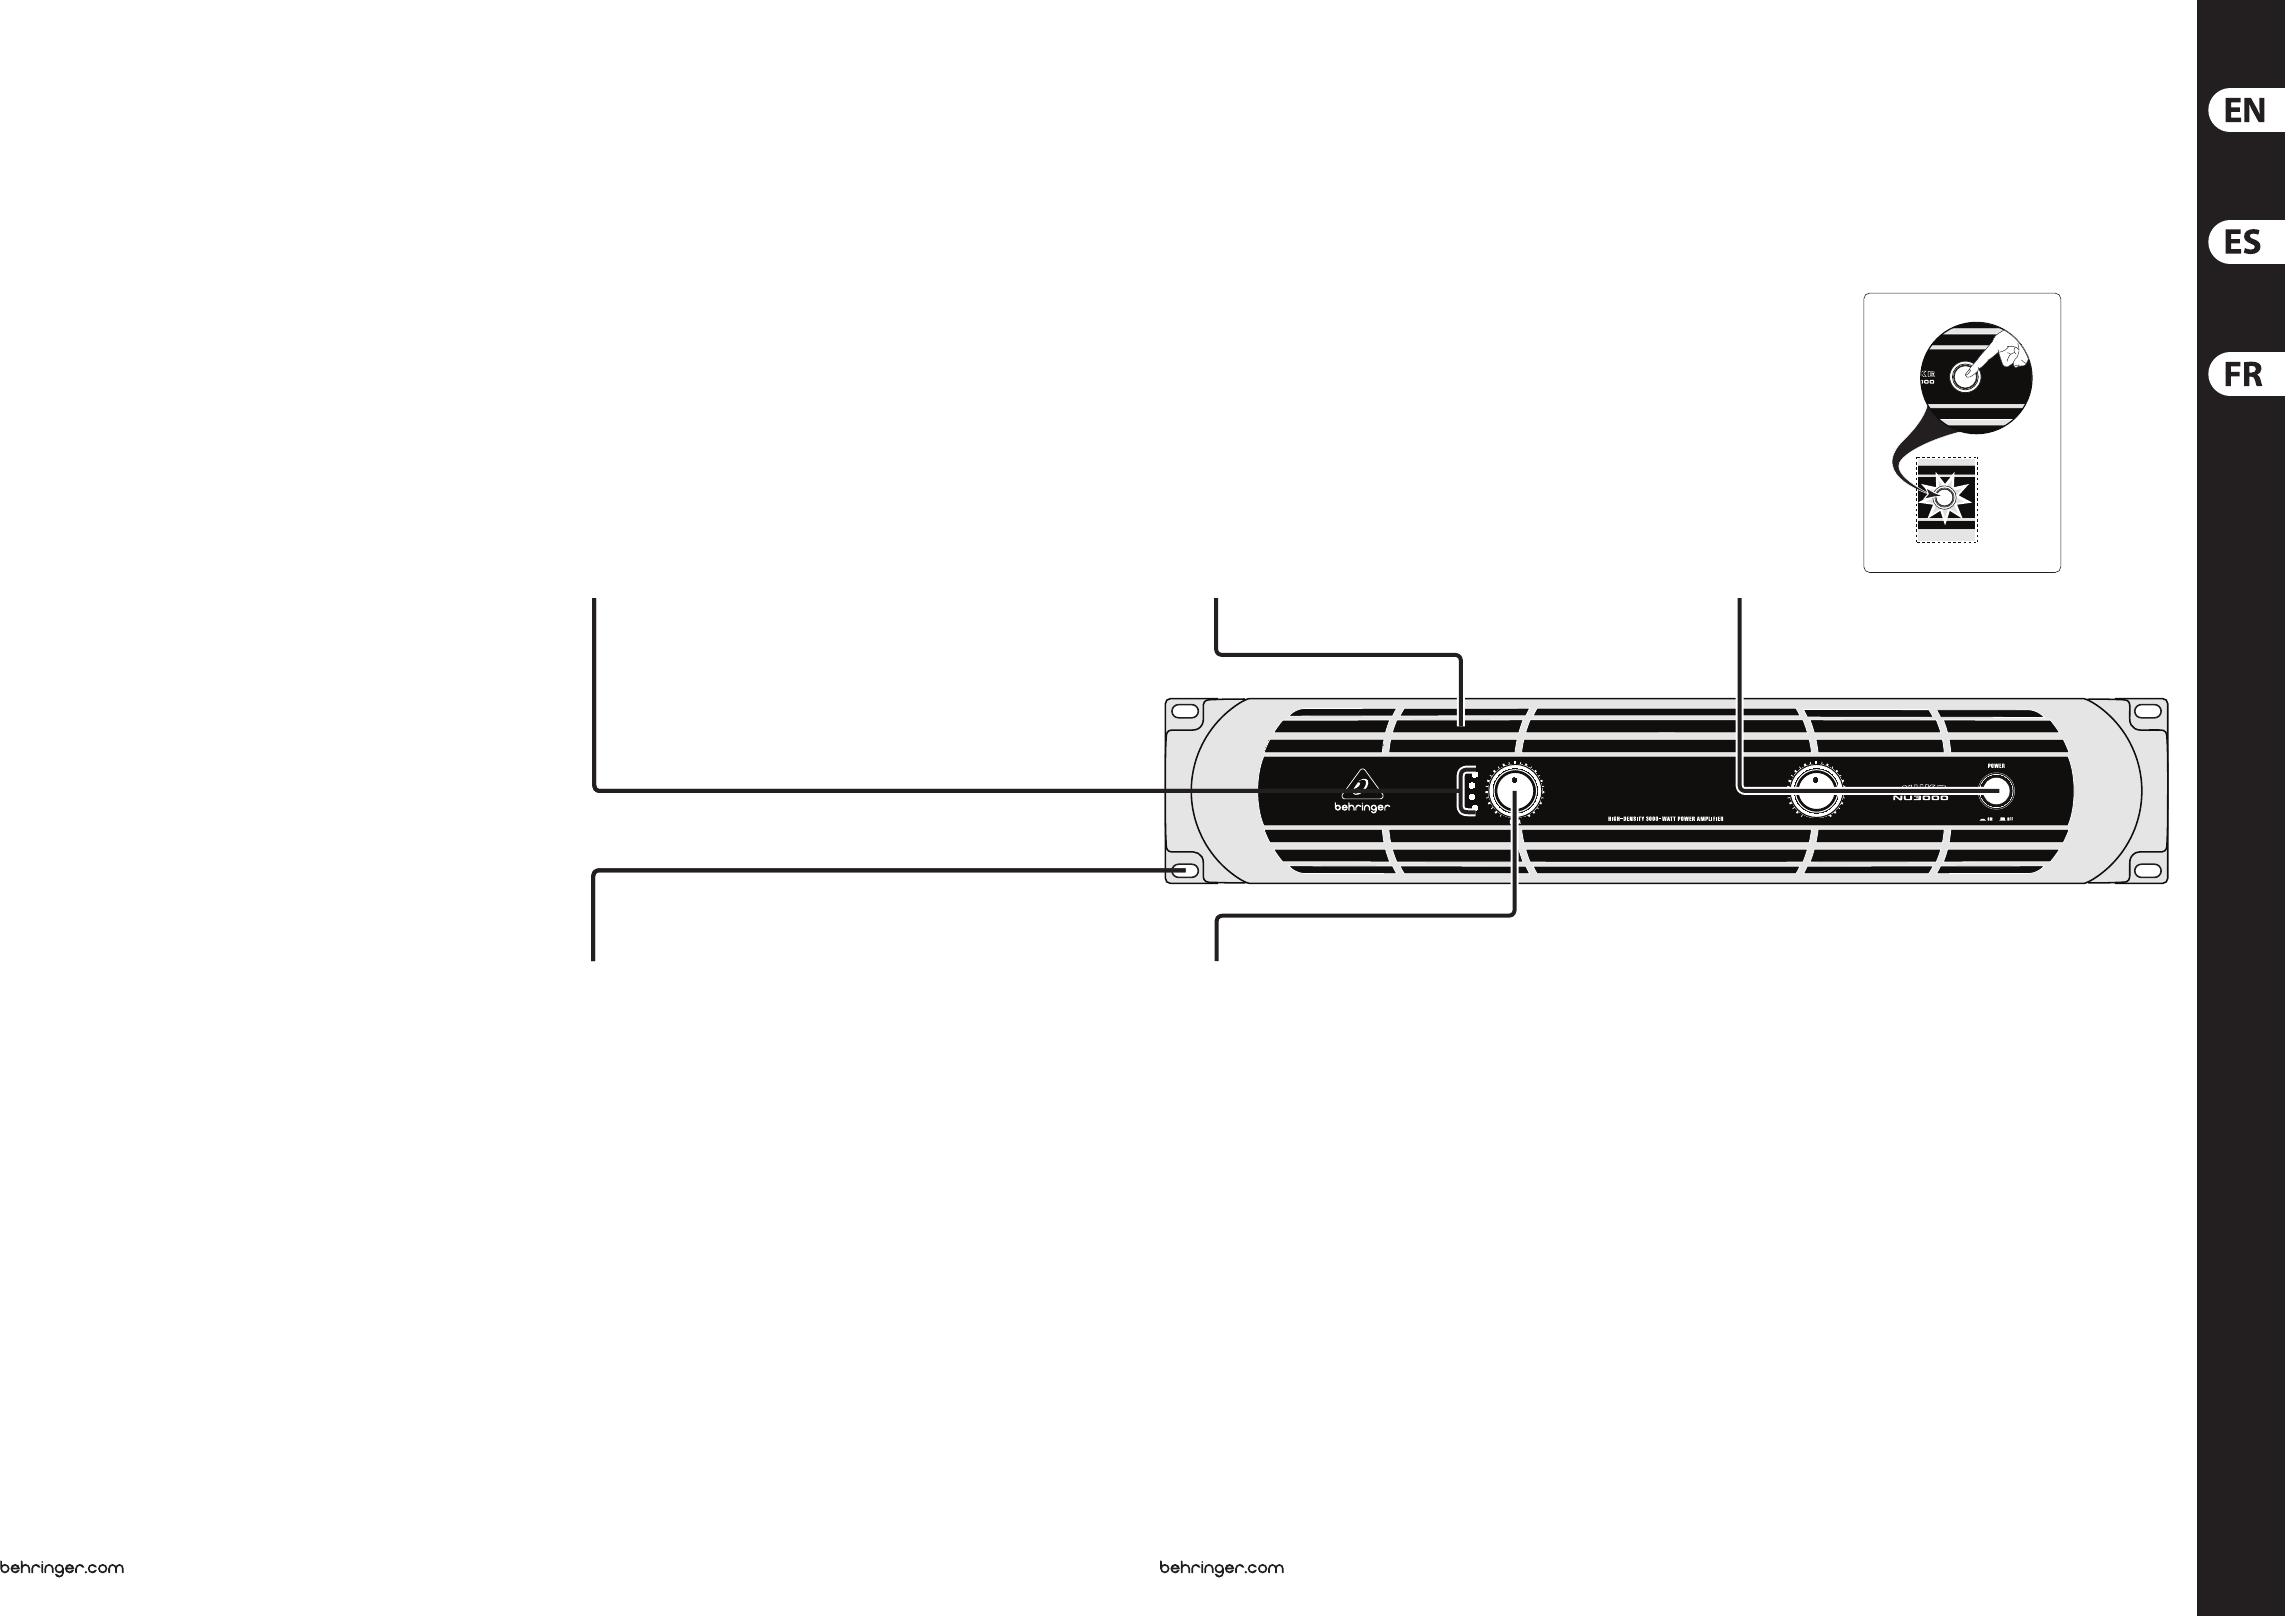
(EN) Step 2: Controls
(ES) Paso 2: Controles
(FR) Etape 2 : Réglages
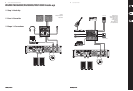
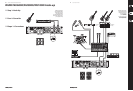
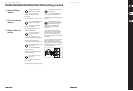
iNUKE NU6000/NU3000/NU1000 Controls
VENTILATION opening
allows airow throughout
the amplier.
POWER button turns the
amplier on and o.
BOTON/PILOTO POWER
Pulse este boton para
encender o apagar
el amplicador.
INTERRUPTEUR
SECTEUR/LED
Appuyez sur ce bouotn pour
placer l’amplicateur
sous/hors tension.
CH A/CH B CONTROLS adjust
the input level. To increase
signal gain, rotate the
knobs clockwise; to reduce
the gain, rotate the knobs
counter-clockwise.
SIGNAL and LIMIT LEDs
display the signal level for
each channel. Reduce the
input gain if the red LIMIT LED
lights up continuously.
RACK EARS secure the
unit into a rack using four
attaching screws and washers
(fasteners not included).
Requires two rack units.
Los pilotos SIGNAL y LIMIT
le indican el nivel de la senal
para cada canal. Reduzca la
ganancia de entada si el piloto
a rojo LIMIT se ilumina de
forma continua.
ESCUADRAS PARA
COLOCACION EN RACK
Coloque esta unidad en un
bastidor rack usando los
cuatro tornillos y arandelas
incluidas (no se incluyen
tuercas). Esta unidad requiere
dos espacios rack para
su instalacion.
CONTROLES CH A/CH B
Ajuste el nivel de entrada
por medio de estos mandos.
Para aumentar la ganancia de
la senal, gire estos mandos
a la derecha y a la izquierda
para reducirla.
POIGNÉES Fixez
l’amplicateur au boitier
Rack en utilisant quatre vis
et rondelles (non fournies).
Cet amplicateur utilise deux
espaces Rack en hauteur.
Les Leds SIGNAL et LIMIT
achent le niveau du signal
de chaque canal. Reduisez le
gain d’entree si la Led rouge
LIMIT reste allumee.
RANURAS DE VENTILACION
El sistema de ventilacion con
diseno “trasero-frontal” evita
el recalentamiento.
OUÏES DE VENTILATION
Le tunnel de ventilation
d’arriere vers l’avant evite
les surchaues.
BOUTONS CH A/CH B
CONTROLS Determinent
le niveau d’entree.
Pour augmenter le gain,
tournez les boutons vers la
droite ; pour reduire le gain,
tournez les boutons vers
la gauche.