


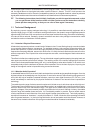

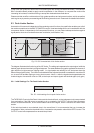
15
MULTICOM PRO MDX4400
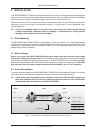
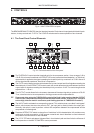
4.4 Rear Panel Control Elements Of The MULTICOM PRO
13
12
14
16
15
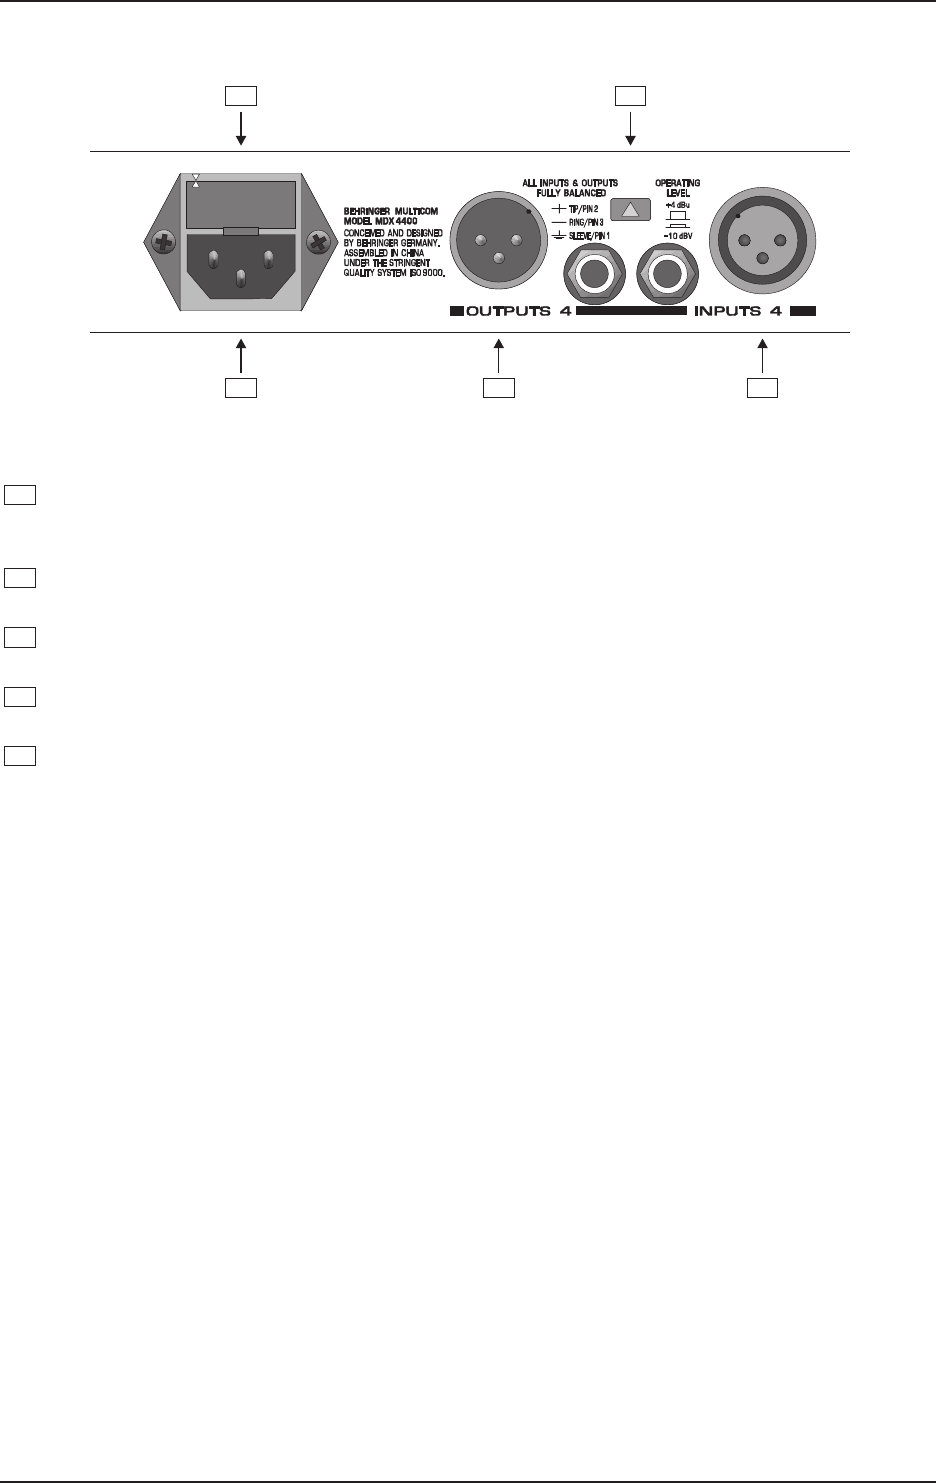
Fig. 4.5: Control elements of the rear panel
12
FUSE HOLDER / VOLTAGE SELECTOR. Please make sure that your local voltage matches the volt-
age indicated on the unit, before you attempt to connect and operate the MULTICOM PRO. Blown fuses
may only be replaced by fuses of the same type and rating.
13
MAINS CONNECTION. Use the enclosed power cord to connect the unit to the mains. Please also note
the instructions given in the INSTALLATION chapter.
14
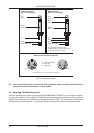
AUDIO IN. These are the audio inputs of your MULTICOM PRO, available both as balanced 1/4" jack
and XLR connectors.
15
AUDIO OUT. These are the audio outputs of your MULTICOM PRO. Matching phone jack and XLR
connectors are wired in parallel.
16
With the OPERATING LEVEL switch you can adapt the MULTICOM PRO to various operating levels,
i.e. you can select both the -10 dBV home recording level and the professional studio level of +4 dBu.
The level meters are referenced automatically to the selected level, i.e. an optimum operating range of
the meters will always be ensured.
4. CONTROLS