


6
V-TONE GM108
3. CONTROL ELEMENTS
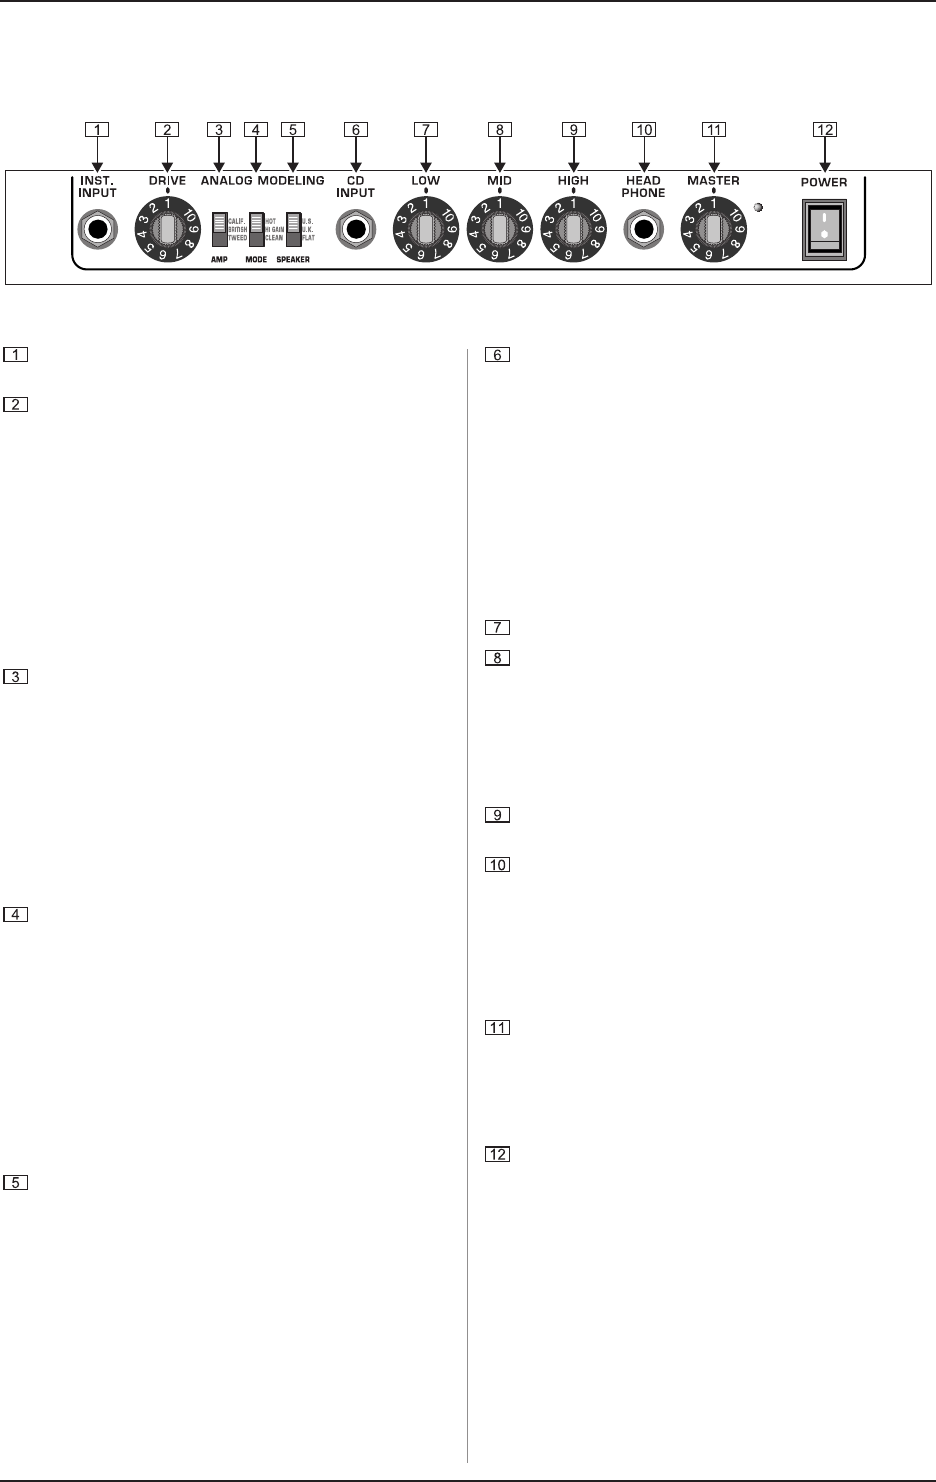
Use the INST(RUMENT) INPUT connector to hook up your
guitar. Use a standard 1/4" TS cable.
The DRIVE control regulates how much distortion you
produce (depending on what amp, mode and speaker
combination you select). The DRIVE control works in unison
with the MASTER control. To some extent, the DRIVE control
also affects the volume. To achieve the same volume level,
turning DRIVE down means you have to somewhat increase
MASTER. The more you crank up DRIVE, the louder it will
get, so that you can finally adjust the volume using MASTER.
This way, you can greatly vary your sound and still be in
charge of volume.
For guitar pros: You can use the volume control of your
guitar as a creative tool as well. The more you turn it up,
the more distortion you end up with!
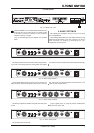
The AMP switch lets you decide which one of the three
classically inspired guitar amp sounds you wish to recreate.
TWEED: Offers the legendary American clean sound, with
dynamic bass and clear transparence.
BRITISH: Aggressive in the mids, tough and full of punch,
thats how you can describe this setting. You get the classic
rock sound of the most famous British amps.
CALIF(ORNIAN): Lead and hot rhythms sounds are what
you get with this setting. This is the amp for that typical Nu
Metal Californian sound.
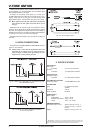
Use the MODE switch to select one of the three settings
(CLEAN, HI GAIN and HOT) for the basic sound you
selected with the AMP switch. The following description
gives you some rough idea about the many possibilities.
Experiment with DRIVE to come up with exactly the sound
you are looking for!
CLEAN: as the name says, clean sound, without distortion.
HI GAIN: ranges from crunchy to strongly distorted
sounds.
HOT: heavily distorted sound with endless sustain and an
extra dollop of presence.
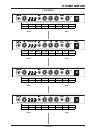
Use the SPEAKER switch to adjust yet another parameter:
select one of the three outstanding loudspeaker simulations
that best fits the amp you go with.
UK: 4 x 12" speaker in an enclosed casing.
US: 2 x 12" open-back speaker.
FLAT: specially tailored for the GM108.
Hook up the output of your CD player, tape deck or walkman
to the CD INPUT connector. An MD player will do too. This
way, you can play music CDs or even CDs accompanying
guitar-playing books and practice at the same time. Of
course, you can do the same using your stereo, but then
you couldnt hear both signals simultaneously via your
headphones!
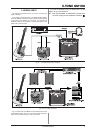
The CD INPUT comes as a standard 1/4" TRS stereo jack
connector. If your CD player features RCA outputs, then
youll need an adapter or an adapter cable. You can get
both at most audio stores. Fig. 5.3 in chapter 5 shows you
what such an adapter looks like. You can also use a mono
cable (fig. 5.4) without damaging the amp or your CD player.
Wanna have more bass? Then crank LOW all the way up.
The MID control is used to lower or increase mid
frequencies.
+ If you are playing alone, lower these frequencies
relative to bass/highs to get a cool sound. When
youre playing in a band, increase these frequencies
relative to bass/highs to cut through. Just keep on
tweaking your sound until you get it right!
The HIGH control regulates high frequencies. Use HIGH to
get your guitar to sound sharper.
Hook up your headphones using the HEADPHONE
connector. Your amps loudspeaker is automatically muted
as soon as your headphones are connected.
+ Some headphones cant handle extremely high
volumes without beginning to distort. Turn the
LEVEL control somewhat down until you notice the
distortion is gone.
The LEVEL control governs the overall volume of your
V-TONE GM108. LEVEL should always be at zero (all the
way to the left) whenever you hit POWER or when you
unplug the cable out of your guitar or your amp. Otherwise,
loud crackling noise can occur, and they are good for
neither your amp nor your ears.
Use POWER to power up your GM108. You should always
make sure that the POWER switch is in the Off position
when initially connecting the unit to the mains.
+ Please take note: Merely switching the unit off does
not mean that it is fully disconnected from the
mains. When not using the unit for prolonged
periods of time, please unplug the units power
cord from the power outlet.
3. CONTROL ELEMENTS
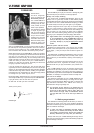
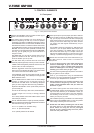
3.1 Front panel
Fig. 3.1: Front panel control elements