


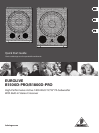
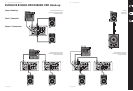
12 EUROLIVE B1500D-PRO/B1800D-PRO
behringer.com
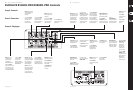
13 Quick Start Guide
behringer.com
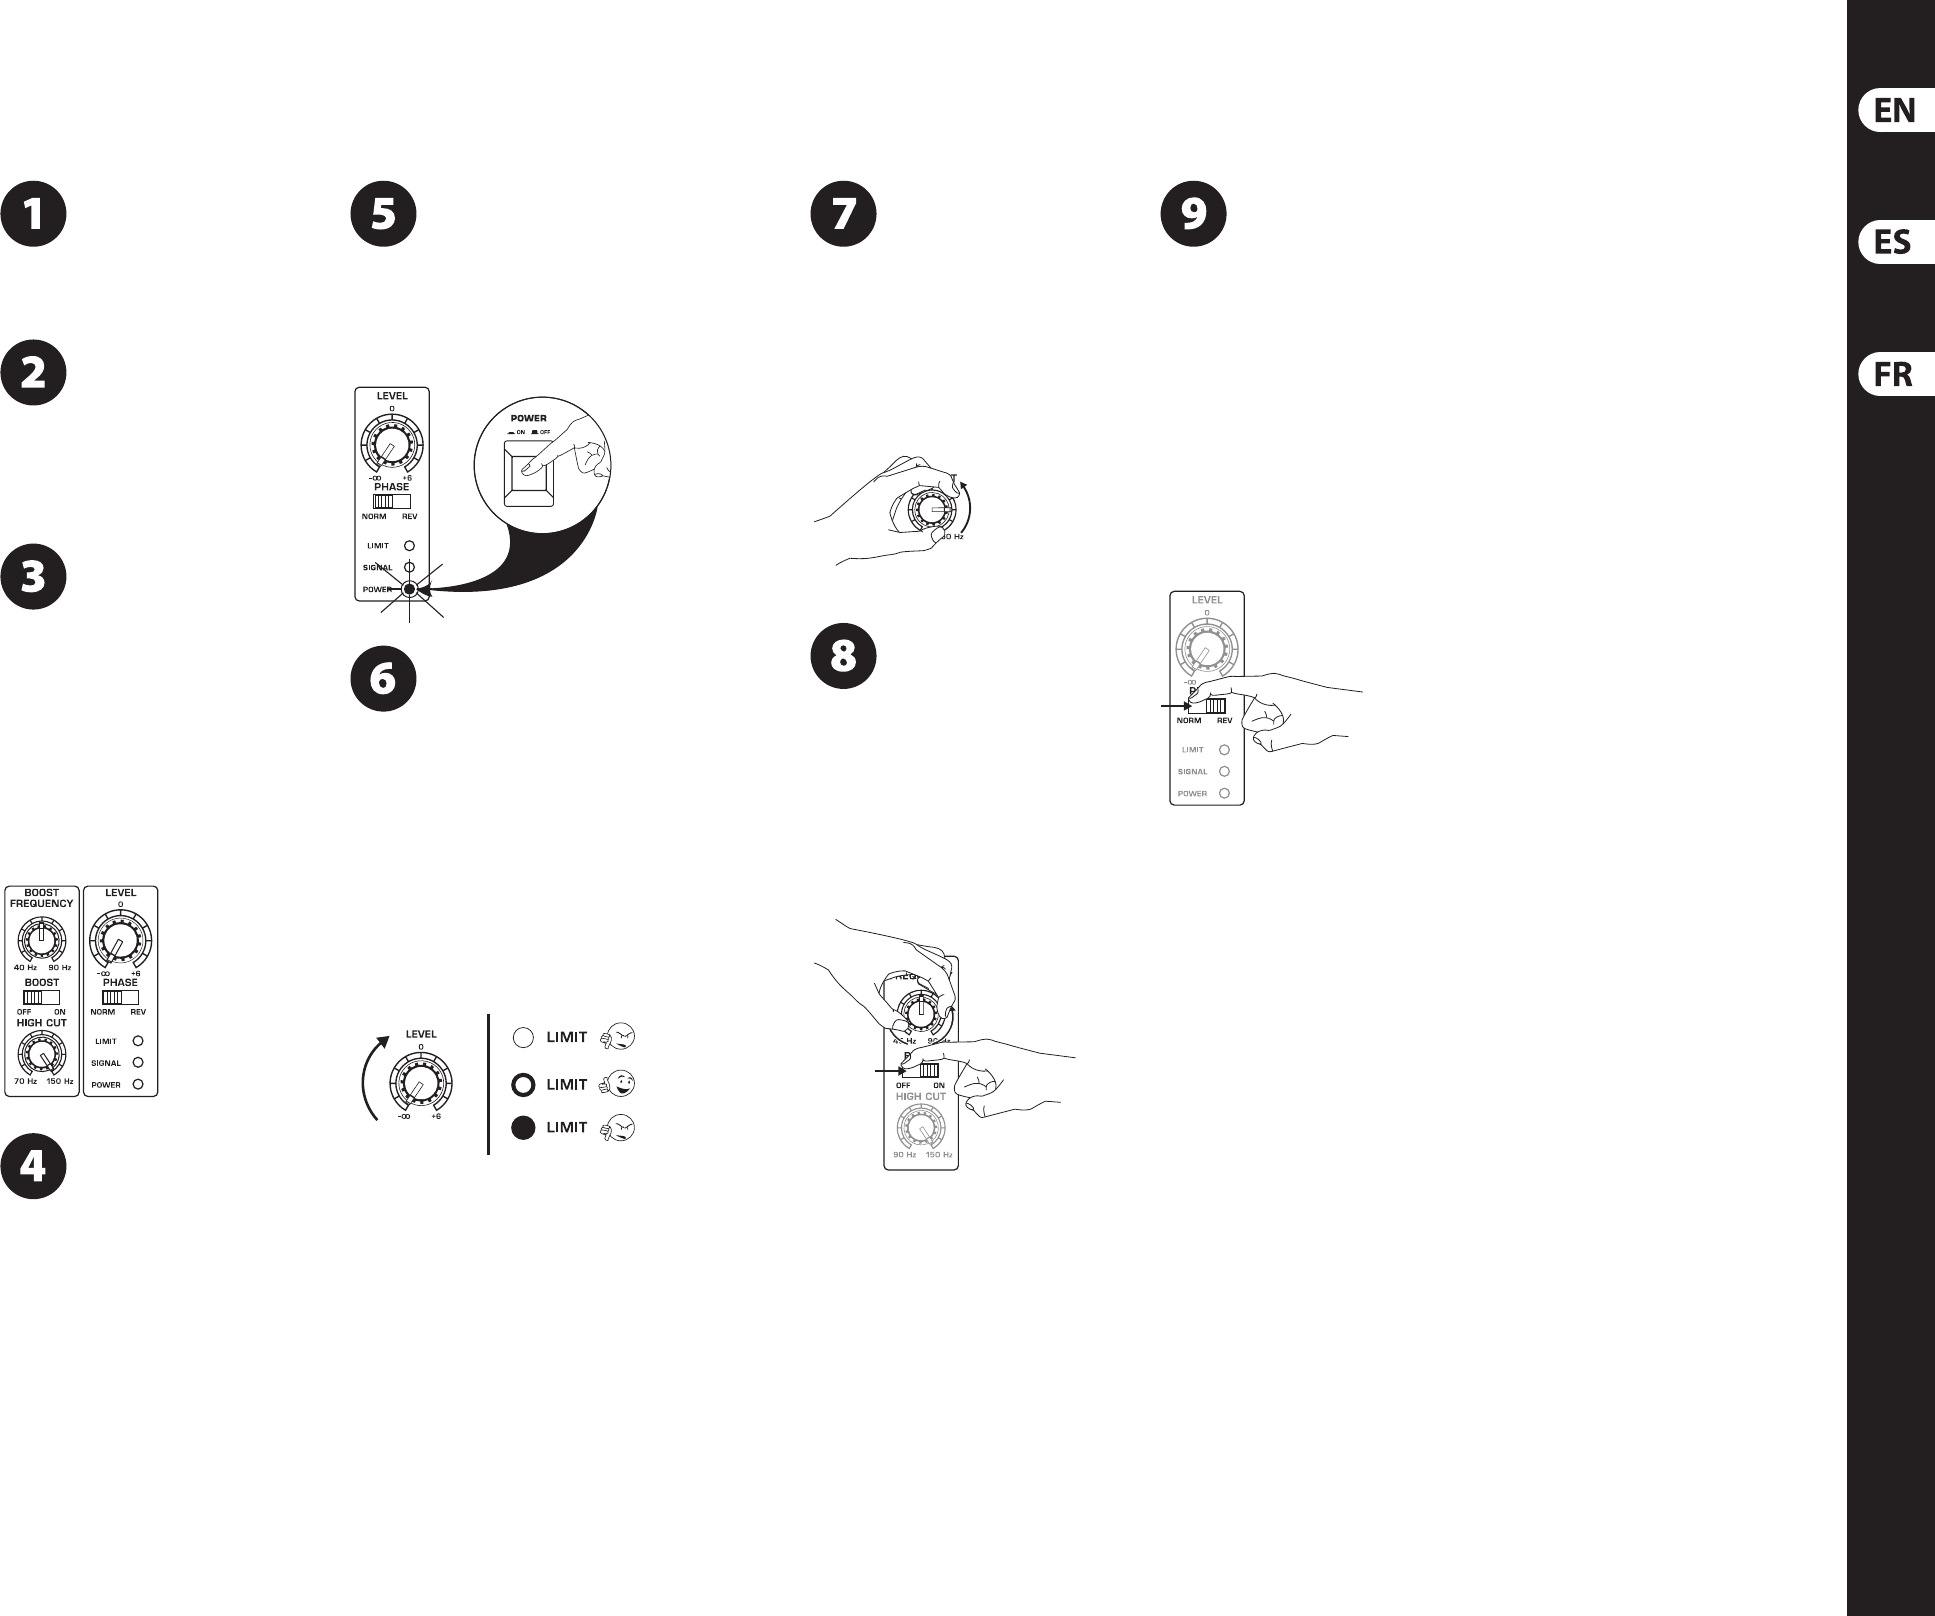
Step 3: Getting started
Paso 3: Puesta en
marcha
Etape 3 : Mise en
oeuvre
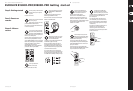
EUROLIVE B1500D-PRO/B1800D-PRO Getting start ed
Place the speaker(s) in desired locations.
Coloque el altavoz(ces) en la posición
que quiera.
Positionnez les enceintes.
Make all necessary connections. DO NOT
turn on the power yet.
Realice todas las conexiones necesarias,
pero NO ENCIENDA las unidades todavía.
Faites toutes les connexions. NE PLACEZ PAS encore
les enceintes sous tension.
Set the controls as shown: LEVEL knob
full counter-clockwise, HIGH CUT knob
full clockwise, BOOST FREQUENCY knob
centered, BOOST switch set to the OFF position, and
PHASE set to the NORM position.
Ajuste los controles de la siguiente forma: mando
LEVEL en el tope izquierdo, HIGH CUT en el tope
derecho, BOOST FREQUENCY en el centro, interruptor
BOOST en OFF y PHASE ajustado a la posición NORM.
Réglez comme indiqué ci-dessous : LEVEL au
minimum, HIGH CUT au maximum,
BOOST FREQUENCY au centre, sélecteur BOOST en
position OFF , PHASE en position NORM.
Turn on your audio source.
Active su fuente audio.
Placez la source audio sous tension.
Turn on your speaker(s) by pressing the
POWER SWITCH. The POWER LED will
light up.
Encienda el altavoz(ces) pulsando el interruptor
POWER. El piloto POWER se encenderá.
Placez les enceintes sous tension avec l'interrupteur
POWER. La Led POWER s'allume.
While playing your audio source, adjust
the LEVEL knob to the desired volume
level. If the LIMIT LED flashes
continuously, turn the LEVEL knob back down until
the LIMIT LED only lights occasionally.
Mientras se reproduce la fuente audio, ajuste el
mando LEVEL al nivel de volumen que quiera. Si el
piloto LIMIT parpadea de forma continua, reduzca
el ajuste del mando LEVEL hasta que el piloto LIMIT
solo se ilumine de forma ocasional.
Avec la source audio en lecture, réglez le bouton
LEVEL sur le niveau souhaité. Si la Led LIMIT clignote
beaucoup, diminuez le réglage LEVEL jusqu'à ce que
la Led LIMIT LED ne s'allume que de temps en temps.
Slowly rotate the HIGH CUT knob
counter-clockwise until you find the
best sound balance between the
subwoofer and the satellite speakers.
Gire lentamente el mando HIGH CUT hacia la
izquierda hasta que consiga el mejor balance de
sonido entre el subwoofer y los altavoces satélites.
Baissez progressivement le réglage HIGH CUT jusqu'à
obtenir le meilleur équilibre sonore entre le
Subwoofer et les satellites.
To further shape the sound, move the
BOOST switch to the ON position. Rotate
the BOOST FREQUENCY knob until you
find a suitable low-end frequency.
Para un mayor modelado del sonido, coloque el
interruptor BOOST en la posición ON. Gire después el
mando BOOST FREQUENCY hasta una frecuencia de
súper-graves adecuada.
Pour terminer, placez le sélecteur BOOST sur ON.
Tournez le bouton BOOST FREQUENCY jusqu'à obtenir
la réponse souhaitée dans le bas du spectre.
To compensate for possible phase
cancellation between the subwoofer
and other speakers in your system, move
the PHASE switch from the NORM position to the REV
position. Keep the setting which delivers the
best-sounding result.
Para compensar posibles cancelaciones de fase
entre el subwoofer y otros altavoces del sistema,
pase el interruptor PHASE de la posición NORM a la
REV. Deje siempre el ajuste que le ofrezca el mejor
resultado sonoro.
Pour compenser tout déphasage possible entre le
Subwoofer et les autres enceintes de votre
sonorisation, placez le sélecteur PHASE sur la
position REV. Conservez la position qui vous offre le
meilleur résultat sonore.