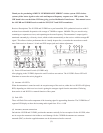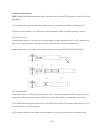
(6) LED INDICATORS
The POWER LED turns green when power is turned “On” or red if battery level is low. If this LED lights up
red replace the battery.
The AF PEAK LED lights up if the input level is set to high, indicating the onset of distortion. Lower the
input level so that the AF PEAK LED lights only occasionally.
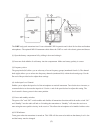
To plug the 51XT onto a microphone (low impedance with XRL connector) first make certain the locking-ring
is turned fully up (rotate counterclockwise). Then plug the 51XT fully into the microphones XLR connector
and tighten by rotating the ring fully down (clockwise).
OPERATING THE SYSTEM:
Because this a frequency agile system, meaning that you choose the frequency of both the transmitter and
receiver via the group and channel controls, we cannot stress enough that any transmitter/receiver pair that you
want to transmit and receive on MUST BE SET TO THE SAME FREQUENCY!
Additionally, multiple systems used in the same proximity must ALL BE ON THE SAME GROUP SELEC-
TION! To change the frequency that a transmitter/receiver pair is already on YOU MUST TURN OFF BOTH
TRANSMITTER AND RECEIVER FIRST!
Do not place the receiver on a metal surface, and avoid obstructions between the receiver and transmitter,
since this could degrade the performance of the equipment.
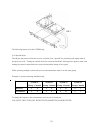
First, make sure that the power to all your components is turned off. Connect an audio cable from the output of
the receiver (phone jack or XLR) to a mic/line input on your audio mixer or amplifier. Plug the receiver’s AC
adapter into the 12V input jack on the receiver and then plug it into the AC electrical outlet. With the volume
of your mixer or amplifier set to minimum level, turn your system’s power on. Turn on the transmitter(s).
Make sure all LEDs on the receiver(s) and transmitter(s) are operating as described in the preceding pages.
Now set the receivers volume to the midway point and adjust the volume level on your mixer or amplifier.
(7)


