


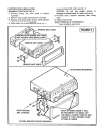
screws included with radio (see fig. 2)
CAUTION: Do not use longer screws or
damage to Internal parts of radio may occur
5. Re-Install radio / bracket assembly after wiring
radio.
6. Replace dash panel.
RADIO REMOVAL (IF NECESSARY)
1. Reverse installation procedure.
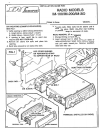
FACTORY STYLE INSTALLATION
(EXAMPLE:TOYOTA) SEE FIG.2:
1. Remove factory radio dash panel to expose
sub-dash.
2. Remove radio bracket assembly from sub-dash.
3. Remove and discard radio dummy panel attached
to factory radio bracket assembly.
4. Install radio Into bracket assembly using special
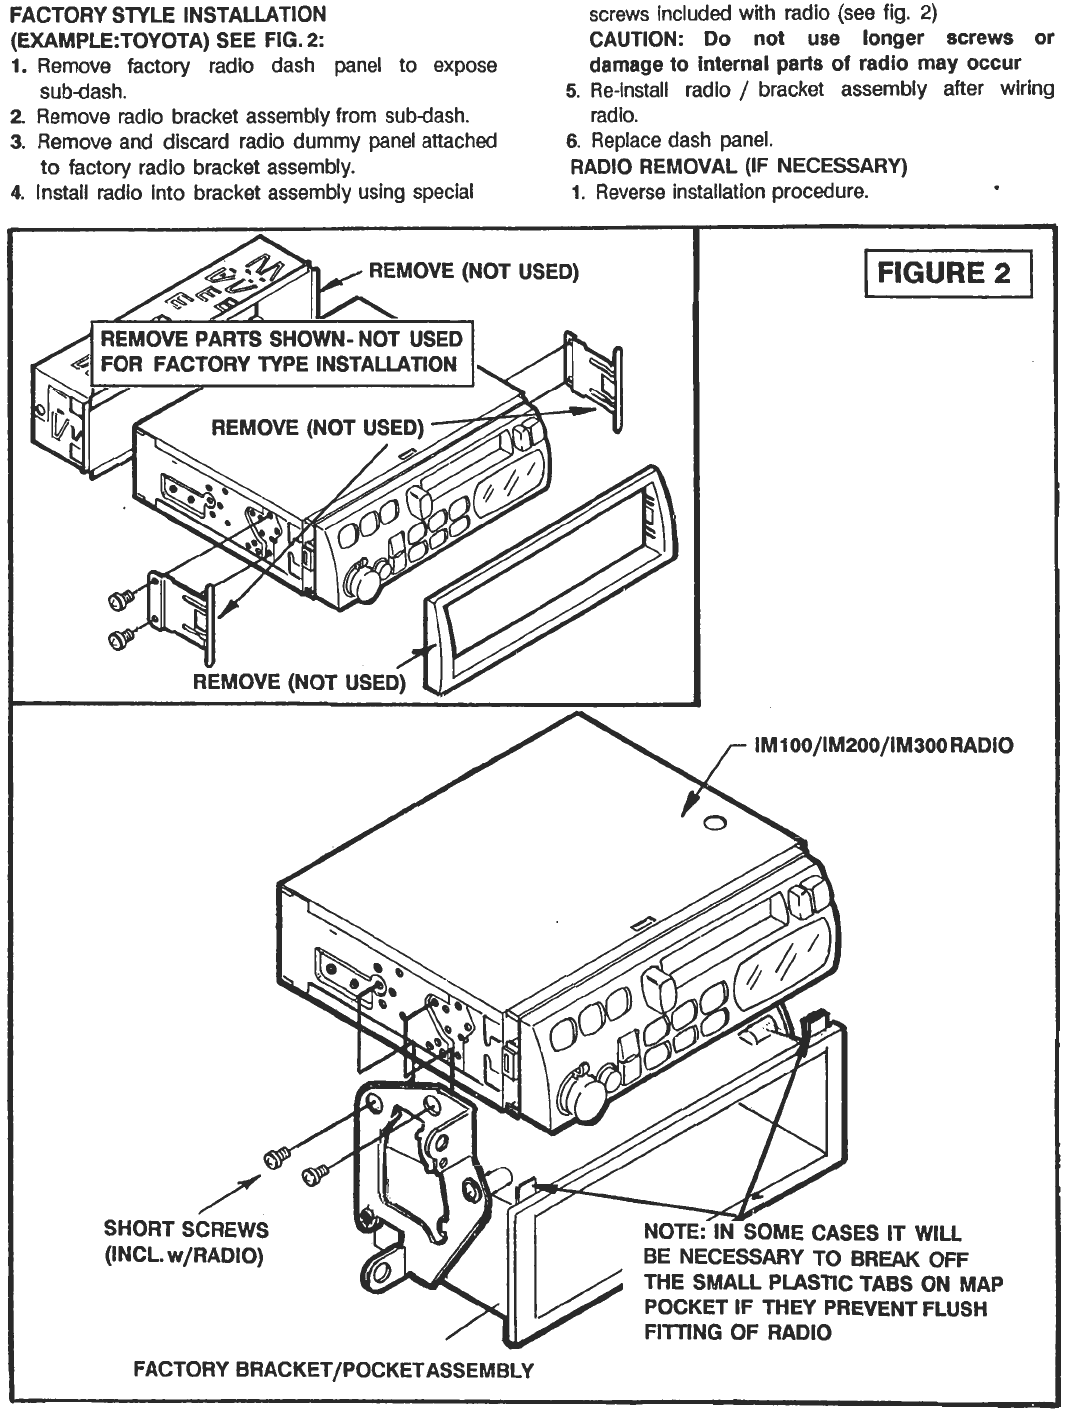
IM100/IM200/IM300RADIO
./'t.
"""'
~I;
~
...
r
~
..".,..
/
SHORT SCREWS
{INCL. w/RADIO)
~~
NOTE: IN SOME CASES IT WILL
BE NECESSARY TO BREAK OFF
"" " THE SMALL PLASTIC TABS ON MAP
~ POCKET IF THEY PREVENT FLUSH
FITTING OF RADIO
--
,.
'#
~
:--
tJ/
FACTORYBRACKET/POCKETASSEMBLY
..-/ )1