


3
Controls
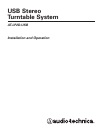
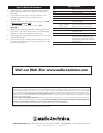
Figure 1 Main Features
Front Back
PHONO
LINE
USB
1. START BUTTON
Engages the motor/platter and begins automatic operation.
2. STOP BUTTON
Disengages the motor/platter and returns tone arm to rest.
3. TONE ARM LIFT BUTTON
Lifts and lowers tone arm for manual selection.
4. PLATTER SPEED BUTTON
Select 33 RMP (button in high position) or 45 RPM
(button in low position) platter speed.
5. SIZE SELECTOR
Select the size of the record: 12" or 7".
6. PLATTER
Aluminum platter mounts directly to center spindle/
motor shaft.
7. CENTER SPINDLE
Precision-machined platter-mount portion of the motor shaft.
8. 45-RPM ADAPTER (Shown in receptacle)
Adapts 7" records with large center holes to fit center spindle.
4
11
9
9. DUST COVER HINGE HOLDERS
Attachment points for removable hinged dust cover.
10. DUST COVER
11. TONE ARM/HEADSHELL ASSEMBLY
Tone arm is permanently attached to the headshell
assembly.
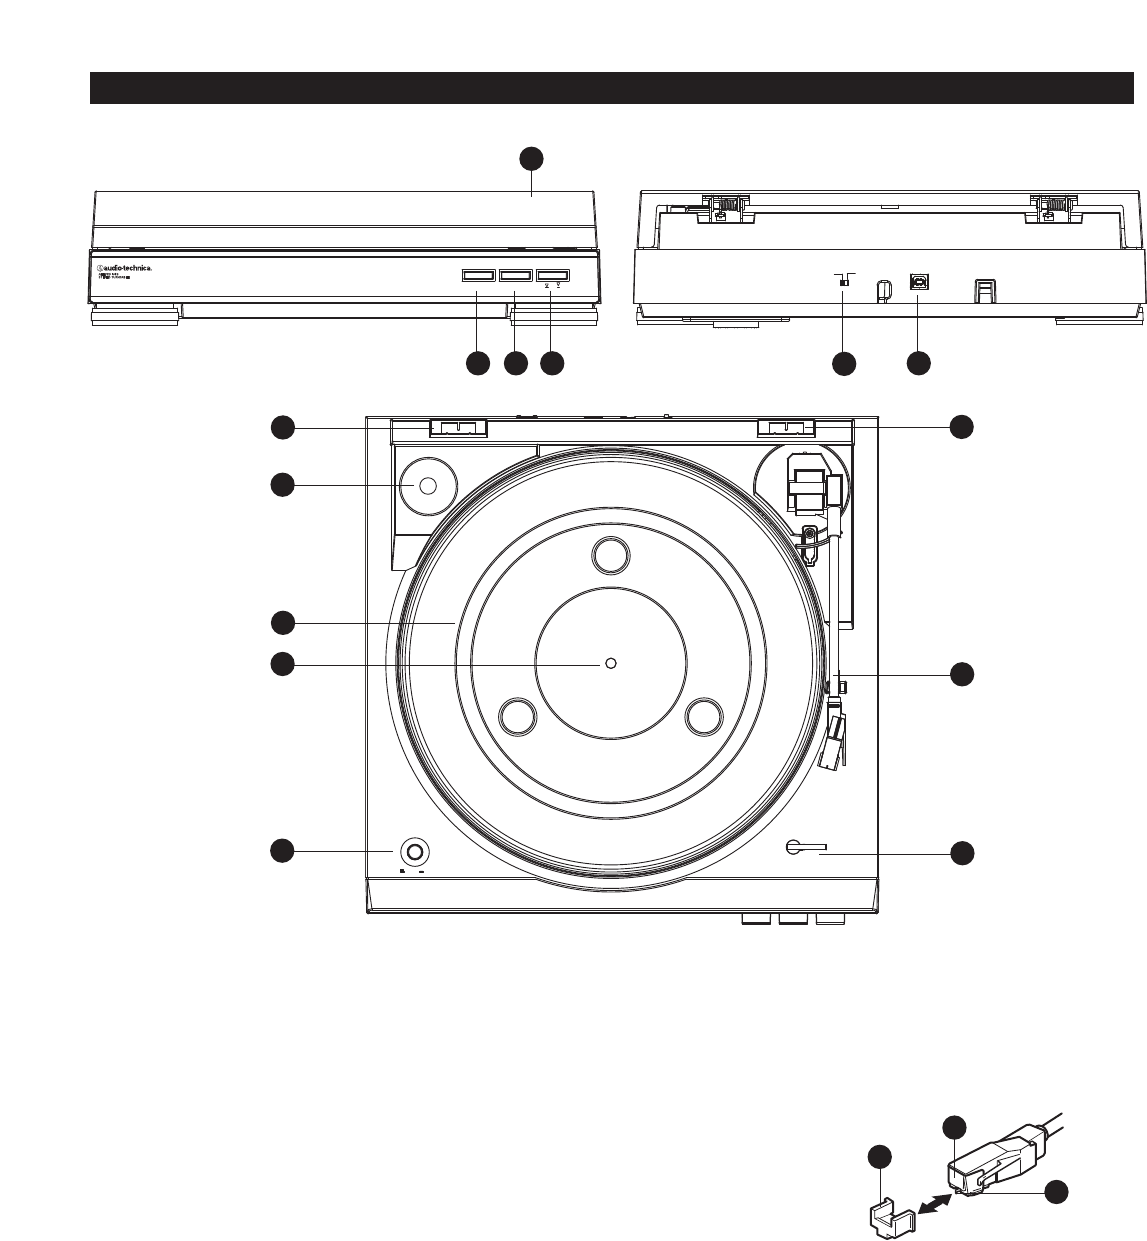
12. STYLUS ASSEMBLY
13. STYLUS (“NEEDLE”)
14. STYLUS GUARD
15. PRE-AMP SELECTOR SWITCH (PHONO/LINE)
(On back of turntable) Use PHONO setting when you
connect to the phono input on your home stereo. Use the
LINE level when you connect to CD/TAPE/AUX inputs of
your home stereo.
16. USB OUTPUT
Use this output to connect your turntable to the USB input
of your computer. Please see included software guide
for instructions.
5
1
10
6
START
STOP
SPEED
33
45
12"
7"
SIZE
2 3
7
8
9
15
16
12
13
14