


Hooking It All Up
The speaker terminals on the IW Six will accommodate up to 16-gauge wire, which should be used for
longer connections. For shorter distances, 18-gauge speaker wire will be adequate. Leave about two feet of
extra wire at the speaker end to make it easier to install and position the IW Six. Do not use staples, nails,
or other metal objects to secure the speaker wire. The resulting short-circuit could affect your system's
performance and damage components in your system, especially the amplifier. You will get the best sound
quality and least amount of hum by keeping the speaker wires away from other electrical wires and cables.
When connecting your IW Six loudspeakers, it is very important to retain the correct polarity. This
means that the wire attached to the +, red, positive, or hot terminal on one component must be attached to
the +, red, positive, or hot terminal on the other component. Similarly, the –, black, negative or ground terminals
must connect to the respective –, black, negative or ground terminals. This is easy to do by observing the
color, stripe, or ribbing that appears on the wire. The amplifier terminals will also be marked left or right,
and should be connected accordingly.
Speaker Mounting
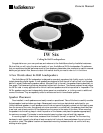
The IW Six loudspeakers are designed to be mounted directly into the ceiling or wall. Yes, you will be cut-
ting a hole in the ceiling or wall. With the right tools and a little extra care, installing the IW Six can be both
quick and easy. Use the enclosed template to accurately cut the mounting hole in the ceiling or wall. Position
the paper template where you have chosen to mount the speakers, and trace along the edge of the circle.
Make your cuts along this line. A utility knife will make the cleanest cuts in drywall. A keyhole saw or electric
jigsaw may also be used. Keep the cuts neat, although the frame will overlap the hole to hide any rough edges.
At this point, with the wall open, run the speaker wires into position, leaving about two feet of extra wire at
the opening. Observing proper polarity, connect the speaker wire to the terminals on the IW Six. Remove the
grille on the speaker, so you can reach the quick-turn mounting screws. Insert the speaker into the mounting
hole. Use a phillips head screwdriver to turn the screw slowly clockwise. The quick-turn mounting system and
frame will clamp around the wall to hold the speaker in place. Do not overtighten. If you are unsure, consult
a professional contractor. If you plan to paint the grille, do so before attaching them to the speakers. The grille
is held in place by a friction fit.
Enjoy your purchase.This manual provides detailed diagrams and instructions for setting up your
equipment.Our commitment to your satisfaction doesn't end there.We also offer friendly,toll-free assistance.
1-800-HELP-115
© 1998 AudioSource, Inc.
IW Six Specifications
Frequency Response . . . . . . . . . . . . . . . . . . . . . . . . . . . . . . . . . . . . . 70 Hz to 20 kHz
Power Capacity . . . . . . . . . . . . . . . . . . . . . . . . . . . . . . . . . . . . . . . . . . . . . . . 75 watts
Impedance. . . . . . . . . . . . . . . . . . . . . . . . . . . . . . . . . . . . . . . . . . . . . . . . . . . . 8 ohms
Sensitivity . . . . . . . . . . . . . . . . . . . . . . . . . . . . . . . . . . . . . . . . . . . . . . . . . . . . . 90 dB
Woofer. . . . . . . . . . . . . . . . . . . . . . . . . . . . . . . . . . . . . . . 6.5” polypropylene/graphite
Tweeter. . . . . . . . . . . . . . . . . . . . . . . . . . . . . . . . . . . . . . . . . 5/8” polycarbonate dome
Dimensions . . . . . . . . . . . . . . . . . . . . . . . . . . . . . . . . . . . . . . . 9” diameter x 3” depth
Weight:. . . . . . . . . . . . . . . . . . . . . . . . . . . . . . . . . . . . . . . . . . . . . . . . . . . . . . . . 9 lbs.
9300 North Decatur
Portland, OR 97203
Tel. 503.286.9300
Fax 503.978.3302