


www.audiosource.net
www.audiosource.net
1
2
3
6
5
4
Figure
6
Figure 5
Figure 6
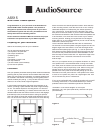
Installing the AS515
It is now time to connect the speaker wire to the AS515. Your
speaker wire is usually coded to maintain proper system phasing.
This can be by color coding, or one conductor may have a printed
marking or a rib along one edge that will not be found on the other.
Identify which type of polarity coding that your wire is using. You
must carefully observe that the positive terminal of the speaker
output on your amplifi er is connected to the positive terminal of the
AS515 speaker. Likewise, the negative terminal of the amplifi er’s
speaker output should be connected to the negative terminal of the
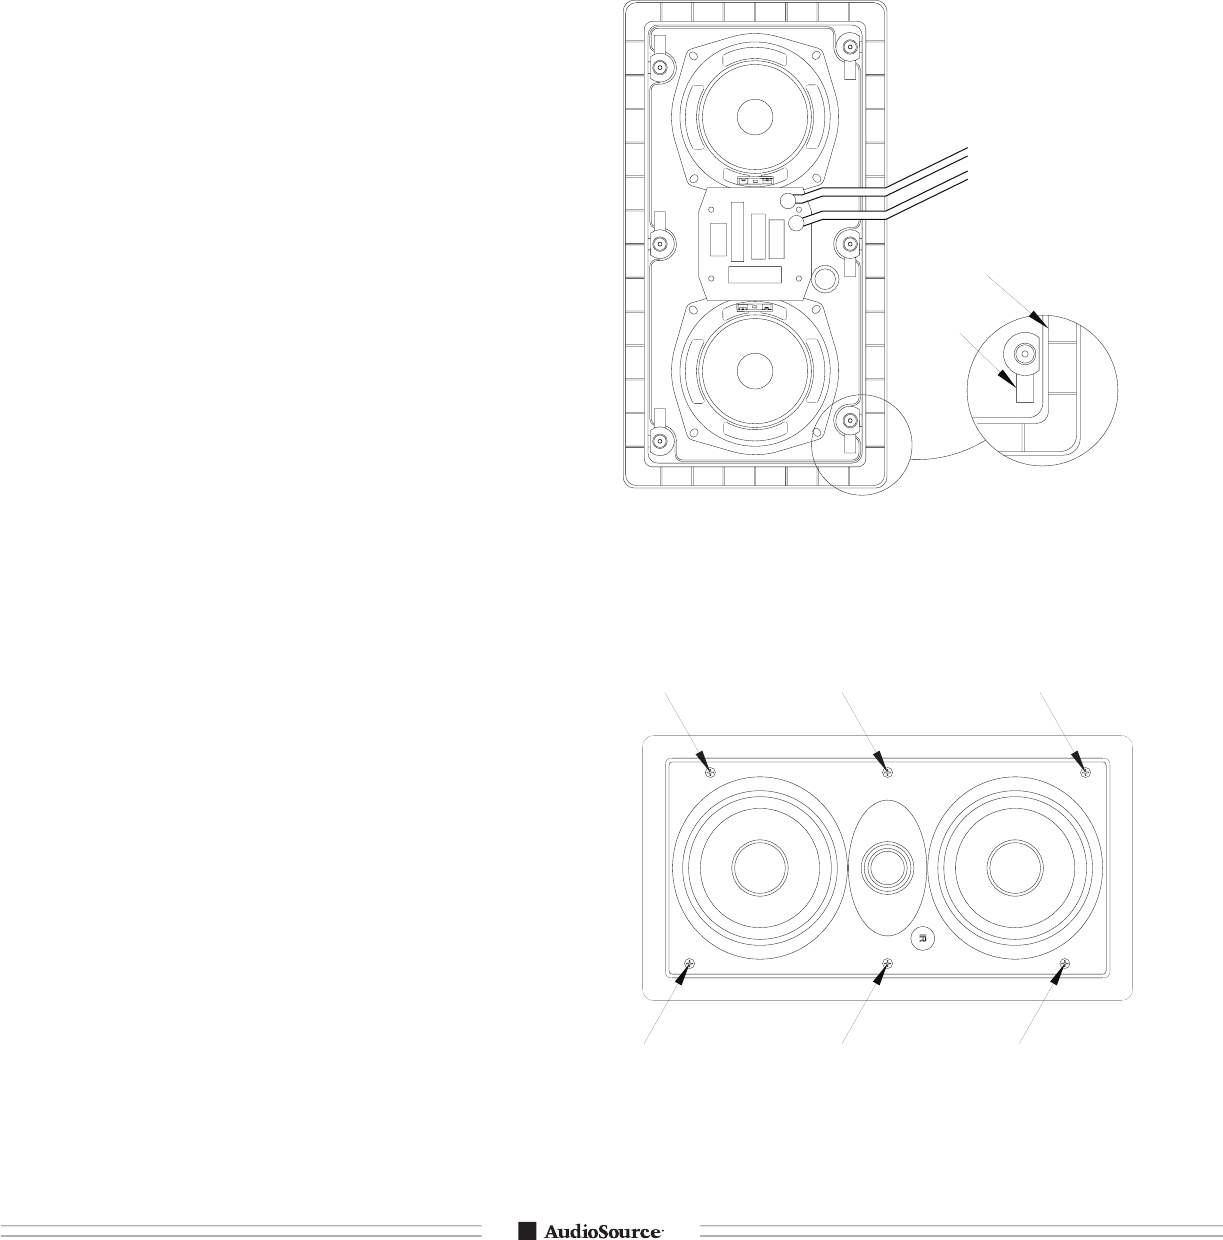
AS515 speaker (Fig. 4).
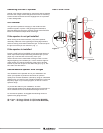
Installation Tip!
To further enhance the performance of
your AS515 speakers, the wall stud cavity where you plan to
place your speakers can be stuffed with a generous quantity of
fi berglass insulation. If un-insulated, stuff the area above and
under the speaker opening with 6” thick insulation to a depth of
approximately 2 feet beginning 1 foot above and 1 foot below
the speaker opening. If the insulation is foil or paper backed,
face the backing away from the AS515 speaker. The addition of
this insulation will help prevent the unwanted transfer of sound
into the large and resonant cavity of the un-insulated wall.
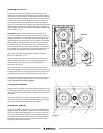
Next, make sure that the doglegs are positioned inside the
frame of the speaker (Fig. 5).
With the grill removed, place the speaker in the wall opening.
Make sure that the speaker wire is not hanging against the
speaker where it can vibrate and rattle as the speaker
reproduces your music.
Next, one at a time, turn each of the six screws (Fig. 6) that
operate the doglegs counter clockwise a few turns until you feel
the dogleg is loose from its resting position. Now turn the screw
clockwise until you feel the dogleg contact the wall surface.
Tighten all six of the mounting screws in the same manner until
the speaker is properly aligned and held securely to the wall
surface.
Caution: Do not over-tighten!
Painting the Speaker
A paint shield is included in the AS515 speaker package. Place
the paint shield inside the frame to protect the speaker. You can
now safely paint the speaker frame to match your wall surface if
you desire.
When painting the grill caution should be taken to ensure that
paint does not clog or block the perforated openings in the grill.
This would prevent full operation from the speaker.
Aiming the Tweeter
Using your fi ngertips, place them carefully at the edges of the
tweeter housing. Apply gentle pressure to swivel the tweeter to
aim the axis toward the listening area. You can use a piece of
music with a solid center imaged vocalist to assist in correctly
aiming the tweeter. When the tweeters are properly aligned for
the listening area you will hear a coherent and stable center
image from your listening position.
Figure 4
+
(+)
(-)
-
Dogleg
Fram
e