


6
IWTS-155 LCR In-Wall THX Ultra2 Theater System Speakers
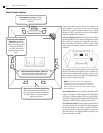
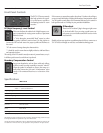
Installing the Mounting Frame
The clamping mechanism allows
the wall material to range from
½ to 1½ inches (13 to 38 mm) in
thickness. There must be a mini-
mum depth behind the wall face
of 3
5
⁄8” (92 mm). As noted above,
be sure to keep the edges of the
cutout at least ½ inch (13 mm)
away from any stud or obstruc-
tion, as the rotating clamps will
not operate properly if you don’t.
Insert the frame into the cutout
and using a level or square care-
fully align it so it is level. Tighten
the mounting screws, which will
cause the attached clamps to rotate and position themselves properly
behind the wall.
Continue to tighten until the frame is snug in the wall. You want the bezel
to conform to the wallboard, and the frame not to rattle from the speaker’s
vibration, but be very careful not to overtighten the screws.
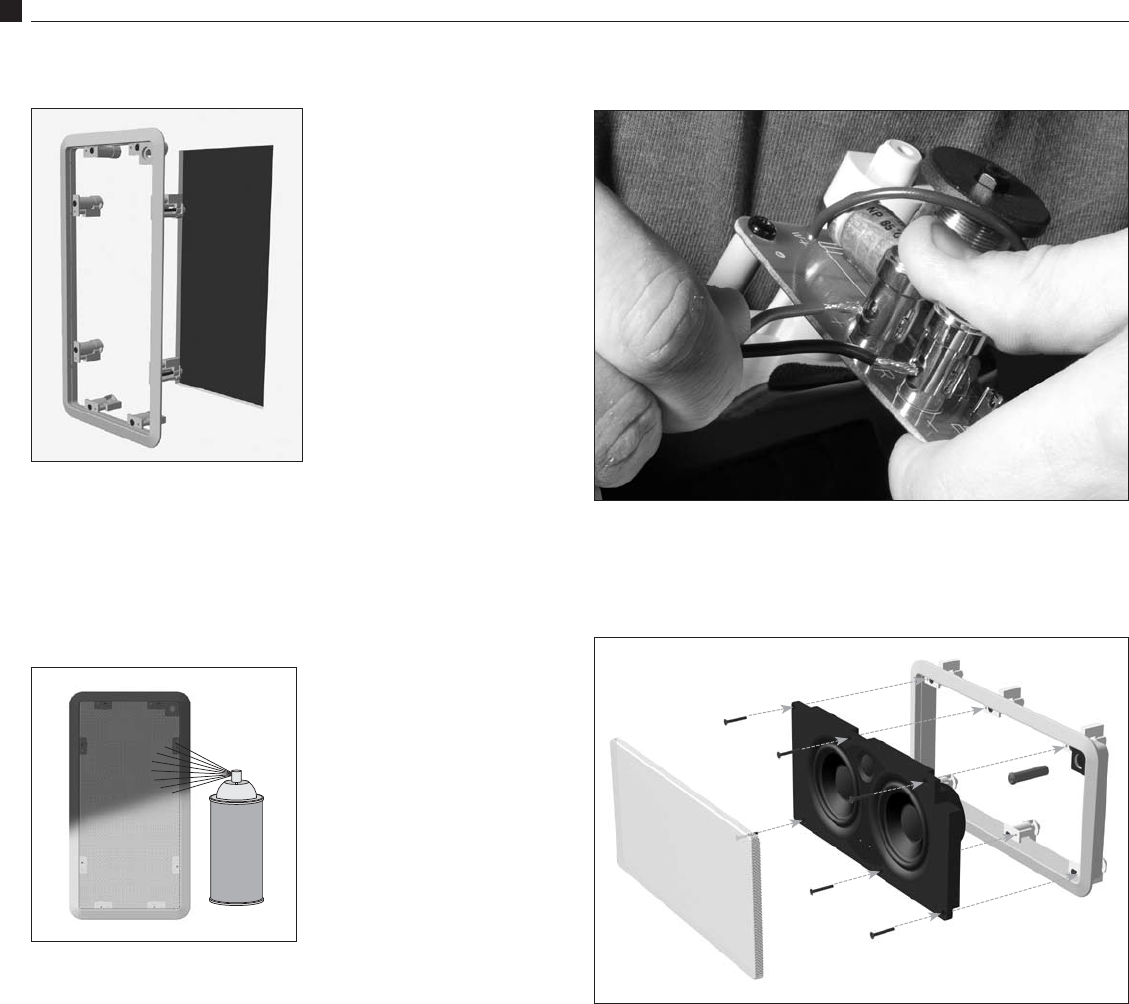
Painting the Speaker Assembly
The white plastic frame and the
metal grille may be left as is, or
painted to match your décor. You
can paint the frame before or after
it is installed in the wall. Spray
painting (using slightly thinned
paint) is the best method to use for
painting the grille. Before painting
the grille, carefully peel off the cloth
scrim. After painting the grille, use
air pressure to “blow out” any grille
holes that are filled in with paint.
Once the paint is dry, re-apply the scrim to the inside of the grille.
Speaker Connection and Assembly
Strip about ½” (13 mm) of insulation from the connecting wires. Connect
them to the appropriate push terminal, being careful to observe polarity
(positive to the red terminal, negative to the black terminal).
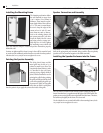
Installing the Speaker Enclosure into the Frame
Once the frame is mounted in the wall, the speaker simply fits into the
frame. Note that there is a gasket around the edge of the MDF baffle. This
gasket ensures an airtight fit between the baffle and the frame. Therefore,
the baffle may fit tightly in the frame. This is normal.
Use the included screws to attach the baffle to the mounting frame, but be
very careful not to overtighten the screws.
Installation