


Unpacking
Care must be taken at all times when handling the AW-12 due to the weight of the product. We
recommend a two-person lift wherever appropriate.
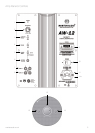
A feature of the AW-12 is the exposed drive unit. Great care must be exercised at all times to
ensure it is not damaged during unpacking and when finally sited in the room. Any physical
damaged caused to the drive unit by not complying with this requirement will not be covered by
warranty.
The feet/spike assemblies are attached to your product ready to use. The mains power cord is contained
separately in the packaging and should be removed prior to unpacking the product.
To remove the AW-12 from its carton place some protective material on the floor and having removed any loose
items (mains lead) from the top of the packaging and carefully invert the carton. Also see the icons on the carton.
Gradually pull the carton upwards to expose the subwoofer, which will be presented with its base uppermost.
Remove fixing tape from plastic bag and expose the base/cabinet. The feet are factory fitted to your product to
allow for swift installation and enjoyment of you new purchase. Before turning your AW-12 over so that it is the
correct orientation, you must decide how you will be using the feet:
Spiked Foot Assembly
For Wooden/Hard Floors
The engineering behind the foot assembly for the AW-12, has been developed from our initial design in the Silver
RS Series, and then in the Gold Signature Series and more recently, the Platinum Series. The foot incorporates
a spike for use on carpeted floors and also, a soft polymer cup for use on wooden or tiled floors.
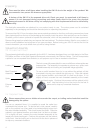
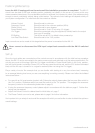
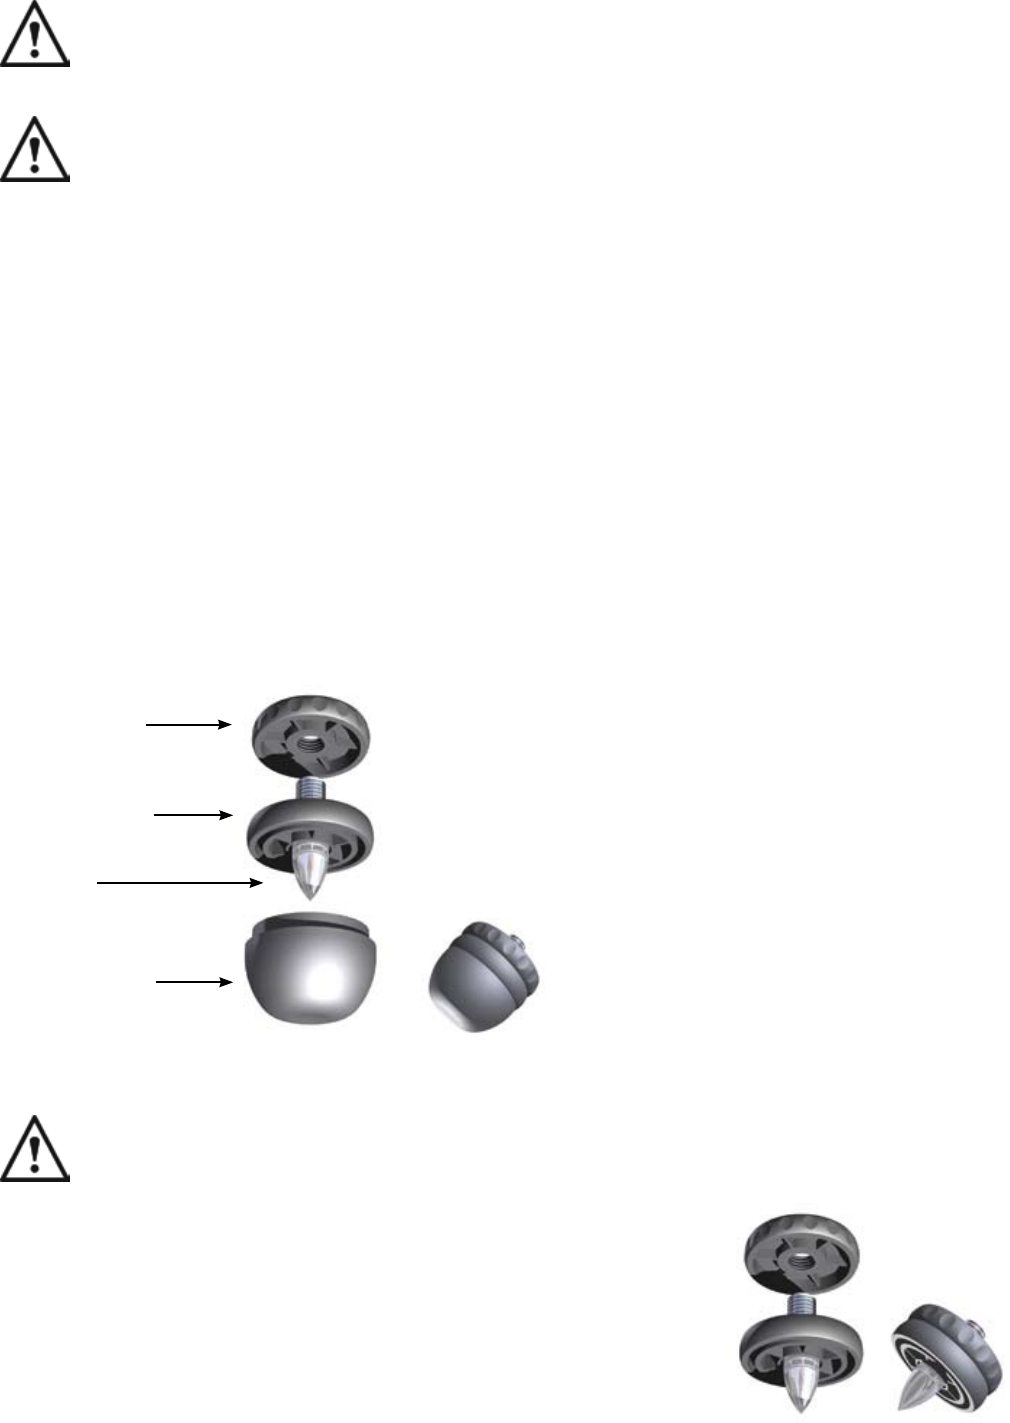
The foot comes fully assembled for use on solid floors where spikes are
inappropriate. The assembly incorporates a polymer cup, spike, main
threaded assembly and locking nut (exploded image opposite).
To use on solid/ wooden floors (or to use without the spikes), all that
is required is turning your cabinet the right way up. Place the cabinet
in your desired location, and check that it is level on all sides. If it is
slightly off level, unscrew the main threaded assembly at the lowest
point and check again. Continue this process until the cabinet is fully
level. Use the locking nut on the foot to fix the foot in
place and to stop any unwanted vibrations.
For Carpeted Floors
Please ensure there are no hidden wires under the carpet, or trailing mains leads that could be
damaged by the spikes.
For use on carpeted floors, it is possible to reveal the spike from
underneath the polymer cup. To use the foot in this manner, carefully
pull on the polymer cup (may need to be twisted slightly) away from
the main threaded assembly. This should reveal the spike. Place the
cabinet in your desired location, and check that it is level on all sides.
If it is slightly off level, unscrew the main threaded assembly at the
lowest point and check again. Continue this process until the cabinet
is fully level. Use the locking nut on the foot to fix the foot in place and
to stop any unwanted vibrations.
Locking Nut
Main Threaded
Assembly
Spike
Polymer
Cup
monitoraudio.co.uk4